Coupons4LV.com  -  Tree Hugging Frugalitarian

 
  • Blog

Eliminating home hot spots with central baseboard heat

3/19/2012

0 Comments

 
Picture
Often times, rooms in a home will be under or over heated when compared to other rooms. When a central hot water baseboard radiant heat system is utilized, this is due to either too few or too many heat fins in a given room. The second floor of a home will often see the largest number of rooms that are too warm (when other rooms are at a comfortable temperature.) The movable vent on baseboards can be closed or opened to accommodate for the temperature variation, but sometimes a more aggressive method must be implemented to achieve the desired results.

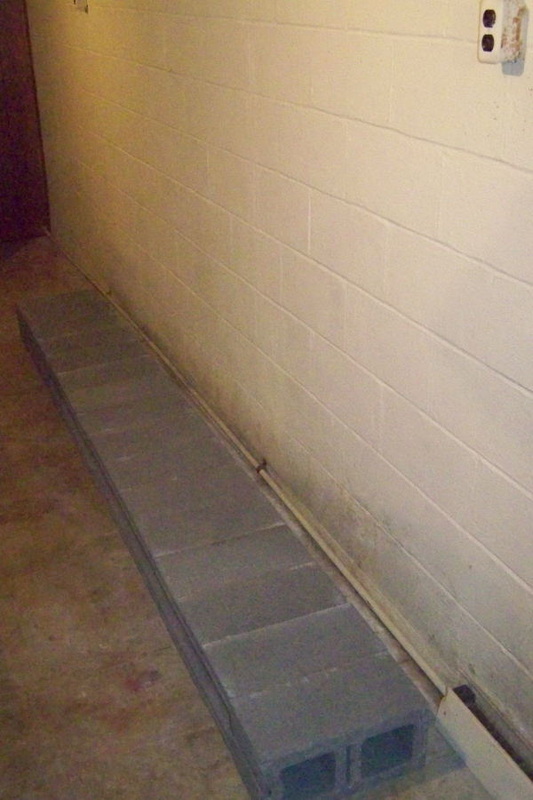
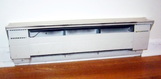
This small bedroom was too hot in the winter due to too many feet of baseboard heat installed for the space.

Here are instructions on how to remove heating capacity in a room.

Get some gloves - razor sharp heating fins will slice your fingers more quickly than you can say band aid.

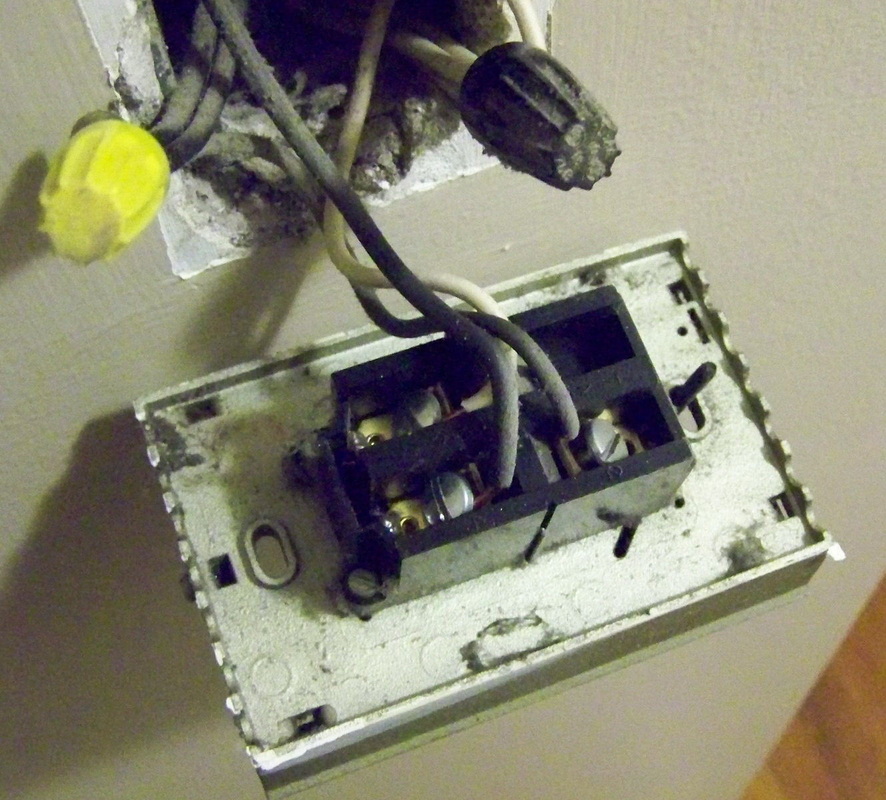
Remove the outer cover (pull up and rotate out towards you)

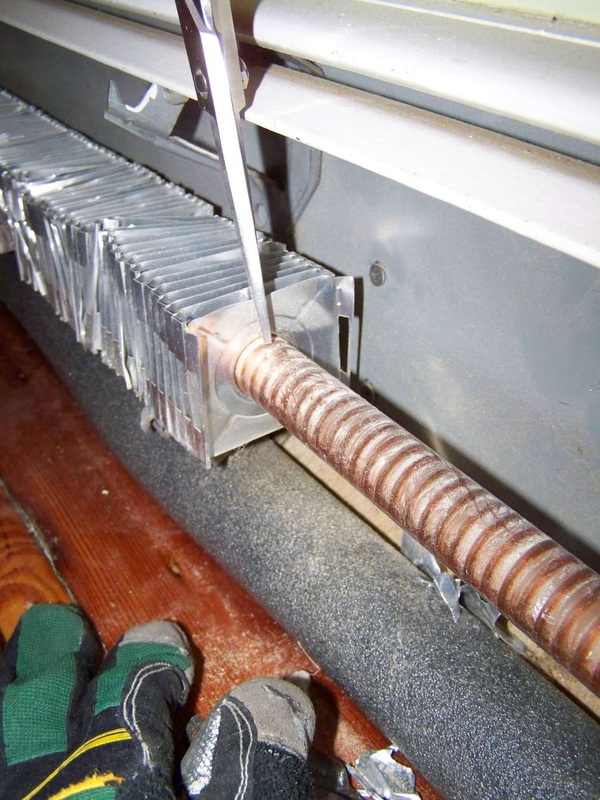
Get a sharp pair of scissors or tin snips, (I used Cutco shears, which can cut pennies in half)

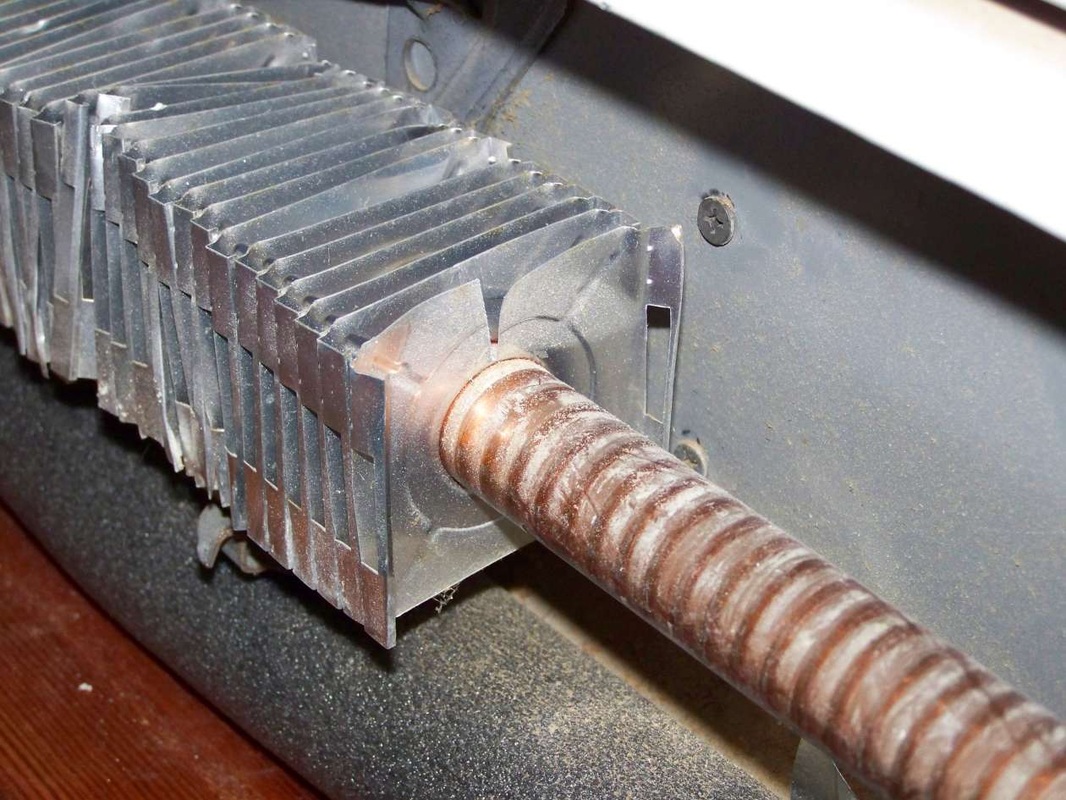
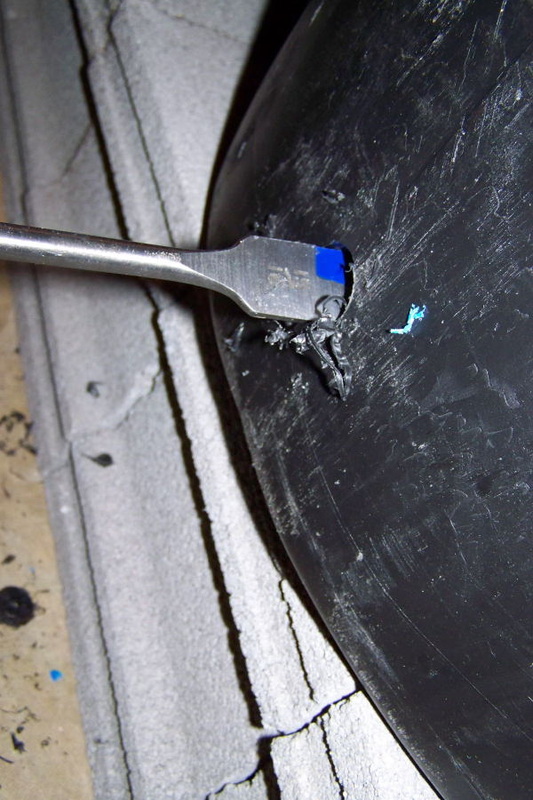
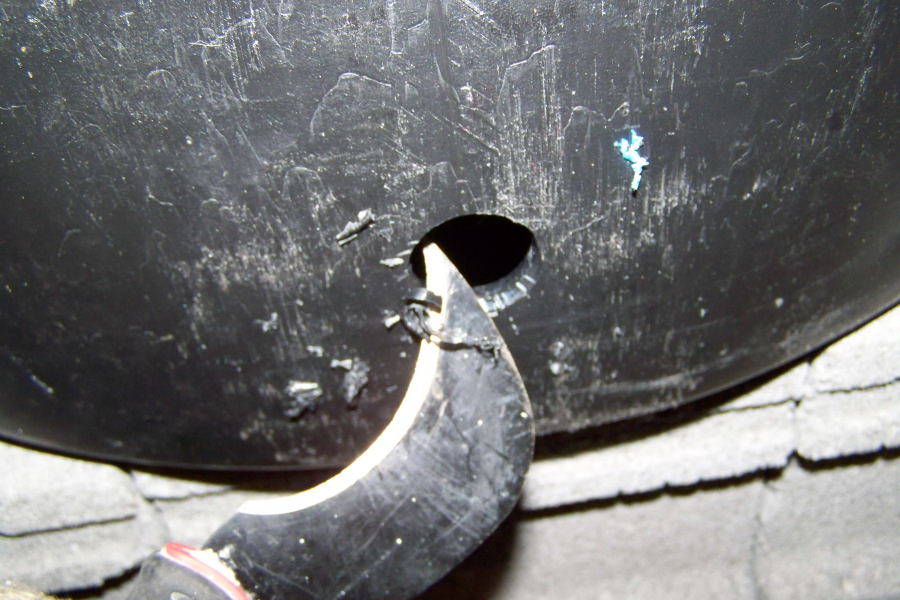
Snip the top of each fin you intend to remove, (I like to stagger the cut zones to keep the heat evenly distributed)

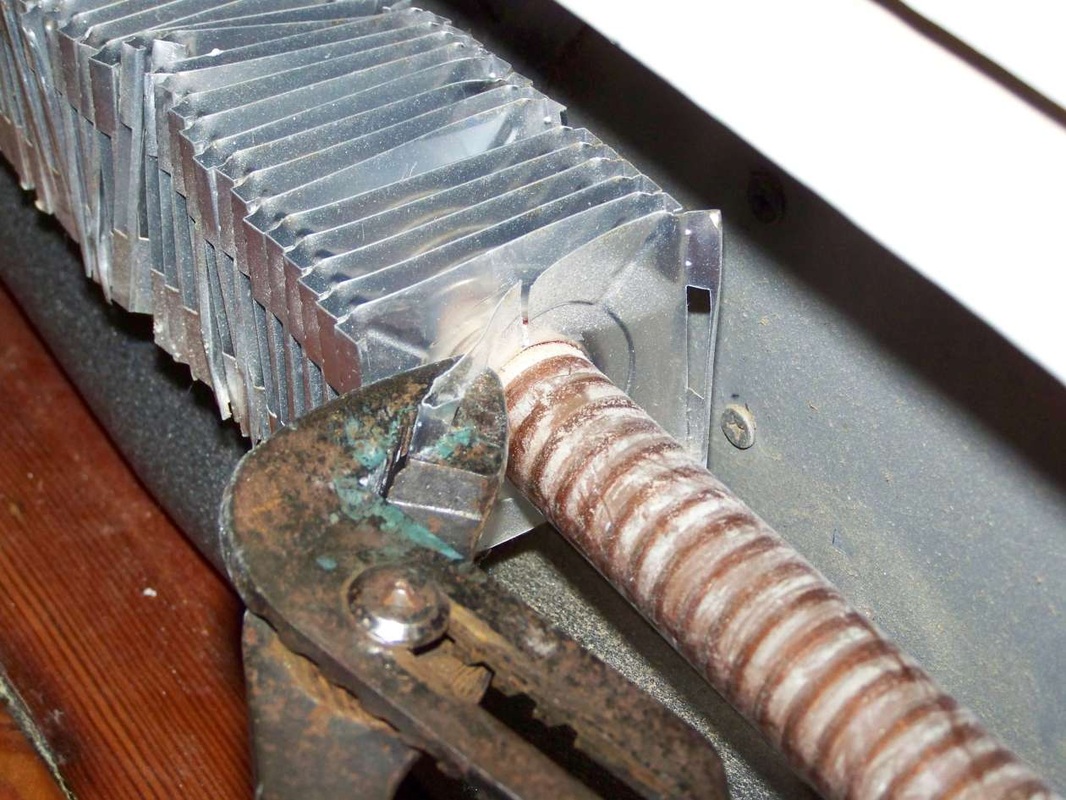
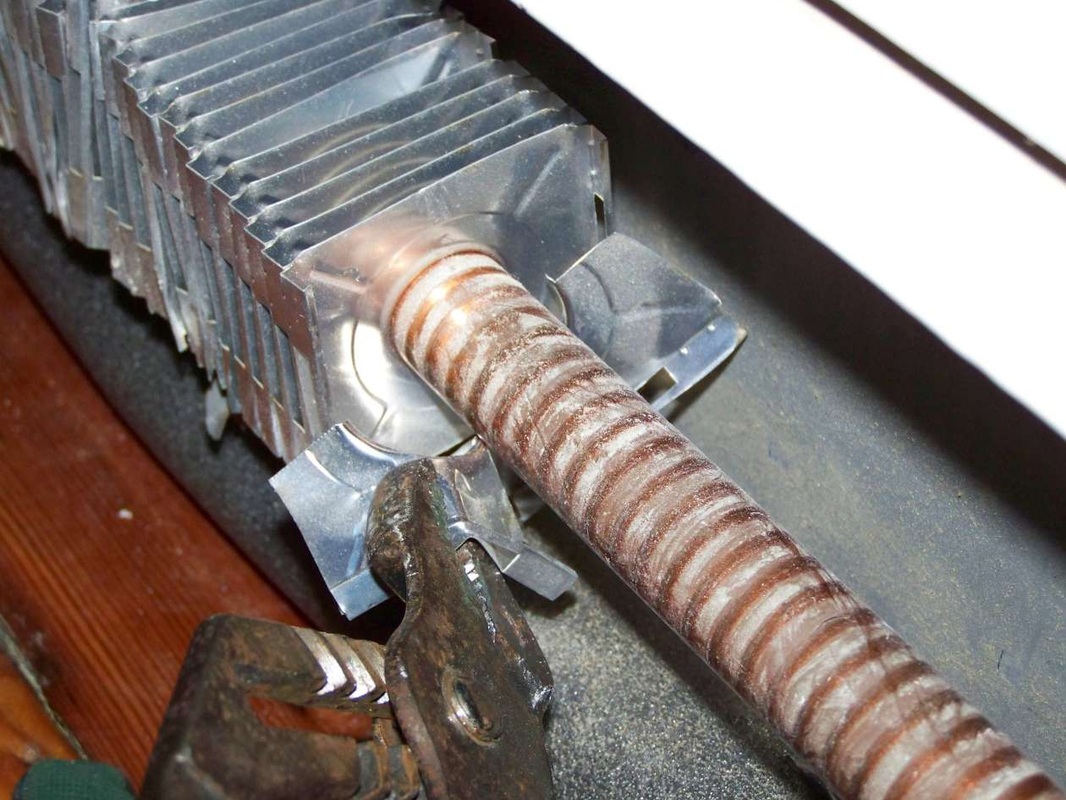
with a good pair of pliers, rotate the top rear portion to the right, then pull the underneath part of the fin - removing it with relative ease.

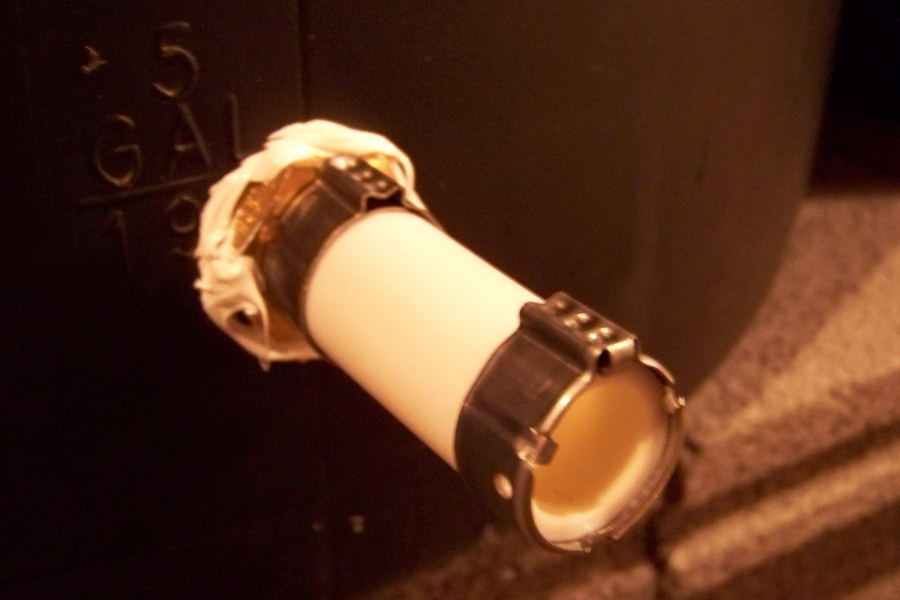
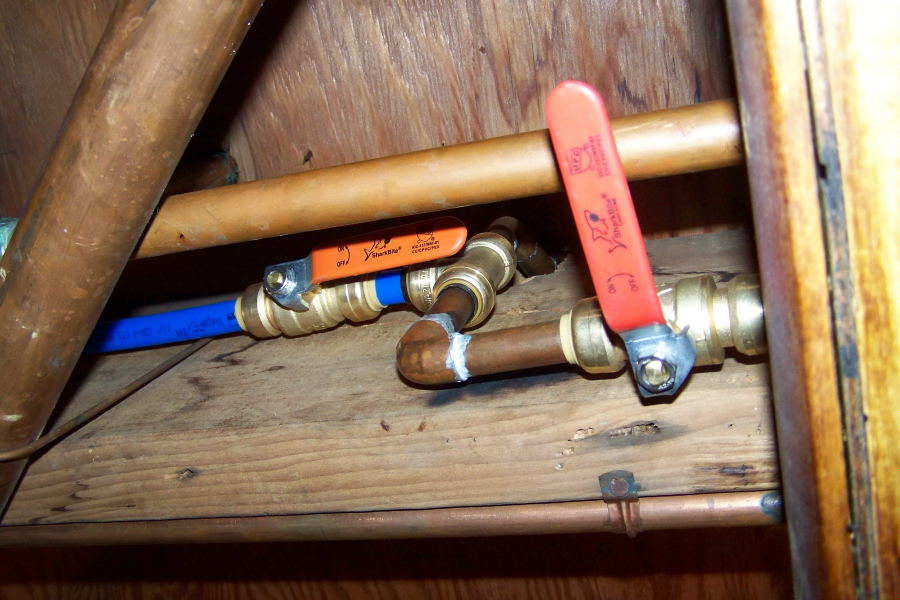
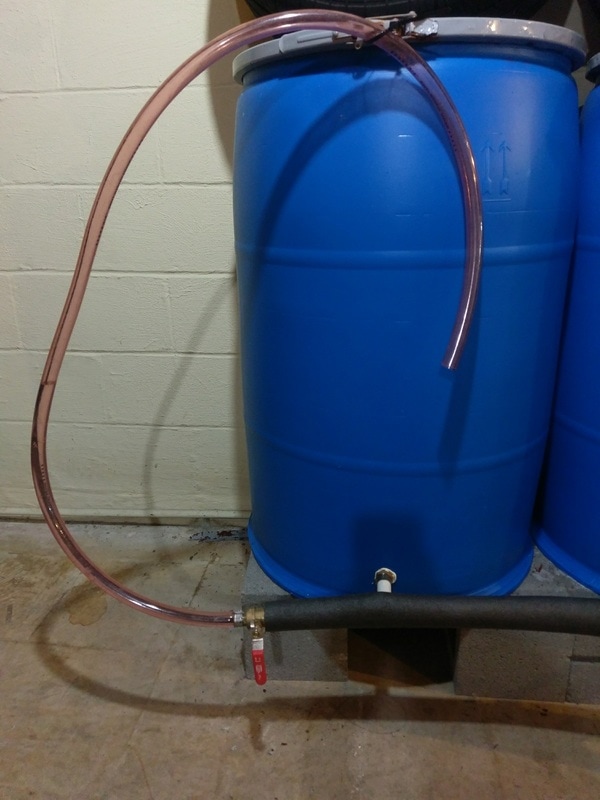
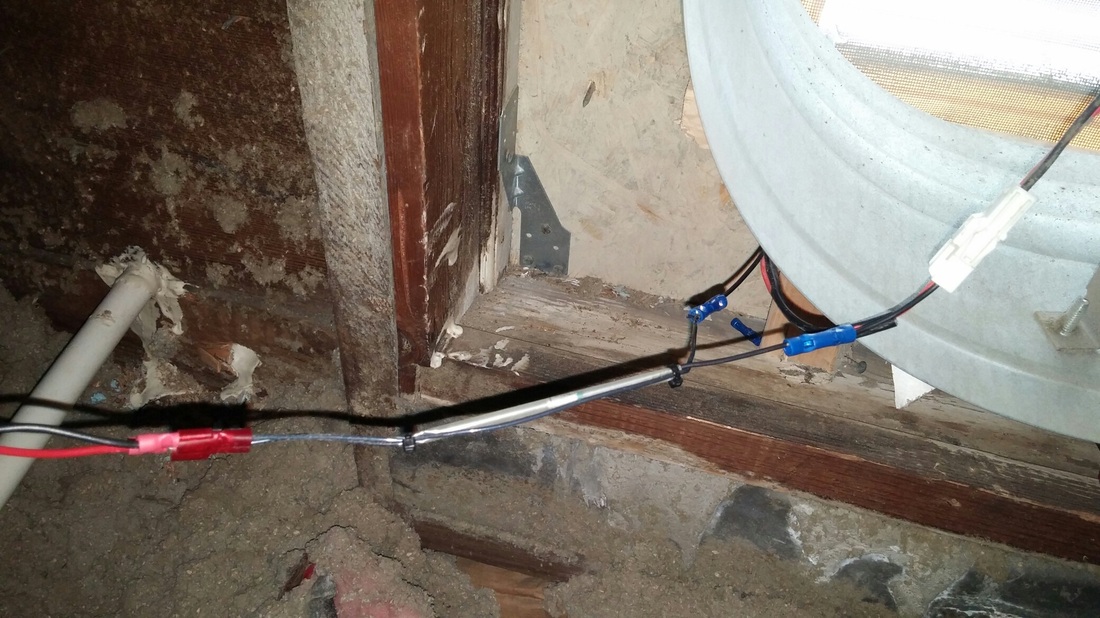
Next, get some split foam pipe insulation and wrap it around the sections where you have removed the fins.

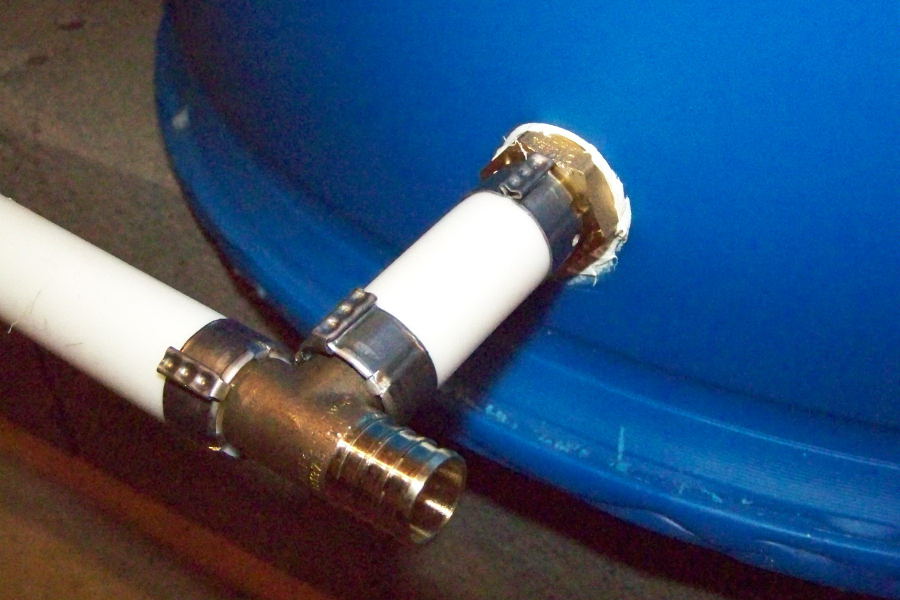
Also make sure you wrap the return pipe (if one exists like in these photos) as it too will conduct heat into the room.

You may want to try a portion at a time and test out the temp in the room - as the fins are not easily replaceable.

Once you are done, replace the cover and enjoy the room at a temperature that matches the rest of the house. The other plus is that the hot water can now heat other portions of your home instead of making one room into a sauna - this saves you money and wastes less energy.
Picture
Note: The aluminum fins can be recycled, turned in at the scrap yard for cash (if you have other items to make it worth your while), or given to drive by scrappers.  
0 Comments

Moving Interstate Economically

1/27/2012

2 Comments

 
Moving a large quantity of items from one state to another several hundred miles away can be tricky and expensive. After getting several quotes from different companies, ABF U-Pack proved to be the best option. 

A truck trailer is dropped off at the packing location - when done, they send the cab back to pick up the trailer. The trailer can be dropped off at an unpacking location.  (You can also bring/take items to an ABF transfer station and pack/unpack the truck to save some bucks.  

Based on quotes over the phone, the ABF Upack solution saves around 50% vs. a PODS or similar type of storage container solution. Also, a POD holds a huge amount of material and may be too large for your move.

This example shows a large load of items being transported from Indiana to NJ. My brother in law packed it at a public storage facility next to their locker - I unloaded it into a rented 15 passenger cargo van. (I particularly like Just4Wheels for their economical van rentals) if you are NJ local.

2 Comments

Winterizing electrical outlets

1/21/2012

5 Comments

 
PictureMind the gap
Old man winter will look for the point of least resistance to enter your home. One often over looked cold air entry point is your electrical outlets.  Take the back of your hand and run it over any exterior outlets. If you feel a chill, and want to save money then follow the steps below.

Turn off the power to the outlets you are working on at the circuit breaker panel. Remove all of the outlet covers that you intend to work on as Great Stuff has one reliable usage per can (unless you use the pro kit with spray gun) - pausing in-between sprays will cause problems and create messes. Wear thin gloves and old clothing also carry a rag to catch any fly away insulating foam (I guarantee you will get it on your clothing). Get an extra can or two, as it is inexpensive and a big hassle if you don't have enough. 

Shake the can of foam vigorously for 30-60 seconds with the nozzle off and cap on. Use an old blade screw driver and pry the sides of the electrical boxes(if they are not plastic then you will have to create an opening in the drywall small enough to thread the nozzle through) so that you can get the spray nozzle in-between the box edge and the drywall. Fill all around as best as possible. It is ok if there is excess, we will not waste the material (as shown later). Allow to dry for around 2-3 hours. 

Tear off the excess foam with your fingers. Use the torn off excess pieces and jam them into the side of the outlet and the box. Never spray Great Stuff into the box as it is conductive when wet/gooey but once dry it poses no threat. You do not want to get the foam stuck to the electrical terminals on the outlet should you need to replace it in the future). Update 12-7-15: Please don't fill the electrical box with wet or dry foam. The airspace is need for heat dissipation. This can start a fire, especially if you put a heavy amp load on the outlets. Thanks to the readers for pointing this out in the comments. We were just so tired of the drafts and got a little carried away.

Now install the foam insulation gasket, screw on the cover plate, and top off with the childproof outlet covers, they keep the air from coming through the slots in the outlets. Acetone removes the foam from surfaces but it is best to just take your time and don't overfill.

If you do this to all of the outlets (especially on your first floor) you will likely notice a significant decrease in drafty spots and your heating system will have one less battle to wage in Winter. 
5 Comments

Lighten your electric bill - Brighten your home

12/16/2011

1 Comment

 
Picture
Let me guess - you rushed out to the home store sometime in the past few years and bought some flourescent flood light bulbs for your home's recessed downlights. After installing them and realizing that the light quality stinks and also you have to wait for them to "power up" till they are bright - you broke down and re-installed incandescents anyway to replace the lousy flourescents. In addition CFL bulbs can pose a potential health risk - link here. 

Well I bring you great news. If you're able, head to NJ and pick up some of these retrofit LED(light emmitting diode) lights at the home store. (They are available elsewhere, but the tax laws in NJ currently make it less costly than other surrounding states). Alternatively get them online - see link below. (Note: The Cree CR6 have a 50k hr and 5 yr warranty vs. home store's version 35k hr and 3 yr warranty)

They are dimmable, instant on, and install in around 2-3 minutes. (though you need to ensure that your dimmer is compatible - link here) The electronic low voltage dimmers work best with shared circuits. Combine these LED lights with an occupancy/daylight sensing dimmer switch and you have a real energy/time saving powerhouse.

They consume only 10.5 watts yet throw off an amazing amount of light. Another plus is that you can not tell they are LED. There are no visible dots of light like many screw in bulbs on the market. The transluscent lens on the fixture casts beautiful clean light. Challenge someone to come over to your house and tell which one is LED vs. Incandescent.

Update 12-18-15: Put the newer suggested Cree model that is now available with the wired socket.(See updated links below) Makes for a much easier install and works with a wider variety of fixtures. Also make sure you get the foam insulating rings if putting them in a ceiling that has attic space above.

Instructions for the swap:

1. Grab some safety glasses as everything is overhead, and will likely fall in your eye otherwise

2. Make sure the light switch is turned off - allow bulb to cool

3. Unscrew old light bulb - donate or recycle. Don't trash old CFL's they have mercury vapor which is extremely toxic. (could also use/keep them for applications low use areas like basements or garages)

4. Remove the trim ring (pay attention to the springs and wear gloves if you have delicate hands)

5. The springs will want to destroy the drywall upon exit, so keep a firm grip.

6. Remove the ceramic bulb socket from the trim ring (on some cans lights, it is screwed to the top of the steel housing instead).

7. Screw in the new LED retrofit light

8. Rotate the (3) spring clips out all the way clockwise until they are locked

9. Test that the light turns on properly

10. Carefully bend down the 3 tabs simultaneously (wear clean thin gloves, as these three spring tabs can deliver a nasty finger cut if not careful) and guide them up into the recessed housing.

The force from the springs keeps the fixture lodged very  tightly  - (but it is removable if need be)

Based on 3hrs / day, these lights powered with a Cree chip should last for 22+ yrs or so… another benefit is less heat gain in the summer time, which translates into lower cooling bills.

The color rendering is phenomenal - even better than incandescents.
 You can even pair black, brown and blue socks without difficulty!

The time to switch to LED is now - prices are down and quality is up.
 Just say no to ugly flourescent lighting in the home.
1 Comment

Everlasting Stress Therapy

11/8/2011

0 Comments

 
Picture
Maybe your experiencing some stress from one of life's many challenges. Perhaps you walk down the street like a loose cannon ready to go off and would rather avoid being on the front page of the paper. Look at your physique, a little pudgy and have a severe case of office or car butt? When you walk down an alley at night are you a little scared or fearful of getting attacked or mugged? Maybe a joining a gym would be nice, but you lack the commitment or the funds required..? Sounds like it's time to install a heavy bag in your home.

First thing to do is find a suitable location. This is often the most difficult step of the whole process as the following criteria need to be addressed:

-spouse/roommates ok with location, as it does not fit in with most décor and is quite loud when in use

-ceiling joist in a suitable location

-enough room for bag to swing freely

Tools you will need:

stud finder(do not scan yourself till after you work out a few times),  drill bits, large screw driver, chair/ladder

Equipment:

40-50lb Heavy bag, bag hanger chains w/ spinner, 1/2" Eye Bolt, boxing gloves, foot pads, foam mat system

Locate joist on either side using joist hanger, mark center with pencil. Drill with a 1/8" bit to create a pilot hole into the stud several inches, measure inner thread diameter of your eye bolt and find a drill bit 1/16" to 1/32" smaller. This will ensure that the eyebolt will be good and tight and not back out during use (don't go too small on the hole diameter or you will not be able to fully screw in the eye bolt and also risk splitting the joist above.)

Place a long screw driver through the eyebolt and use that as a lever to turn the eyebolt. You will also need to push up firmly in the beginning to ensure that the threads are engaging properly. Make sure that you completely thread the eye bolt all the way up into the stud so that there is only about 1/4" of shank left - punching/kicking a heavy bag can generate a large amount of force.

Hang the heavy bag so that the top is a little above your head - use a chair and a friend for support to figure out how low to hang the chains. It is critical to have a free spinning element, otherwise you will wear out the metal components above and your bag will fall on you eventually or unscrew the eyebolt - none of which are desirable or safe.

I obtained all my chain, spring clips, eyebolts, at the home store - but there are kits that are available which make the process a bit simpler.

By having a heavy bag at home, you will save on gym membership fees, stay fit, keep stress at bay, let out any inner demons on an inanimate object, plus train for any situations should you ever need to defend yourself.
0 Comments

5 Spring Lawn Care Tips

4/25/2011

1 Comment

 
Picture
So you have dug the mower out of the garage…. here are a few tips to make lawn care more enjoyable.

Get a new oil filter, spark plug, (air and fuel filter if required)

Remove the old blade and replace it with a gator mulching blade
Or sharpen your old blade. I use a bench grinder on the fine wheel side.

Using a hand file is a fools task and takes too long, balance the blade on a nail that is hammered sideways into a wall. As long as it's fairly close you are good.
Picture

If you have a yard that is larger than 1/4 acre, consider picking up a used 48" walk behind mower from craigs or the paper. I obtained a used zero turn belt driven Ferris mower about 9 years ago at a very reasonable price and it decimates my 1/3 acre yard in about 14 minutes! Driving tractors are slow and inefficient for most lawns. Mine also came with a steel mesh bag that is wonderful for chopping up and collecting the leaves in the fall.

 Look at your yard - there are likely dandilions. Get a weed hound, some work gloves, a small trash can, and a large open ended wrench. The weed hound is much more efficient at removing the weeds than chemicals - and better for the environment. Chemical weed killers get into the sewer/storm drain system which is not eco-friendly. The weed hound has a series of nails in the bottom that grab the weed by it's roots - a quick turn and done. Use the open ended wrench to smack the top of the weed hound handle to kick the weed out of the jaws.
 (not using the wrench leads to a sore hand)
 I have found that by removing them physically before they can blossom and cast their seed - their proliferation has dwindled each year. Place the removed weeds into the trash quickly so that the buds don't scatter about. *Important: remove the dandelions before you mow, so you can spot the yellow flowers easily. Also, you won't cast about the seeds everywhere on your lawn.

When it comes to trimming - use an electric if you can or a small gas powered unit. Update 12-18-15: I got the Ryobi 48V from HD at beginning of the summer and mounted the pivot trim - it is phenomenal. (Though it did take a little shim to get the spacing to work out correctly) The fact that I can take it apart and throw in trunk is a real plus too.  I highly recommend replacing the stock line feeder spinning head with a Pivottrim unit, it fits just about all trimmers. I also buy 100' spool of line, not the stock replacement pieces. Cut the line into 12" long segments with a sharp pair of scissors and thread them into the gator head. The rotating line holders all but eliminate line breaks due to the ingenious design. I have found this method to be the most efficient use of trimmer line and best performance. One set of strings lasts about 30 minutes or so, more if you avoid hitting the line against sharp edges.

One final note, I have used several types of gas cans in my life, the best one (for filling mowers only) is the style shown below by Blitz. Spilling gas is a big pet peeve of mine and these anti spill nozzles solve the dilemma. I even remove the nozzle and place it on a smaller blitz can with an oil/gas mix to fill up the trimmer tank - (they both have the same neck thread)

Happy Spring!
1 Comment

DIY Rainwater Harvesting System for Toilet Garden and Washer

4/9/2011

18 Comments

 
Picture
All season rain water collection system


I love rainwater in my basement!

Recently I installed a Rainwater harvesting system on a 1200 sqft ranch home in surburban Allentown, Pennsylvania. You can likely duplicate this system in your home or business.

The collection system stores water in a basement, filters it, pressurizes it and distributes it to the toilets, garden hoses, and washing machine.

The system should save about 5000 gallons per year per person in your household (if you size the collection vessel(s) properly.)

It may sound a little tricky to install, but I have included pictures, a YouTube video, basic instructions, and a spreadsheet of all the parts/ tools you will need to take on this endeaver. You can do this with minimal plumbing knowledge!

UPDATE 12-19-15: The washing machine Y has continued to be an issue. I had to replace with a solid brass Y and separate 90 degree shut off globe valves. Luckily my washing machine is in the garage so a leak was not a huge issue.

Update 3-29-17: System still working well. Added a 4' long transparent section of tubing at the drain valve located at the far end of the system. This enables a quick level check without having to drill into the barrels. I secured the top with a zip tie and keep the valve closed. Ultimately I want to install a high level sensor float switch and a solenoid cutoff at the in-feed line. (Thus preventing an overfill scenario) Currently the system if totally full just backs up to the gutter collectors, but that is not a good fail safe in my opinion. I also added a wifi plug to the rainwater pump, that way i can shut it off when on vacation from my phone. I use the insignia ones, as It is very reasonably priced - though it would be nice to have a next compatible one that can sense when we away. Also, the PEX tubing is starting to have some issues due to freezing w/o too much trouble and UV exposure on the outside of the house. I have patched a few leaks, but suspect that I might need to replace the outside tubing with something else more durable or just replace it periodically, as it is not that expensive.

Side Note: The round in-feed screen filter has to be cleaned pretty regularly as I have trees around the home. If it is not cleaned, the flow goes to a trickle and you can not capture the water well during a storm. Clean those gutters!

Collecting rainwater accomplishes several positive things:

1) Decreases your water bill by around 5000 gallons per person per year

2) Decreases load on the storm system in your neighborhood

3) Decreases the amount of water that will try to seep into your foundation

4) Decreases the amount of power consumed by your water utility, indirectly allowing them to keep costs lower for you.

5) Decrease costs associated with maintaining your water softener - as less water will need to be softened

6) Increase water softness so that clothes and vehicle wash more easily & you can use less laundry detergent / soap - thus polluting less. Update: I am not using the rainwater for the washing machine any more, only the toilets. The system just doesn't collect enough water to make it practical, also the water quality varies.

7) Eliminates sudden temperature/pressure changes in a shower when someone flushes a toilet, uses the washing machine, or a garden hose. 

8) Increases anticipation of arriving storms - it's essentially raining free money for you to enjoy!
Fresh water will become more and more valuable as we progress into the future. Flushing a toilet with drinking water is really silly when you think about what is actually happening. Your spending money to treat water just to flush it down with waste - not logical. Our ancestors would likely look at us with head tilted wondering why we weren't using our gutters more wisely…

If you are feeling really ambitious and are able to collect the grey water from your bathroom sinks, showers, tubs, and laundry - this water can be recycled and filtered one more time in an auxillary system to supply water to the toilets and the garden hoses - though you will have to ensure that all of your soaps are bio friendly. Depending on your location, installing an inline UV sterilization filter may also allow you to use the water you collect for consumption.

Note: You should not collect the water from a kitchen sink, toilet, dishwasher as this becomes known as black water and must be sent into the sewer or septic system.
rainwater_bill_of_materials.pdf
File Size: 12 kb
File Type: pdf
Download File

rainwaterbom.xls
File Size: 25 kb
File Type: xls
Download File

18 Comments

Making electric baseboard heat more efficient

3/5/2011

4 Comments

 
PictureElectric Baseboard heater
Looking for a way to make your electric baseboard heated home more efficient? Why not consider swapping out your antiquated thermostats with a more modern programmable unit? Despite the bad rap, heating a home with direct resistance heat can be a bit de-humidifying, but it's actually a fairly efficient use of electricity. (Especially if you have solar panels on your roof or an array in the yard) All of the energy consumed gets emitted directly as heat, where as with a combustion heat (oil or gas) there are losses. Only a percentage (although significant) of the total energy of combustion is utilized. The only factor is really the amount of time the electric baseboard heat is on and the temperature at which the thermostat is set. 

Typically when we sleep, temperatures in the house can dip down to 60-62F and we are still comfortable under the covers. When we rise in the morning, the temp should be around 66-68 F otherwise getting out of bed is not very tempting. Leaving for work or play? Have the heat ramp down to 60 till you get home in the evening. If you have a temperature sensitive pet, make sure they have an area where they can keep warm during the day. Coming home to a house that's comfortable temperature makes returning home that more enjoyable.

Here are some simple instructions for swapping out your old baseboard heat thermostats.

Turn off power at circuit breaker

Turn up thermostat to make sure the heater does not turn on

Use current sniffer / Volt alert tool to make doubly sure power is off.

Remove the old thermostat, typically only need a blade screw driver.

Note: Most homeowners do not remove the thermostats when painting. While you have the thermostat(s) off the wall, apply paint that matches the walls around the thermostat. Home stores will match the paint, just bring them a chip. Use a hair dryer to have it completely dry in a few minutes so you can get to the main task at hand. Painting around thermostats can be done, but often it gives you a very unprofessional looking result.

Wire the outer two wires to the black wires coming from the heater, wire the inner red to the neutral (white wire) coming from the heater.

Use wire nuts and make sure to use good quality electrical tape to secure wire nuts. (Baseboard heat due to it's cycling will cause wires to come loose easily through thermal contraction and expansion. Apply the tape and wrap it counter clockwise to make sure the wire nut will not come loose inside of the wall box.

Many job boxes are small, so take care to place the wires back into them carefully, I like to use the end of a screw driver for the final push to make sure they are pressed inall the way.

Do one last visual check on the wires to make sure none fall out or have become loose.

Screw on the base plate of the new thermostat.

Install the 9V battery and program the unit based on your schedule and your requirements for the room.

Switch the heat slider on the right side of the unit to on, then place the control portion onto the base module.

Turn the breakers back on and then make sure the heater turns on properly, if not you have something mis-wired and will have to try again. (The usual culprit, is that you wired the inner black wire instead of the outer black wire.)

I have had good results with the LUX ELV4 unit. PPL electric will give you a 100% rebate on these units (save your reciept) up to $50 each. So take advantage of this offer while it lasts. (12-18-15 Not sure if these rebates are still available.)

4 Comments

Solar Powered Attic Fan Installation

2/20/2011

1 Comment

 
Picture
Summer will be upon us in a few short months - is your attic ready?

Attic temperatures during the summer months can reach staggering temperatures - as high as 160 degrees in some parts of the country. this heat buildup not only increases your air conditioning bill but also degrades your sub roof. A 25 yr shingle is worthless on a roof that has rotting or buckling plywood underneath due to heat damage.

This past summer, I installed a solar powered fan to remove heat, moisture, and stagnant air in the attic. The benefit is that the fan only operates on sunny days and does not increase your power bill. If you have room for gable vents on either side of your house it is an easier installation than a roof penetration. Note: Though not required, the best time to install a a fan like this is prior to siding or re-siding your home.

Step 1 - Install some attic lighting if you don’t have some already. Measure the opening in your attic walls and get a pair of vinyl gable vents, make sure you have a good quality ladder, or borrow one from a friend. (Typically the installation will require you to be both inside and outside on the roof, with your final steps to be done outside after the fan is installed.)

Step 2a - pencil out on the inside and drill a hole in your attic wall through each corner of the portion of the vent that protrudes through the wall. This will be for the inlet side, as the attic fan will not work properly unless it can draw air across the attic. double check, then saw-zall out the rest of the required cut-out. Note: If you have properly functioning ridge vents or soffit vents this step is not required.

Step 2b (Many houses have a window in the attic that you can use to install your attic fan, in that case, remove the all or a portion of the window and make a cutout of OSB or plywood with a vent hole to accommodate the new gable vent/fan combo. Wrap the OSB with Tyvek so that you keep the wood free from damage, use staples to hold it in place. P.S. get the yellow handled staple gun, other kinds are not good and will have you cursing.

Step 3- Secure the fan in place and ensure that the power cord goes through the vent to the solar panel.

Make sure the solar panel is facing South or Southwest , you want to collect the most sun later in the day, as the attic won't really heat up to maximum till mid to late morning. When securing the panel to the roof, make sure you cover up the bolt holes with lots of silicone sealant to avoid leaking issues. Tighten all the panel adjustment bolts, so that you don’t have any surprises from the wind. Use a temperature thermostat to keep the heat in your attic in the winter time to save on your heating costs, (otherwise the attic fan will run whenever the panel is exposed to the sun.) Also, you can get additional modular panels to double the power of your fan, or install them at different solar collection angles, but I have found that the single 10W panel is plenty to cool a 700-1000 square foot attic space.

Step 4 - Fasten the OSB board into the window frame or cut out that you made for the fan, I like to use hurricane clips as they are inexpensive and very flexible in their mounting configurations. Secure the fan in four locations on the inside to prevent vibration, three is not adequate. Also try to block out as much airflow around the perimeter of the fan, to avoid blowback out of the sides.

Step 5 - Enjoy your lower electric bill from reduced summer cooling load, more enjoyable time when looking for items in the attic during the day, longer lasting sub roof, and increased home value..

Update: 11/15/14 added a Fire Cutoff switch - this is a good idea as firefighters have no way to turn off the fan in event of a fire. the Fire cut off switch will melt at 280 F so that the fan will not draw air into the attic, burning your entire house down with a quickness.... make sure to install one on your fan, I had to use some butt splice connectors as the spade connections that came with it did not fit.

1 Comment

Find Your Inner-Barber

2/18/2011

0 Comments

 
Picture
If you're follically challenged like me - going to the barber shop to get a haircut every two weeks is almost ridiculous. At $18-25 per cut plus tip, you are looking at an outlay of nearly $500 year, not to mention wasted time and gas.

I have been cutting my own hair since 2001 and wanted to share a few suggestions.

First let's begin with the items you'll need to do the job correctly.

a)Good quality Wahl clippers, the ones with colored guards are preferred

b)Wall mounted extension mirror (with a standard and magnifying side) installed adjacent to a larger medicine cabinet, but far enough away that you can see the back of your head in the reflection off of the medicine cabinet mirror - also obtain a handheld mirror

c)make sure you have decent dust pan / whisk broom or vacuum handy

You will get hair everywhere, but so long as you have a hard surface floor - no worries, cleanup when you are done is quick.

Cut your hair in the bathroom, preferably in the mid morning after you have eaten. You won't be fatigued from hunger or sleepy. Plus the lighting will be better. Clothing is optional, or you can wear a smock - don't wear socks unless you like to waste time cleaning things.

Unravel the trimmer cord, hold it from the plug end and let it spin till the kinks are out, having a smooth cord makes for a more enjoyable hair cutting experience.

Always start guard-less, with the adjuster just off the end so you don’t hurt your skin. Stand in front of the mirror faced away and use either the pocket mirror or the wall mounted mirror to shape your rear hairline profile. Next trim your sideburns and ear line. (Being a little ambidextrous is handy but not completely required.)

Next add on the #1 guard = 1/8" length to the trimmer. Make sure that the oscillating blades don't contact the guard, as otherwise it makes an annoying noise. Trim against the grain first (up from back and up to your crown) brush your head a few times to ensure that seated hairs can't escape the clipper on your second pass. Repeat with the sides your head, and again go against the grain. 

Check the back of your melon in the mirror a few times to make sure you don't have any freakish patches left over like 'Sloth' from Goonies. also if you want to leave a little more hair on top (if you have any) use a #2 or #3 and fade in the line between the sides and top.

Once your done with your new skin junk, optional man-scaping can follow - but you're on your own for guidance in that arena. (suggest at least a 1/8" guard btw) When you are cleaning up the floor, put the cousin "It"  hair clump that you have just generated into a trash can where it's not staring at the next bathroom user.

When you shower afterwards, make sure to really shampoo well and massage the scalp thoroughly, it will help to reduce ingrown hairs. also, check your ears twice - little hair clippings always seem to loiter there for awhile after a haircut.

After you cut your own hair a few times you will learn what works best and have it down to about a 10 minute operation. Good luck!

0 Comments
<<Previous

    Categories

    All
    Coffee
    Craigslist Etiquette
    Cree Led
    Decreasing Power Bill
    Fixing Hardwoods
    Gardening
    Green Commuting
    Heavy Bag Installation
    Home Heating Hot Spots
    Less Pollution
    Moving
    Nightlight Theory
    Organizing
    Polluting Less
    Rain Water Collection
    Saving Money
    Saving Time
    Self Defense
    Self Hair Cutting
    Smart Power Strip
    Smart Take Out Boxes
    Solar Power
    Solar Powered Attic Fan
    Staying Warm
    Texting And Driving
    Thermostat Installation
    Yard Care

    Author

    Lehigh Valley Veteran - The Green Bargain Hunter

    Picture

    Blogroll

    Be the Bee Social Media Coaching
    Lehigh Valley with Love
    Digital Signage Insights
    Juicing Art
    365 Days Of FFFFound Poetry
    PriusLiftSupports
    Urban Shelf
    Sprout Defender

    Archives

    February 2018
    November 2017
    March 2017
    February 2017
    November 2016
    April 2016
    August 2015
    June 2014
    April 2014
    April 2013
    March 2013
    March 2012
    January 2012
    December 2011
    November 2011
    April 2011
    March 2011
    February 2011
    January 2011
    March 2010
    February 2010
    December 2009
    November 2009
    October 2009
    September 2009
    July 2009
    June 2009
    May 2009
    April 2009
    February 2009
    January 2009

    RSS Feed

    View my profile on LinkedIn
    Picture
    Picture
    Picture
Powered by Create your own unique website with customizable templates.