Coupons4LV.com  -  Tree Hugging Frugalitarian

 
  • Blog

Solar Powered Grid Tied Crypto Bitcoin - Dash Mining Heating System

2/4/2018

0 Comments

 
Picture
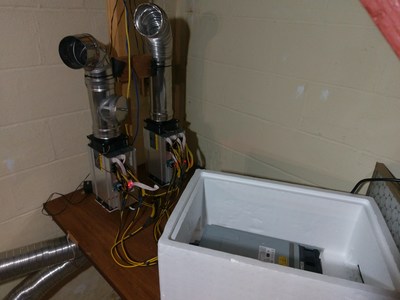
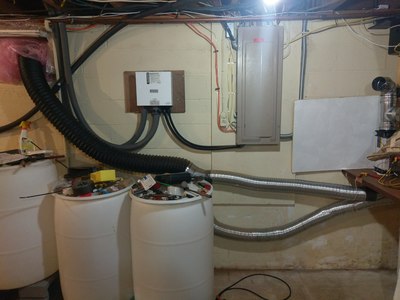
​Installed some crypto miners in the basement to a) mine crypto and make money b) heat the house in winter - though the profitability of crypto mining is nullified unless you have a very low electricity rate. If your rate isn't below about 8-9 cents per kWh, then you are going to lose money in today's market. Choose a profitable miner(s) to start with though they seem to become obsolete quickly, so buyer beware. Wire up a 240v circuit for your miner - use with double pole 20 or 30 amp circuit with some 20 amp receptacles - mark them as 240V and do not plug in any 120v devices or you will destroy them.
 
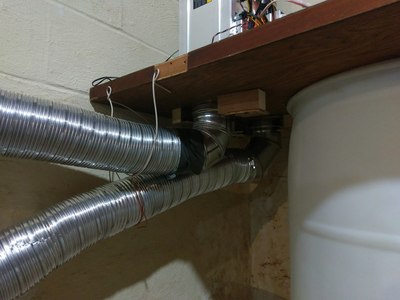
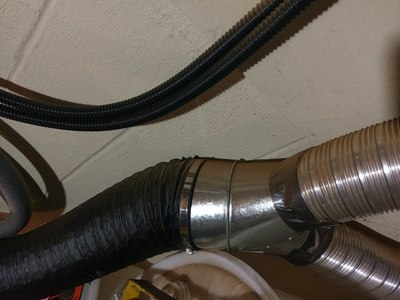
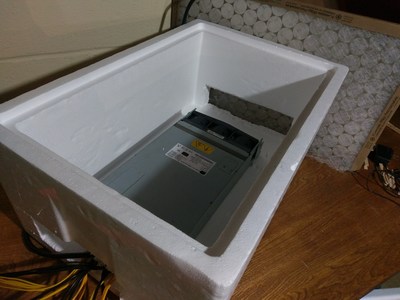
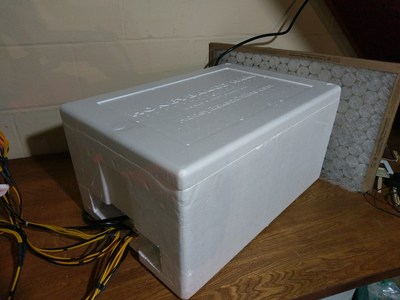
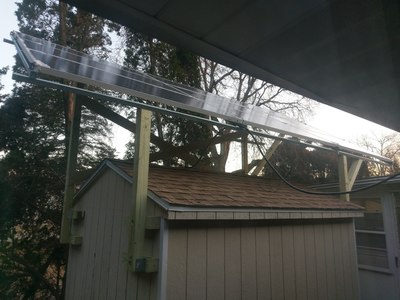
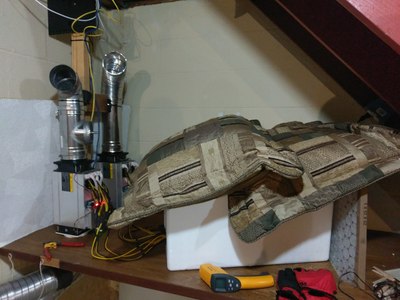
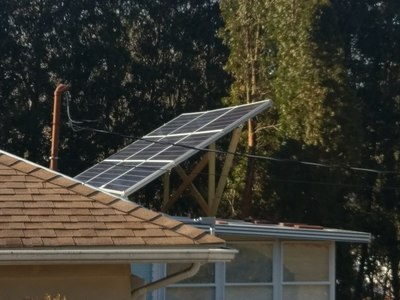
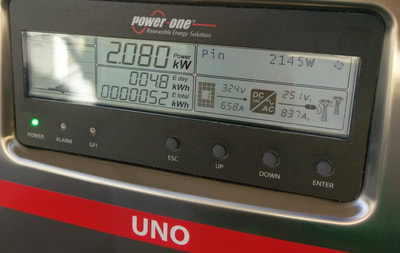
I decided to install a back yard 2.7kw solar panel array hooked up to a grid-tie inverter (I found a great deal on nine 305watt Solartec Panels down in Philly and a UNO 2.5 Inverter on eBay - see what you can find locally or online for a good value).  Since they use a 2880 w dual miner server power supply - mine came with a standard 3 prong plug - but you must use a 240 wired double pole breaker  / receptacle - make sure you connect the ground! I have the listing below for the miner power supply - but there are versions on ebay that have the 20 receptacle pin out wiring harness pre-attached from Asia, which is what I bought.  They are much more efficient than buying two independent power supplies. With a 30 amp breaker and 10 gauge wire you could wire up a few power supplies on one circuit. If you are using 12 gauge wire, you can safely only have 1 receptacle if using a dual miner power supply. If you want to keep the miners in your house or basement - find some coolers for noise insulation, as they are loud. The server power supply is so much quieter when put into a Omaha Steak Styrofoam cooler. Use a inexpensive fiber high flow air filter too, that way it will remain dust free. Also use outside air if possible to cool the miners - I used 6" duct and some fittings along with some 3D printed fan shroud/adapters. Mount the miners vertically if you can as well, the chip temp should remain less due to the chimney effect (keep them below 80deg C). Mine are outputting between 75-85 degree air with 25 degree F intake air. If you live in a warm climate - you may want to rethink mining these days. No money it for cooling these puppies anymore.
 
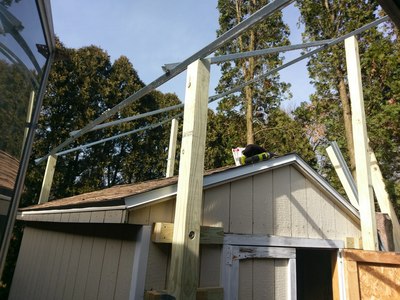
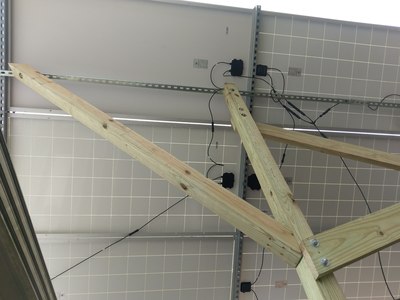
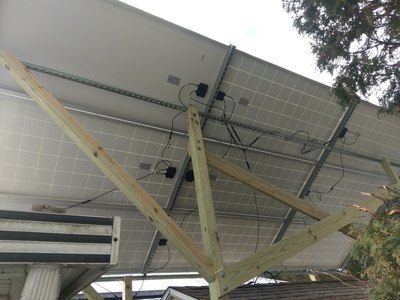
 (We get around 10 hrs of daylight in the winter here in PA). This brings the cost per kWh adjusted down to around .06 cents for the miners - I designed a pressure treated / channels strut rack and mounted everything with galvanized hardware and stainless washers. Yesterday we generated about 12kwh with the array, but I expect the summer will bring this up to around 15-20kwh due to longer days and higher sun angle. Obviously I know a thing or two about AutoCAD, electricity and using some power tools,.... but you too can do this if you have a shed of your own that is not too far from your house.
 
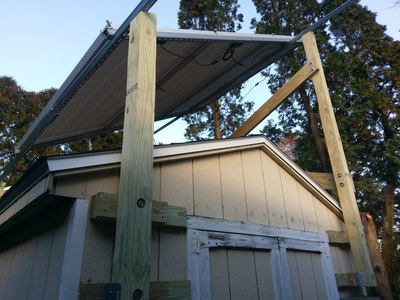
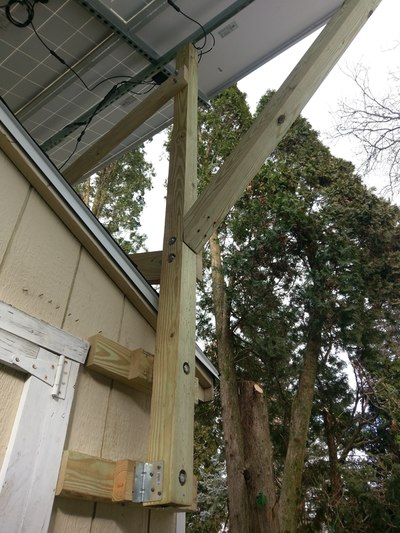
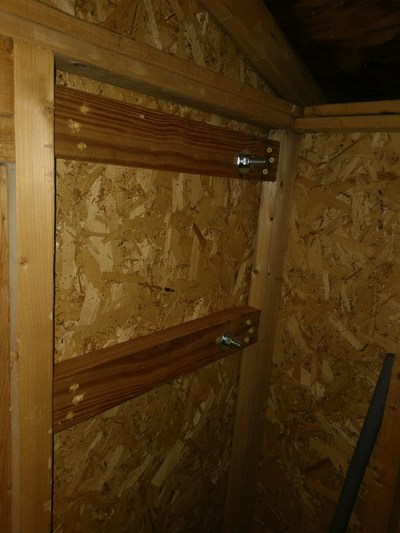
Installed pressure treated cross bars and reinforced the inside of the shed with additional lumber for strength. Tied everything together with 3" torx deck screws, then drilled through with a 5/8" bit and through bolted the whole thing with a 1/2" threaded rod. Using cad, I was able to calculate the lengths required for a 30 degree array angle (an angle that works well with our latitude of 40degrees). By angling the top of the (4) support posts and through bolting the tops with more 1/2" threaded rod (make sure to use washers and galv split lock washers) I now had a secure place to mount the 20' long pieces of strut(joined in the middle with two four hole plates each).
 
Once the main structure was built, the overhang on the East side was deemed too long - so I added some 45 degree 4x4 support angles, the top angle of 30 degrees required that the tops be compound mitered(which I did sort of by hand on a standard chop saw) but would have been much easier on a compound miter saw. Having a friend for this step is helpful, as the long pieces were heavy. Make sure to get high quality outdoor grade 3" long screws for fastening things together. Many holes have to be counter-bored with a 1/2" bit - so having a drill guide is helpful (or use masking tape to mark the desired drill bit depth. The project requires use of a corded 1/2" drill, a cordless drill is good for many of the tasks, but not the heavy duty 5/8" boring work(get the long wood shipbuilding bits at Harbor freight). I also installed an X brace with (2) 2x6x12' pressure treated - as lateral sway is no good when you have 10' 4x4's sticking up in the air that have ~700-800lbs on them.
 
Make sure your array does not get too much shade from trees, or if it does - sort out the tree with a saw. If you get shade from structures - find a better location or elevate as possible / codes allow. Don’t make it too high though or you won't be able to work on the array or build it easily when needed. I plan to stain the pressure treated wood too in the next few weeks so it will stand the test of time.
 
Make sure to use a string sizing tool for your inverter so you stay within design parameters.
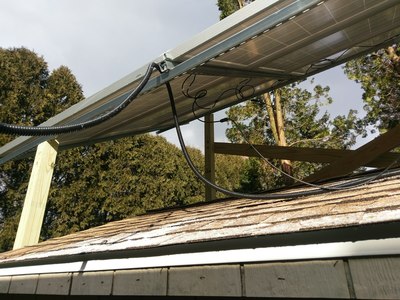
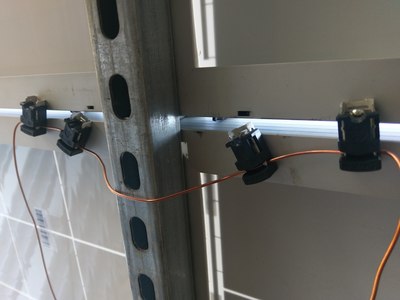
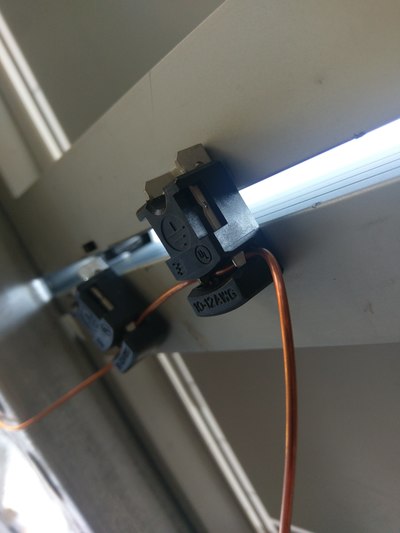
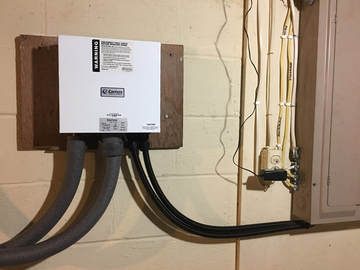
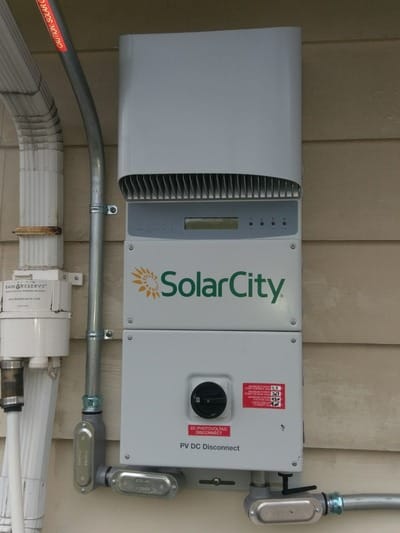
I used 10/3 wire as the system is only 2.7kw - be careful on wire size - don’t go too small. 10/3 can handle 25 amps so long as distance to service panel is not too long. You must have a 30 amp rated AC disconnect as well. You will need a pair of Mc4 extension cables to get to your array from the inverter - I used the Hubbell black 1/2" flex to keep the cables save and weather tight as they entered the inverter fittings. You will also likely need some extension cables to tie everything together. I like getting the prewired ones online but you can also buy the connectors and cable loose if you wish. Also may need a metric npt adapter fitting depending on your inverter for some of the fittings- check the thread type at the bottom. Finally, you will also need some ground wire mounts for each panel, I chose the Tyco units as they are easy on and easy off - and easy to move. Saving labor time is critical and they work with 12 or 10 ga solid bare copper wire - though you only have to strip the wire where you make the connections if desired.. though I chose bare 12 ga wire for simplicity.
 
All of my materials were bought at: Craiglist, eBay, Amazon, Graybar Electric, Fastenal, Home Depot / Lowes.... happy hunting for parts... I was able to source the whole solar job for around 3k or so... the mining portion for about the same. The solar part will ROI in 2-3 years, the mining part is uncertain.  Though the heat they generate decreases our heating bill from the oil man (no natural gas available on our street)
0 Comments

Electric Tankless in series with 6 gallon water heater

11/1/2017

0 Comments

 
Picture
​Before: 1959 3 Bed /2 Bath ranch house has oil boiler with a summer/winter hookup.
I wanted to convert the domestic hot water to electric.
 
Some goals of the project:
Less oil dependence
Nearly Instant hot water to all taps
Energy efficiency
Endless hot water at a very controlled temperature
Smart Controls and remote control via phone apps
 
Obtained a used eemax 23kW tankless and a 6 gallon hot water heater.
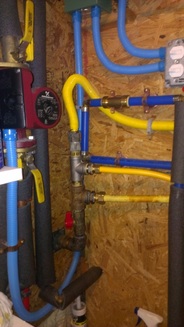
Got a whole mess of ¾” PEX and brass connection / valves etc..
(See parts list below)
Remove all existing ½” hot water copper lines.
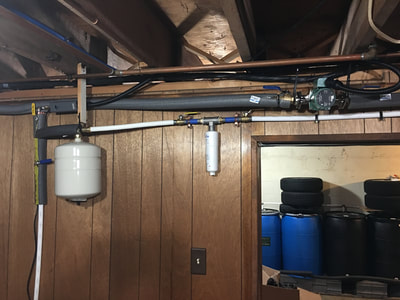
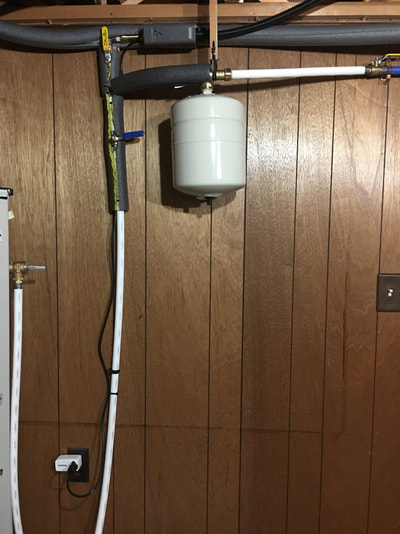
Install a direct ¾” line from the meter to an Aqua pure descaling filter then an expansion tank.
Replace the aquapure filter every 6 months. Your hot water devices and faucets will thank you.
 
Pipe into a loop that circles around the basement joists underneath each tap.
Go through the joists safely or under them and secure with pipe fang straps.
Use barb connections wherever possible, they are way less expensive than shark-bites and will outlast them too.
Some connections will have to be shark-bites, just be smart with them.
Avoid soldering connections unless you are experienced, the quick clamps are just too easy.
Also, I suggest using the PEX as freezing issues all but go away.
They can expand to accommodate most freezes based on my experience with a house in NJ that has exposed pipes.
 
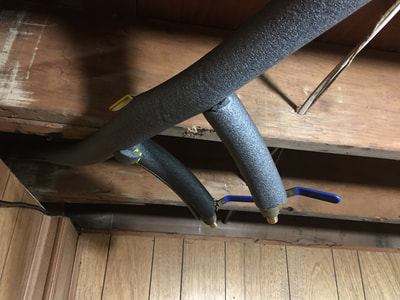
Install a shut off valve and tee at each tap.
Install the tankless water heater as close as possible to your electrical panel to reduce costly 6GA wire requirements.
Immediately after the tankless, pipe the outfeed of the instant into the 6 gallon tank.
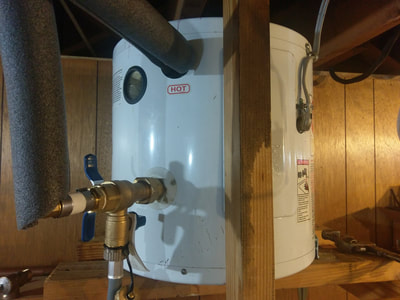
Install a shelf for your 6 Gallon water heater and hang it from the rafters. (I put mine near the kitchen sink as that gets the most usage.)
I removed the old 6 gallon water heater heating element and the pressure release valve as they were shot.
I also added a webstone cold water bypass valve isolator to drain the tank when needed – as my tank had no drain valve.
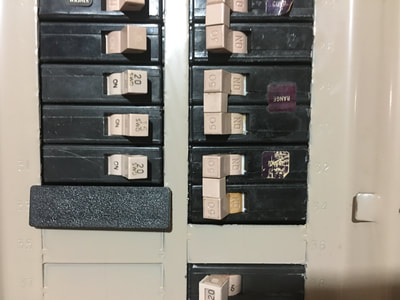
Replace the heating element with a 1500 watt unit so you can use a 15 amp circuit. (though I installed a 20 amp circuit with 12GA wire to keep the wire resistance less)
Using a 15 amp load also enables you to utilize a WEMO switch!
I adjusted the temp to 122F on the 6 gallon tank.
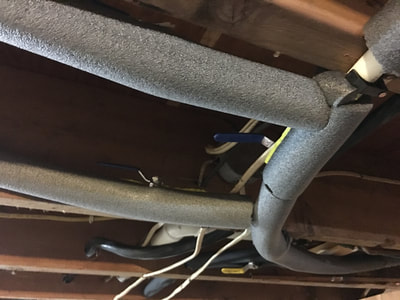
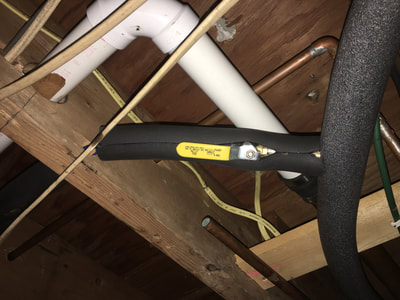
Insulate all the PEX pipe with foam or rubber, as you are not looking to heat the air. Leave no surface behind, try to get the valves too, be creative. I use the PEX cutters to trim the pipe insulation.
 
Install a stainless steel recirc pump at last part of the loop just prior to the infeed – choosing non stainless steel is a bad choice and will cause things to rust. Don’t do it.
Install a Honeywell aquastat and set it to around 85 degrees and the hysteresis dial to 5 degrees – you can find these used too. Don’t get the clip on aquastats, they stink and you can’t fine tune your system.
Mount the aquastat on a 12” long section of copper ¾” pipe, as the PEX does not transmit the water temp well due to its low specific heat. Your aquastat will be close to useless if mounted on PEX pipe unless you want to waste energy.
I have the recirc pump controlled by a WEMO switch and in series with the aquastat.
Make sure to include a check valve so there is no back flush of cold water to your taps!
 
Not currently used but:
I also ran a bypass in/outfeed run off the main loop back to the oil burner domestic coil to have redundant systems, or for possible winter applications.
I also ran one more in/outfeed run off the main loop to a 50 gallon water heater. This can be used in the winter to “store” water at a warmer temperature then the ground water from outside. Additionally, DC heating elements could be added to preheat the water prior to entry into the main hot water loop. Thus far I have not used it yet, but will update in the future.
 
Set the 23 kw Instant hot to around 125 degrees – will take some trial and error.
BTW you will need (2) double pole 50 amp breakers for this guy. It uses a lot of juice when on full demand, but if you figure you are only using it for an hour per day or so, depending on household size… it really is not bad. Use a union prior so you can remove and clean when needed. I also mounted mine on a sheet of plywood and put some rubber cushion to serve as a noise mitigation device. As when the contactors are energized, they click a bit. Mine is in the basement so can’t hear that much but good to be safe.
 
Set the WEMO switches such that they turn on the 6 gallon water heater at 6:15am, then the recirc pump at about 6:45 to 7am. This will ensure that you have instant hot water at 7 am in time to wash our face, shower, or what ever…
 
I do the same timer sequence at 445pm so that we are ready to make dinner and wash hands by 515
 
If you find yourself taking a shower at a similar time, add some more timers etc… you will minimize the length of time it takes to get hot water.
Though I will tell you that even from a dead cold, the tankless 23kW will heat up the whole loop(including the 6 gallon tank) in 2-3minutes. So essentially activating the recirc just prior to going in the shower works fine. And yes, you can shower until your body prunes into oblivion, the hot water never runs out!
 
The system without the 6 gallon tank is not pleasant to use. It gets too hot and has longer lag times. The 6 gallon tank serves as a mixing chamber and provides a 2-3 minute buffer of hot water. The temp stays rock steady at 122 which is perfect for showering, laundry, handwashing, and dishwasher.
 
Make sure all your faucet pressure balance valves are working properly(the diaphragm commonly breaks over time), or have separate taps for Hot and Cold. You will have hotter water with separate taps and can likely turn the temperatures down vs having all your water mixed. But with a hotter setting, more people can use hot water devices simultaneously.
 
You can leave the recirc on for whenever you are in the house so that it satisfies the aquastat temperature, but we don’t use much hot water during most of the day since at work/school so no sense in heating water. 
 
Additionally, I have a WEMO rule such that if my phone is not in the geofence of my house block area, it turns off the WEMO switches.
Integrate to your IFTTT app – google for more info.
Technology is pretty wonderful.

One should note, that even without the recirc system on(nor the 6 gallon heater element on for that matter), the hot water from the tankless punches through the 6 gallon unheated/circulated tank quickly. Mainly impart due to the fact that hot water rises over top of cold water. You could also install the tankless electric after the 6 gallon water tank, but i'd rather have the preheated 6 gallon tank last - My theory (though untested) is that it provides a steadier output temperature during the first minute or two of hot water demand (handwashing) which is frequent in a family of 4 household. Thus lessening the chance of getting scalded. I would also imagine that if you triggered the 6 gallon to heat several times per day and had the tankless after, you might consume less electricity overall - but lose some output temp conformity... especially for short cycle uses. 
 
An alternate system would be to have instant water heaters at every tap, but with 7 hot water taps in the house: kitchen, 2 bath sinks, 1 tub, 1 shower, washing machine, basement sink…. It seems like it might be an electrical and cost challenge. But eliminates a lot plumbing in the house by doing away with hot water lines.
 
One note: When using the oil boiler domestic coil, I always found the water temp to fluctuate from super hot to lukewarm plus it seemed that a lot of energy went up the chimney. With an electric system, very little energy is wasted and it has a high efficiency – though your price per kW may make it more expensive. If you have your own solar PV system, electric is def the way you want to lean. Also note that natural gas is not available on our street… so that will have to weigh into your heating method decision matrix.
0 Comments

Automate your gas water heater tank

3/29/2017

0 Comments


Do you have a gas water heater tank? While you sleep, you are heating water for no good reason except to pay a higher gas bill and pollute the earth. Take advantage of the fact that you don't need to heat the water to that optimal 120 degrees or higher while you are sleeping.
​
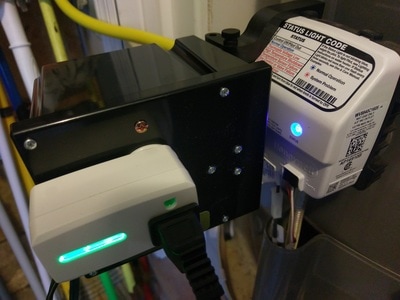
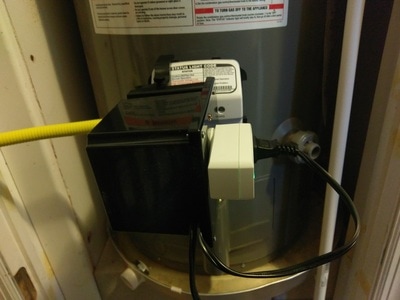
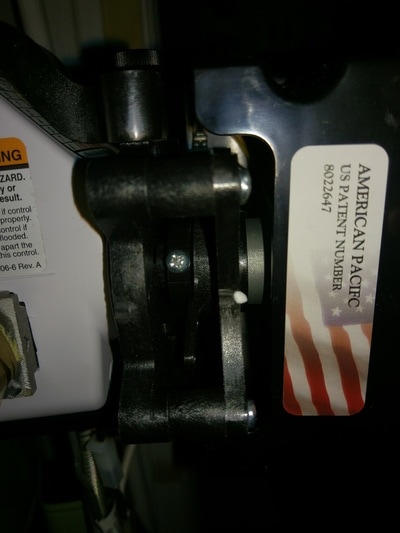
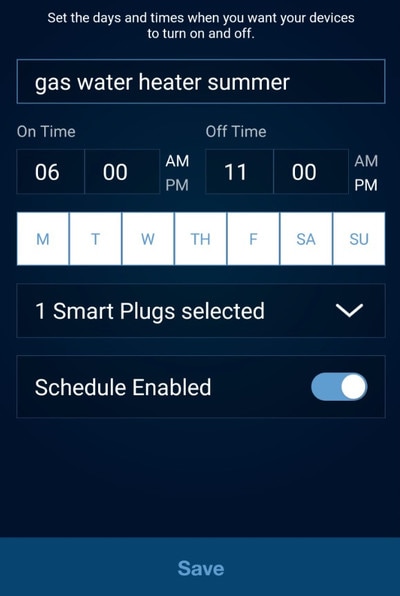
A month ago, I stumbled into a very clever invention, the gas water heater timer. A patented device that enables you to electrically control the valve on the front of your water heater. (You can also adjust the temp setting of the water heater, but not remotely) The average person goes to bed around 11 or so and wakes up at 7 or so. So for around 7 hours, there is no need to heat the water in your tank. Have the water heater turn on at around 6 am and by 7 you will be all set.  A gas water heater can recover temperature quickly, so you should only need around 1-2 hours to make the tank a comfy shower temp, and if you shower at night, and leave early in the morn... there is really no need to turn it on till 1-2 hrs prior of your returning home from work.

When the switch is off, the water heater valve is rotated to the vacation position, then when turned on - back to the preset temperature. It comes with a manual timer switch, but that is a throwaway in this day and age.

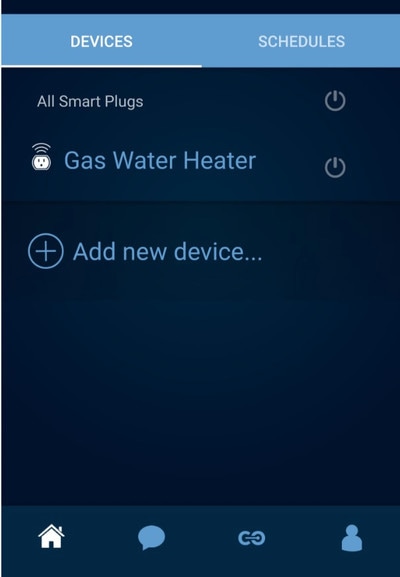
​With a wifi enabled plug, scheduling and bypassing schedules and also vacation control become trivial. Tie it into the away/eco setting on your Nest thermostat and really get carried away. This device is a dream for second homes or vacation properties. Embrace home automation and save money and the environment. There are 3 different models available depending on your water heater type, look at the gas valve in the pictures below. They are not interchangeable, so choose carefully. All the newer water heaters use the type 3 design, as pictured above. Choose the gas valve from the picture below, a WiFi plug of your choice, and you will be all set. It only took around 5 minutes to set it up, including the smart plug programming.

I also put the link for an electric water tank control unit, the Elk model seems to rate well and can be plugged into a smart wifi plug as well for control from anywhere.
0 Comments

Roll your own Newport cigarettes

2/24/2017

4 Comments

 
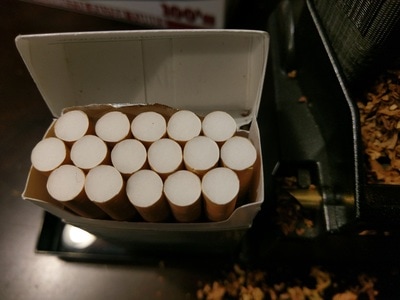
​So despite the health risks, my wife has been a pretty die-hard Newport 100 smoker for 10+ years.
She has tried vaping, e-cigs, patches, gum, lozenges, but always resorts back to the Newport :/
After experiencing the third price increase in the last few years, I decided to do some research and find a lower cost method of procuring cigarettes.

(Updated 11-23-17) 
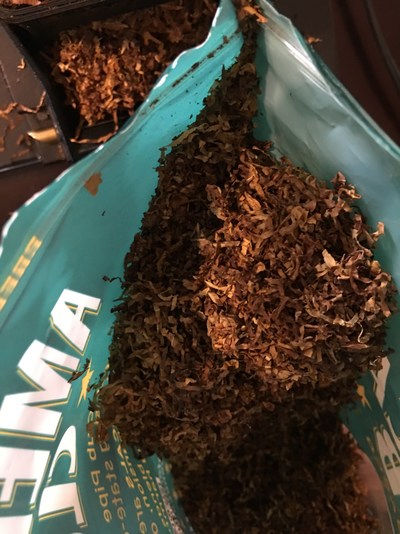
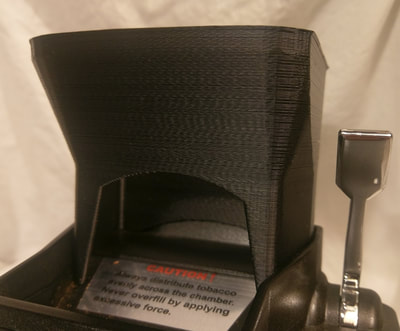
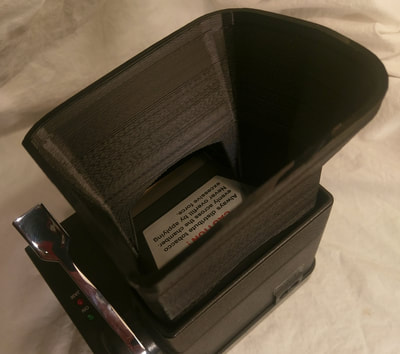
Enter the Powermatic II, an Ergo 3D printed Tobacco hopper available on eBay Another update: 3-10-18 And now available on Amazon as well. (that we designed - it helps keep messes to a minimum, we make them here in Pennsylvania on a 3D printer), Gambler King’s filters, and American Club Menthol Pipe Tobacco. The American Club has way less stems and sticks than the other brands. In short, the good stuff is good, American Club (AC) is the best stuff. Look at how light and fluffy the AC is in the bag, also it bogs the powermatic way less and doesn't get hung up like the thicker tobacco brands. It also seems to be a bit more dried but not too much.
I like to sit down at the kitchen table, keep the machine on an extension cord with a on/off switch and put on some good tunes.
Make sure you get a good cigarette case. I suggest the clam shell style ones. They are sturdy and won't mangle your smokes. Update: Past few years been using the gasketed Sistema Klip it for a cig case for Kings, they are fab. 

​Helpful tip: Also, after you make a bunch - you have to give the ends a quick pinch so that that tobacco does not fall out of the end when putting them into the holder.
 
Go with the King size Gambler filter tubes, the machine loads them better than the 100's and you will have less jams.
 
Pour the tobacco leaves so it floods the hopper and the front area, then make sure to push down gently a few times(when you are packing the loading area), and especially towards the outsides. If you have arthritis, you can attach a cheater ever to the powermatic arm to give yourself more mechanical advantage.( this is our next 3D printing project :)
 
One hopper full makes around a pack, I usually make 2 packs at a time – so everything stays fresh.
 
With the combination mentioned above, my wife now PREFERS the homemade cigs vs the Newports. This translates to huge cost savings.
Less chemicals than the Newports as well = slightly healthier I suppose
A 1lb bag will yield around 2.5 cartons = 500 cigs
Figure a pack of Newports in PA costs around $8 or around $.40 ea, a roll your own costs you about $.04 ea!
So you are saving 10x the money by going to roll your own.
Of course you have to factor in the time it takes to make them, but I can bang out around a pack in 8-10 minutes, maybe less if you are in the groove.
 
Note: You will have to buy tobacco in a store in PA due to laws, but many places have it. Don't use a menthol flavored tube, you will likely be disappointed, unless you like things Über minty.
4 Comments

Tips for getting your laptop to run faster

11/26/2016

0 Comments

 
So you have a laptop and you use it at home and at work – currently it runs a little slow.
Here are a few things that I have picked up over the years to make it run faster and reduce bloat.
Disclaimer: I am no expert – though I am an engineer who has been know to figure out a few things here and there.
 
Hardware Suggestions:
If your computer is old, replace it – they are so inexpensive these days – no one has time to wait for a slow/old computer.
Get a docking station so you are not cord fumbling.
Get wired external keyboard
An external monitor is a great addition – they are worth it so you don’t have to struggle with a small laptop screen.
Use a wired mouse dedicated for home keep it plugged into docking station (most laptop integrated mice are inferior) – go wireless if you want, but I like not dealing with batteries and Bluetooth issues.
Run a cat 6 cable from your router directly to your docking station, wireless signals not as fast nor as reliable. May have to drill a few holes here and there, but it is worth it. (sometimes can't put the router in same room as docking station)
Corded docking station connection will free up some bandwidth for you mobile devices / fire stick etc… too – they will run a percentage faster overall – as your pc will have a phantom draw of bytes while turned on.
Make sure your router and cable modem is not too old, if so replace so they are not the weak link.
Make sure to disconnect from wireless networks if you are using a hard line – then it won’t fumble around looking for wireless networks when you are home.
 
Free program suggestions:
Decrapifier – gets rid of the “Crap” programs on your computer – peer review analyzes what most people delete.
Malwarebytes – run it weekly or so, or buy the auto version and will be real-time
Pdfexchange – use instead of ram bloating adobe pdf viewer – has more features too, like being able to make measurements
Dopdf8 – print from any program on your PC to pdf file, eliminates lots of paper usage.
Autotab Discard for chrome – keep your tabs open, I usually keep about 20. This guy will freeze each tab to free up memory. Click on the tab to un-Hans Solo it.
 
Try the above tips for a few days/weeks and report back with your findings, I think you will find that things will be better than before implementation.
0 Comments

SolarCity PPA experience

11/20/2016

2 Comments


I had been waiting a few years – but figured the time to get on board for solar is now. share.solarcity.com/coupons4LV
So long as your home has some decent sized roof sections SE or SW exposure it will likely meet the litmus test.

Also, you should make sure your roof is not nearing the end of it’s useful life. If you have an architectural GAF roof, it should last around 25 years or so.
Figure if you have less than 5 years of useful life left, either replace your roof prior to the solar install, or wait till you ready to replace your roof.
Keep in mind that the solar panels may likely extend the life of the shingles where they cover as the shingle will degrade from solar exposure over time.
 
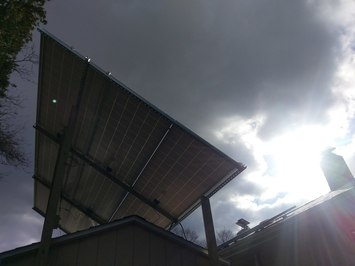
SolarCity software program on the reps computer analyzes the roof, lays the ideal panel locations and makes sure that the overall system efficiency is above a certain threshold. You approve the rough draft the panel locations on the roof from a rendering. (Sometimes you will have some options depending on your roof-line)  Trees and surrounding shade generating items are factored in to the analysis. System efficiency calculator enables them to mount panels on roof sections that aren’t as efficient from a solar harvesting perspective – so long as there are enough panels that have high efficiency (by being directly pointed in the Southerly direction). Micro-inverters make this happen, they are able to optimize each panels performance and make it so the system doesn’t depend on every panel getting the same amount of light.  
 
With PPA (Power purchase Agreement) from Solar City – you can decrease your homes carbon footprint. All while not outlaying a dime. Currently I am in a 3 year contract with an energy supplier at a very aggressive rate on Kwh with PPL(our local electric company), but by switching to solar power, my monthly bill will remain the same, and I will reduce the burden on fossil fuel burning power plants. (Solar City will sell back any excess power generated to the grid) After 2018, it is highly likely that our rate per kw will be even more competitive – as I don’t expect the price per kwH from the electric company PPL to decrease. Inflation makes all rates rise(typically at around 4% per year), and I expect price per kwH to keep increasing over the next 20 years. The 20 year PPA with Solar City fixes the power rate per kwH which protects you against inflation and market volatility.
 
I also did some research and it appears that homes with solar sell 20% faster and for more money that those that don’t …
 
So essentially, I pay the same for power for the next 3 years, then the system should be net positive for our home moving forward.
An old friend once told me, think long term. “If it is not right long term, then it is not right short term.”
 
Solar City also gives you the option of buying the system outright after 5 years if you sign up on a PPA, then every year anniversary. It may make sense to buy the system at a certain point, especially if your power bill is high. You will have to crunch the numbers for your given set of parameters.
 
The apps are neat too, everything can be monitored from your phone/computer and it is turnkey warrantied for 20 years.
 
Thus far, the rep from Philly drove up and went over some rough panel position plans and crunched the numbers to makes sure that our home was a good candidate for solar.

Next they setup a tech to come and do some detailed measurements: roof, meter location, attic, circuit breaker panel – the process took about 2 hours. (and you don't need to help, ha!) There were a few forms to esign online a day or so later on the MySolarcity website, and their concierge assisted me over the phone for one document.  
 
Next step is for them to come and install the system, I will update this blog entry when that happens and add some pictures.
 
To get started on a system for your house click here:
share.solarcity.com/coupons4LV

Update 12/22/16 - system was installed yesterday in 1 day! These guys did a great job and have good attention to detail. Next step is the electrical inspection which will be done next week. Additionally, they also installed a free NEST thermostat which is a local incentive from our power company PPL. The phone control and learning features are really neat.  

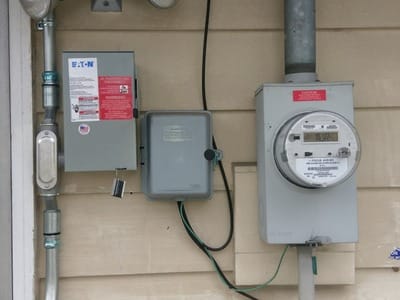
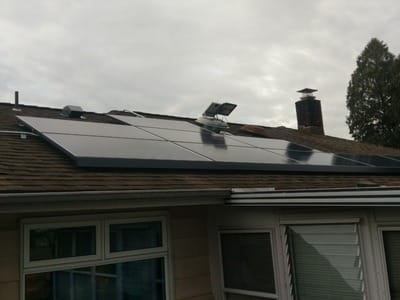
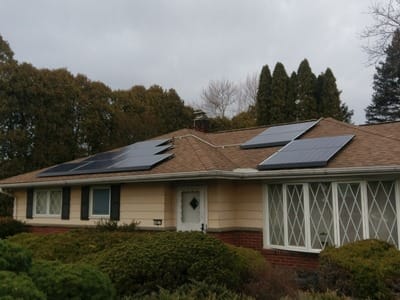
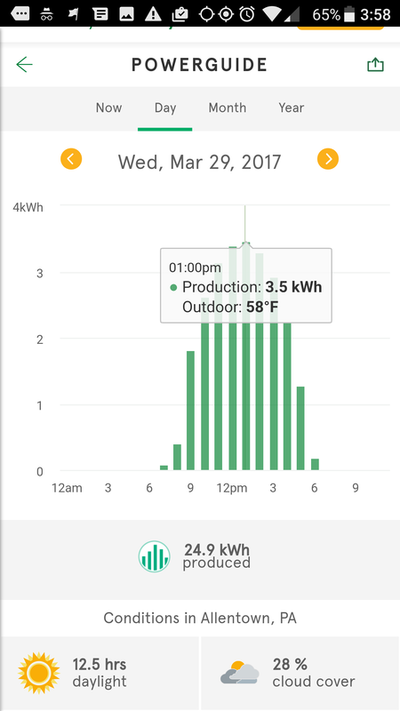
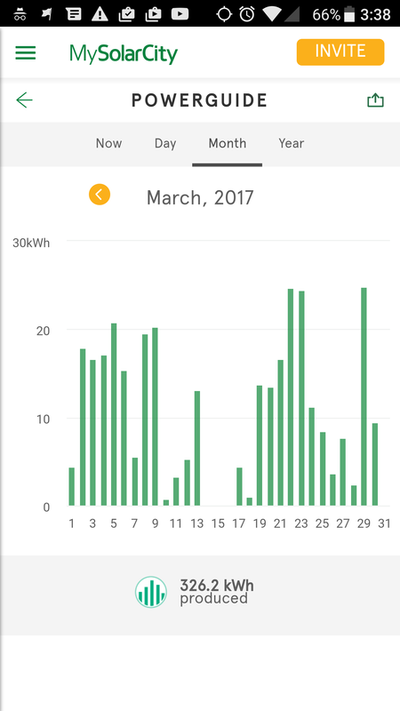
Update 3/30/17 - system has been online for a few months now and working well. Can monitor the whole system from a phone which is neat as well. Below are some screen shots of the app.
​
Picture
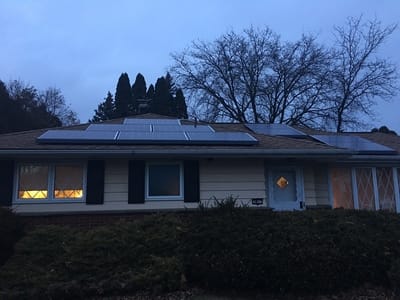
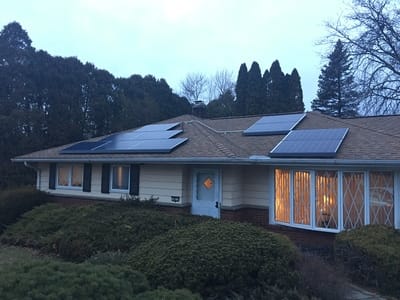
Before solar - South facing, but pretty cutup roof line in the front. Rear of the house has one long run, where many panels will go(though they won't be as efficient as the front facing panels)
2 Comments

Roof Mounted Solar Fan

4/25/2016

0 Comments

 
​An attic fan is a great investment, it cools your attic, which in turn lowers your Air conditioning load and also prolongs the life of your roof by eradicating moisture and heat. I’ve had an AC powered attic fan for a long time on a thermostat.
 
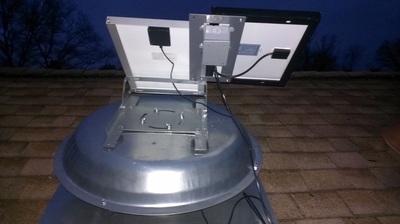
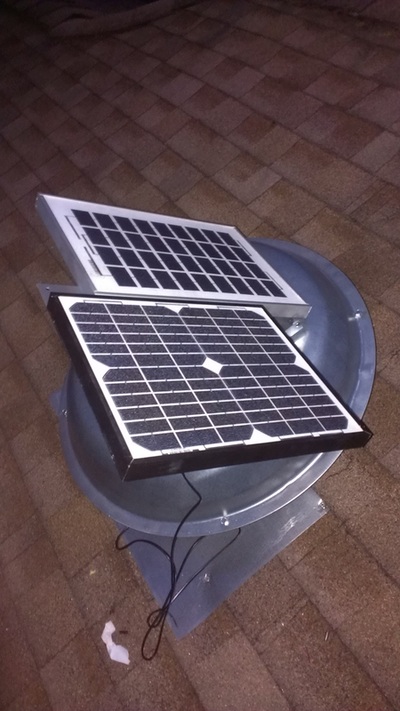
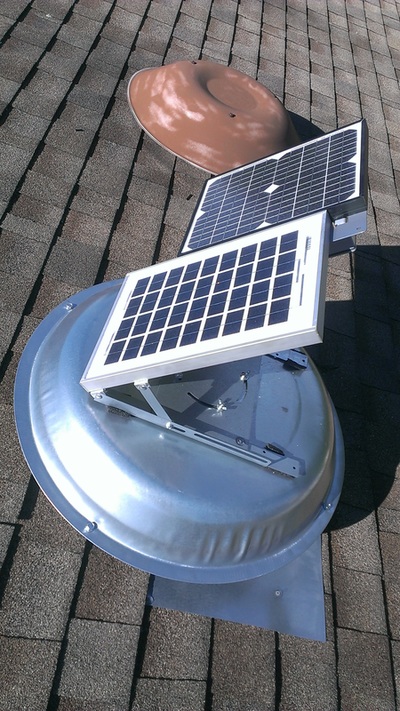
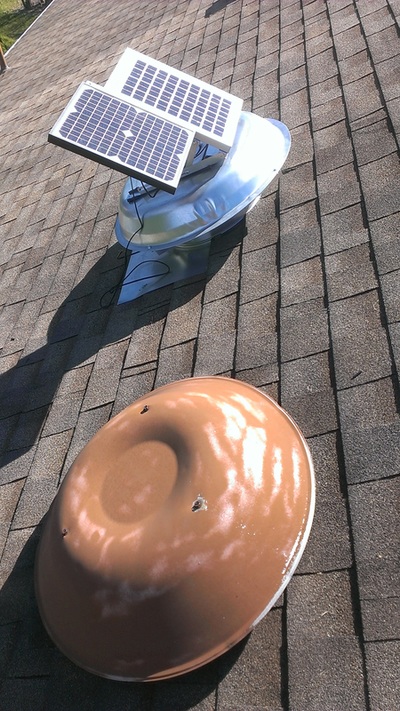
Enter the now very affordable solar attic fans. I picked up a 10W roof mounted one, installed it a few feet away from the Ac powered one but discovered that the one panel did not have the oomph to get the 24V fan going without full sunshine. (Motors need a lot of startup current to overcome starting inertia resistance) So I picked up another 10W panel and wired the two panels in parallel.
 
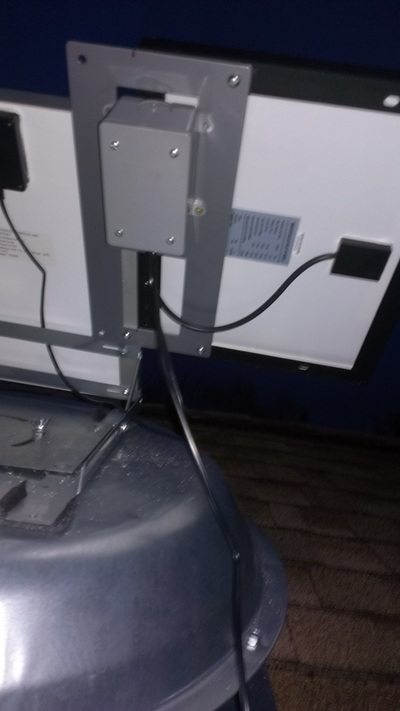
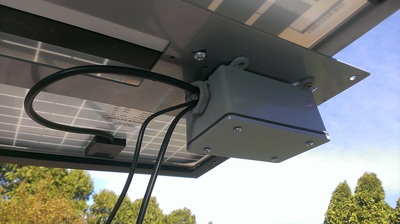
The new panel came with a mounting bracket that I modified with a few holes to sister next to the factory panel. I used a nonmetallic box to do the wire terminations. Make sure you tape up your wire nuts well or use a secure wire connection device. Now the fan will work in a variety of conditions so long as there is some light.
 
I kept the AC fan as some hot days or non-sunny days the solar fan will likely not be able to keep up with the heat load. Additionally, I had a very small leak due to a shingle issue - so the new solar fan hole killed two birds with one stone. Make sure to remove all the nails above and around the hole where the solar fan flange must lie. You have to be very gentle with the shingles especially if they are a bit older so they don’t crack. I used a small shingle removing tool to pry them up(to gain access to the roofing nails). Make sure to have a tube of waterproofing or roofing sealant with you while you are on the roof to fix any issues.
 
Make sure you get the temp cutoff switch if you live in colder climates and the fire safety switch to protect fire fighters and your house in the case of a fire. (these get mounted in your attic and after the quick disconnect to the motor. I used butt splice connectors for this task) I figure the solar fan will pay for itself in 5-6 years or so, but it is really nice to not have to listen to the noisy AC fan on except for the hottest part of the day. The solar one is pretty much silent from inside the house.
0 Comments

Tankless Water Heater Cleaning

8/28/2015

0 Comments

 
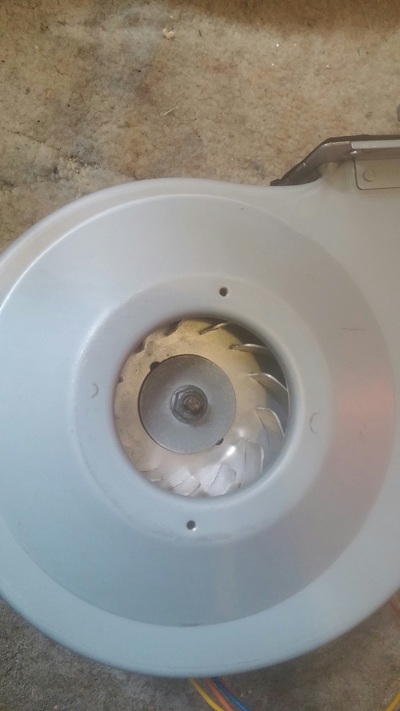
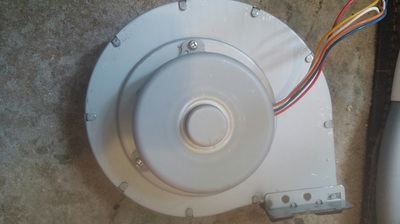
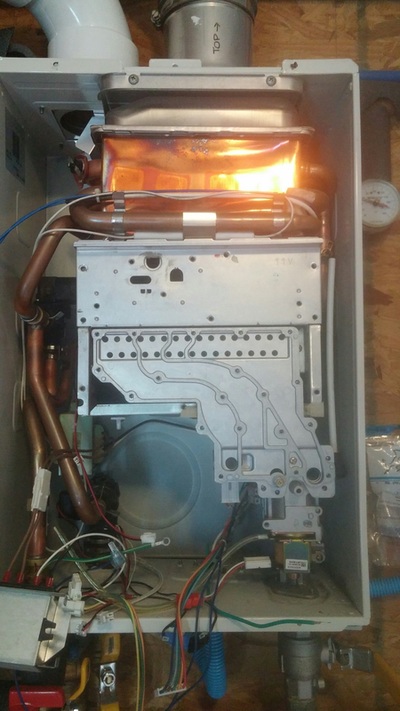
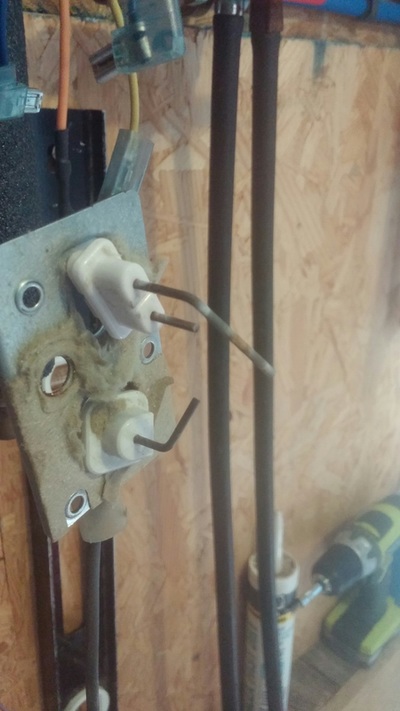
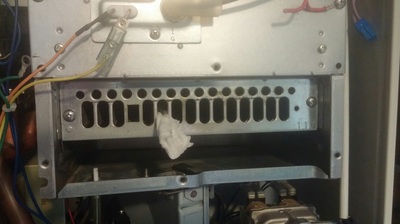
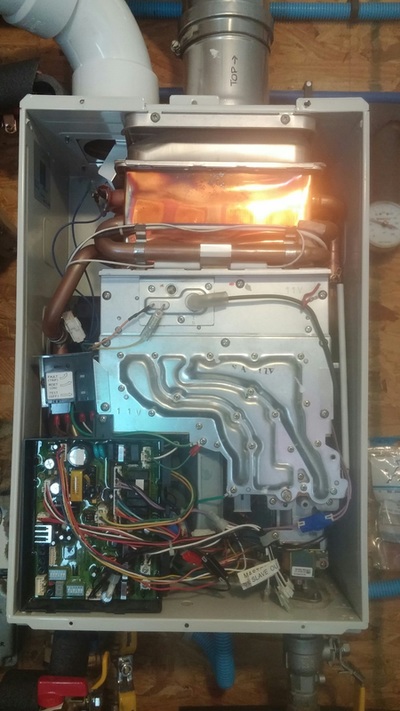
If you have a tankless water heater be aware that it must be maintained, or it will breakdown and not work properly. I have previously outlined the steps need to drain and clean the pipes with descaling fluid and a pump via bypass valves... but there is another piece of maintenance that must be performed periodically. The internal high rpm blower fan must be disassembled periodically and cleaned. Dust builds up on the unit and causes the blower to run out of balance at high rpm causing tremendous vibration through out the whole house. This will lead to eventual destruction of the blower motor and potentially other problems if not dealt with. Adjusting the fan speed with dip switches will get rid of the vibration problem for a short time, but unless you clean the blower - the noise will return.

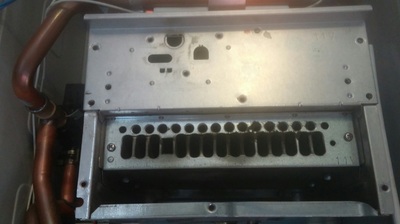
Additionally, the gas channels need to be cleaned out as well. they accumulated debris and must it must be removed. a combination of q-tips, pampers baby wipes (use a chopstick to get in the nooks) and an air compressor are the tools of the trade.

The connectors and screws come apart pretty easily, just take a few pics as you take it apart, so you remember how it goes back together.

I would plan on doing this cleaning once a year to keep it running in top condition. It runs so much smoother you can barely hear it when it runs. We have an external intake on our heater to get the most fresh air to the unit as possible - a 4" foam intake filter is recommended to keep the grime out. There are some ATV ones that are available online that fit with a hose clamp.


0 Comments

Ditch the Propane bottle for Natural Gas Grilling

6/15/2014

1 Comment

 
Picture
Picture
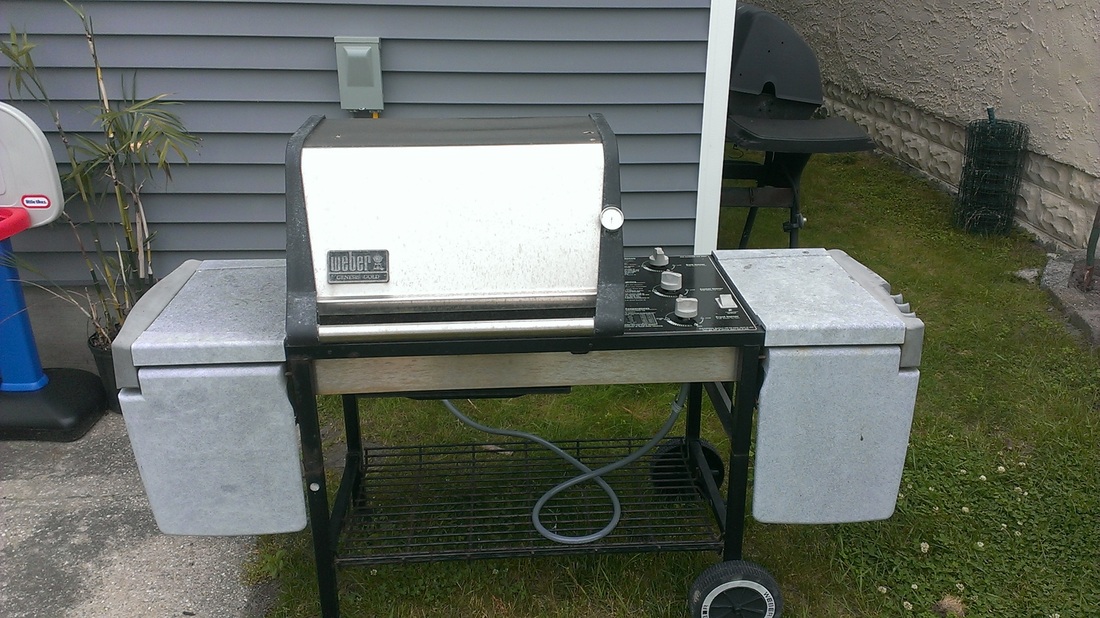
craigslist gold - picked for $22!
Picture
3/4" tee, 3/4" to 1/2" reducer - make sure you get some 3/4" couplings as well so you can insert your tee into the main.
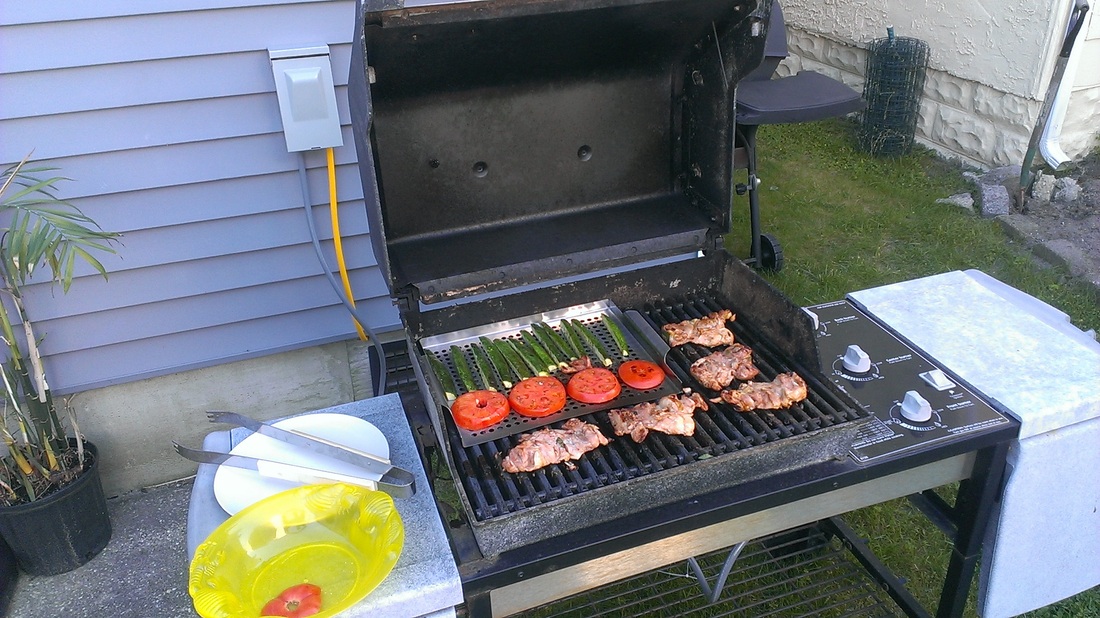
Face it, dealing with propane tanks is a hassle. Eliminate stress and half cooked meals that have to be "saved" by the oven due to out of propane issues.If you have natural gas at your home, consider switching to it vs. propane for your outdoor cooking fuel. The propane regulator, tanks, filling the tanks, connecting reconnecting, running out of fuel, the sheer weight of the tanks - forget about it. Once you go natural gas, you will be glad you did. One of the only downsides is that propane does burn slightly hotter than natural gas, but i rarely use the hottest setting for cooking, other than cleaning the grates.

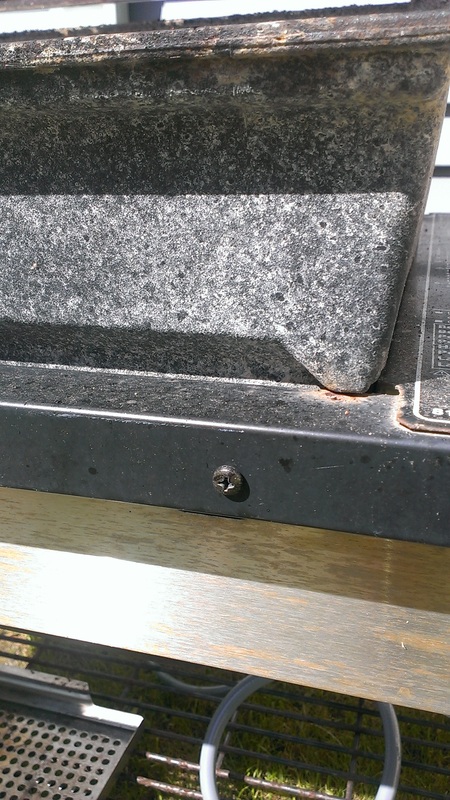
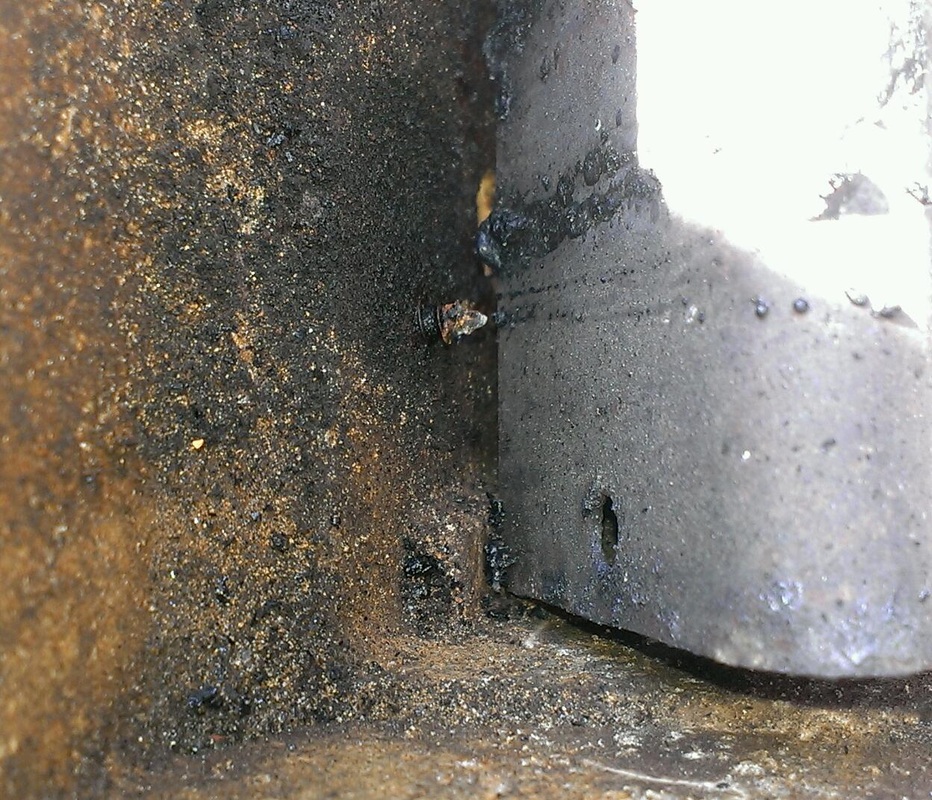
First see if you can source a good used Weber off craigslist. Preferably one that has already been converted to natural gas. You may need to replace a few parts, but Weber's are know for being able to be rebuilt with relative ease. The frame on the one i found for $22 was a bit rusty, and the hinge was very stiff. Two pilot holes in the front frame and some sheet metal screws secured the cooking portion securely to the frame once again. A little 3-1 oil on the hinges had those working as good as new again as well.

Disclaimer: If you are not comfortable with plumbing, running gas lines and such hire a gas fitter. Also comply with any codes that in your area and make sure your gas line is grounded properly near the meter.

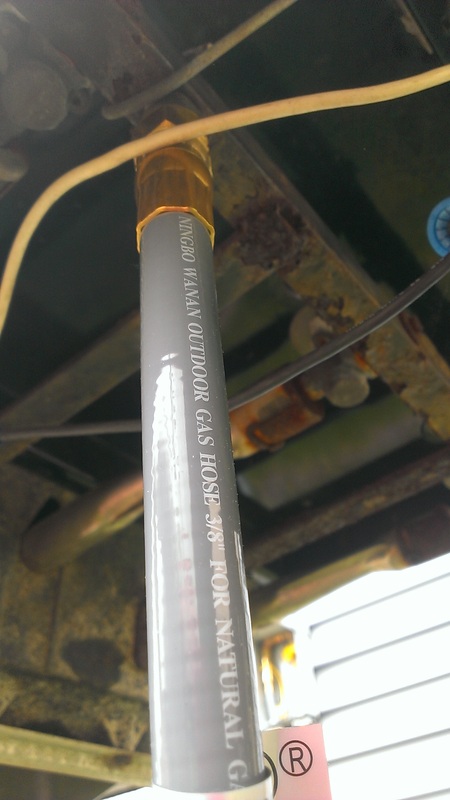
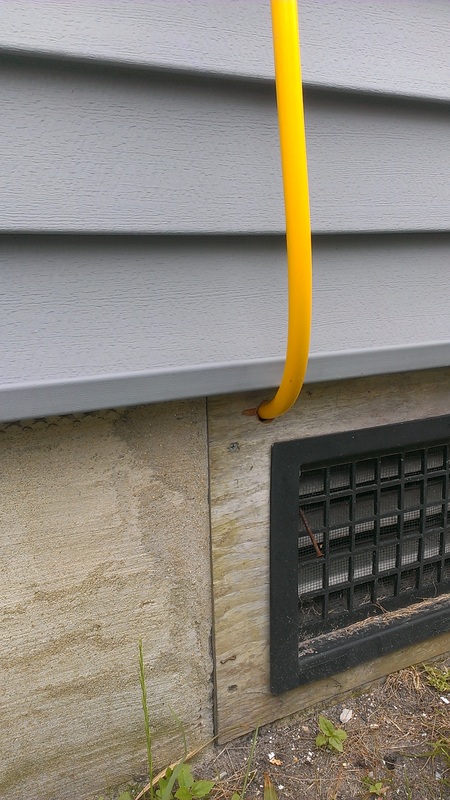
First, Tap a tee off your main and run a 1/2" flexible CSST line to an area outside near where your grill will reside. There is a 33' kit on amazon with fittings on both ends that has a price you can not likely beat. I like to use 3/4" couplings with a hex in-between for better control when tightening. 

I use Rectorseal #5 pipe thread sealant for all of my water and gas connections. It can be pressurized immediately, easier to apply than teflon tape, and seems to have never leaked in all my installations. I also test every connection with gas leak spray a few minutes after installation and wait to see if bubbles appear. Obviously, gas leaks are not something you want to have in or around your home.
Picture
Drill a pilot hole and screw in some sheet metal screws through the frame and into the grill.
Picture
You can see that the sheet metal screws from the inside.
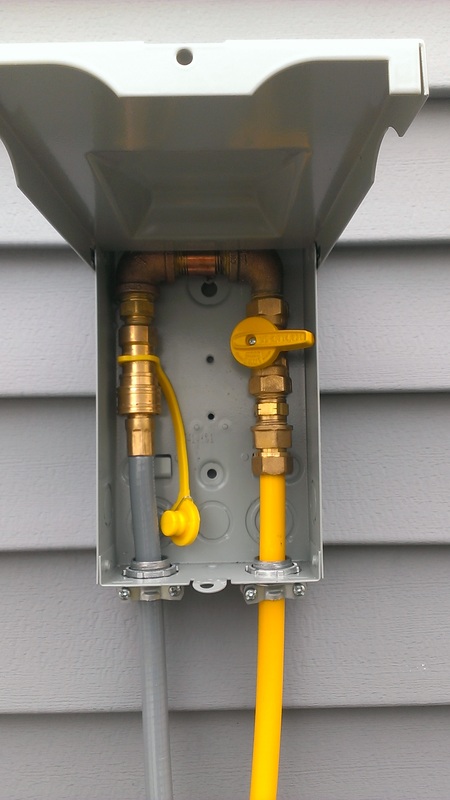
Make sure you have a shut off valve inside and outside for this line for safety and security. Shutting gas off to the grill inside your home could eliminate the chance of kids or deviants from tampering with your line and worst case creating an explosion that blows up your home while you are asleep or away. I chose a low profile1/2"  ball valve for the one inside the box as the lever handle would not fit. Also note, that I went with all brass inside of the box, there is a lot of moisture in the air here, so this reduces corrosion and will make it look nice for years to come.

I used flexible CSST line and fastened it to underneath my joists with 1/2" plastic clips.
Mounted a 60 AMP disconnect box outside and removed the stock components. I chose this enclosure due to its outdoor use rated capability and it's ability to lock. Then I could install all of the connections required to get the flexible CSST line to the grill inlet hose. Mount the box 3-4' off the ground to make connections easy and protect against possible flood intrusion.

I got a new inlet hose for the grill to ensure that there would be a good connection, no leaks, the kit i got also comes with both ends of the quick disconnect line.

Keeping all the connections inside the box also makes things tidy. Of course, it is easy to remove the quick disconnect hose from the enclosure if you wish to move the grill more than 10' away.
Picture
Eaton 60A sized electrical box used for housing shutoff and quick disconnect. Keeps things discreet and looking tidy.
Picture
new flexible quick disconnect line for the Weber.
Picture
CSST routed under the house and fastened by 1/2" plastic clamps to the joists below
Always make sure that you grill at least 5-6' away from the house, as many house fires are started due to excessive heat coming out the back of the grill catching the siding on fire.

I was able to source most items online for a bit cheaper, but did go to the plumbing supply house for a few fittings.

Good luck and happy grilling.
1 Comment

Save your veggie sprouts and seeds - Disappoint Rodents

4/19/2014

0 Comments

 
Picture
So a friend came up with this revolutionary idea: Take material that was being thrown away at the plant where she works in Bethlehem PA and re-purpose it into a gardening item. Behold, Sprout Defender was born. These clever contraptions allow airflow, water, and sunlight through - but not critters who are hungry for your sprouts and seeds. They are made out of a material that will hold up for years and even come with the bamboo stakes to put them into the ground. Available in 3 or 9 packs, you will get a charge out of seeing your sprouts flourish, while the squirrels and bunnies sulk. Here is a pic of my veggies garden this year. Last year I used them only for zucchini and snow peas and they worked great. They are available on amazon.
0 Comments
<<Previous

    Categories

    All
    Coffee
    Craigslist Etiquette
    Cree Led
    Decreasing Power Bill
    Fixing Hardwoods
    Gardening
    Green Commuting
    Heavy Bag Installation
    Home Heating Hot Spots
    Less Pollution
    Moving
    Nightlight Theory
    Organizing
    Polluting Less
    Rain Water Collection
    Saving Money
    Saving Time
    Self Defense
    Self Hair Cutting
    Smart Power Strip
    Smart Take Out Boxes
    Solar Power
    Solar Powered Attic Fan
    Staying Warm
    Texting And Driving
    Thermostat Installation
    Yard Care

    Author

    Lehigh Valley Veteran - The Green Bargain Hunter

    Picture

    Blogroll

    Be the Bee Social Media Coaching
    Lehigh Valley with Love
    Digital Signage Insights
    Juicing Art
    365 Days Of FFFFound Poetry
    PriusLiftSupports
    Urban Shelf
    Sprout Defender

    Archives

    February 2018
    November 2017
    March 2017
    February 2017
    November 2016
    April 2016
    August 2015
    June 2014
    April 2014
    April 2013
    March 2013
    March 2012
    January 2012
    December 2011
    November 2011
    April 2011
    March 2011
    February 2011
    January 2011
    March 2010
    February 2010
    December 2009
    November 2009
    October 2009
    September 2009
    July 2009
    June 2009
    May 2009
    April 2009
    February 2009
    January 2009

    RSS Feed

    View my profile on LinkedIn
    Picture
    Picture
    Picture
Powered by Create your own unique website with customizable templates.