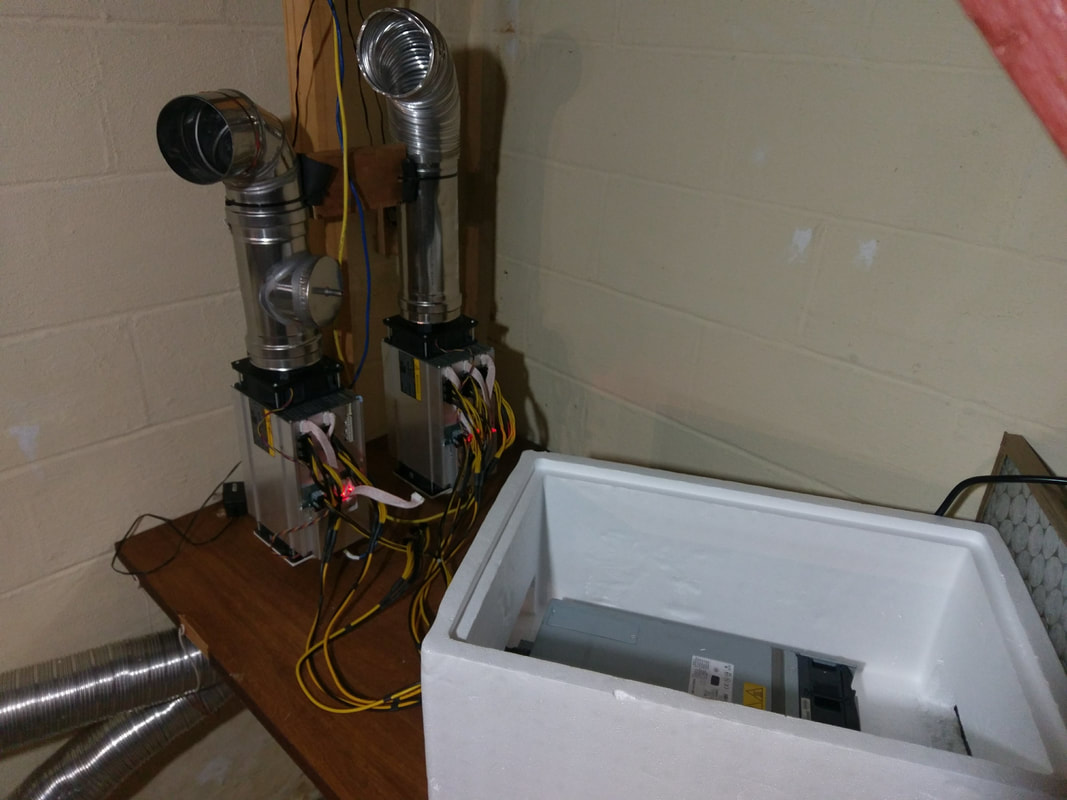
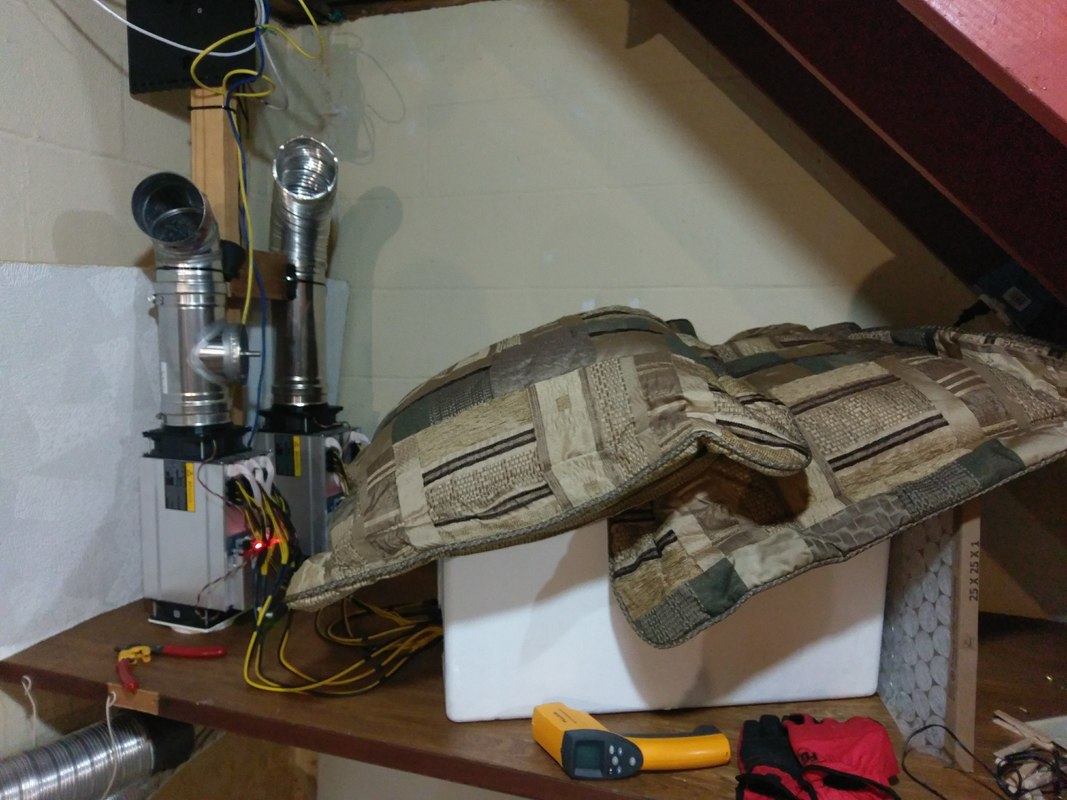
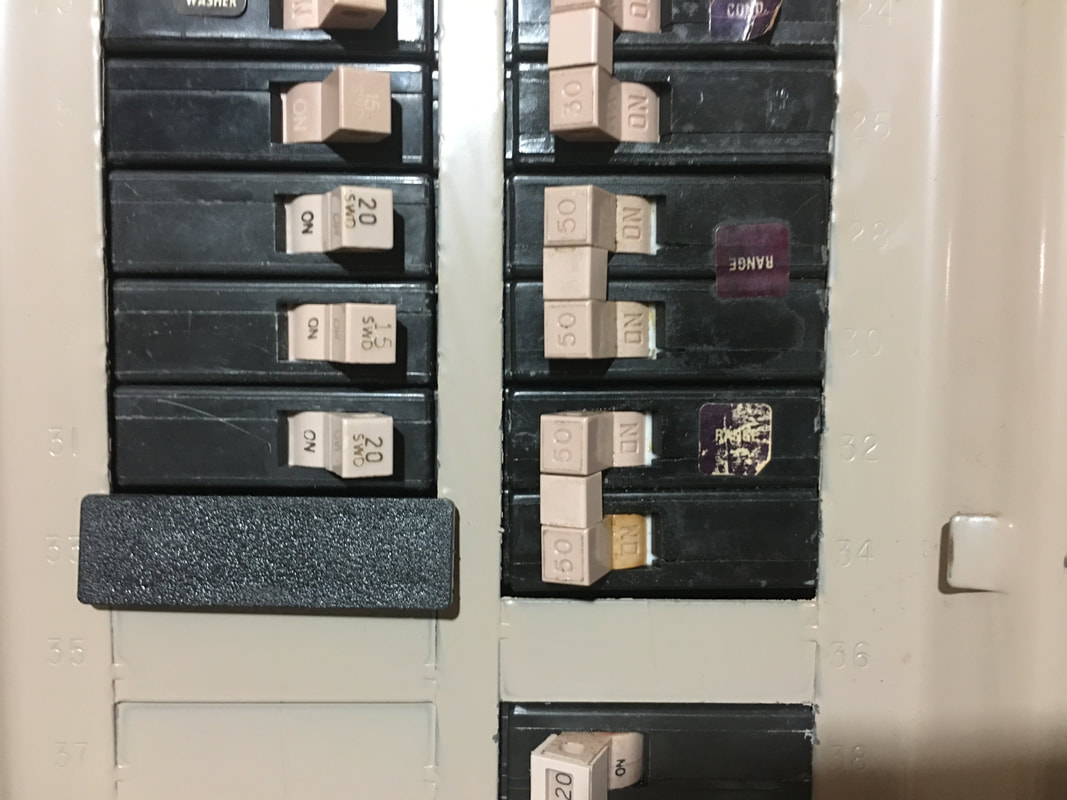
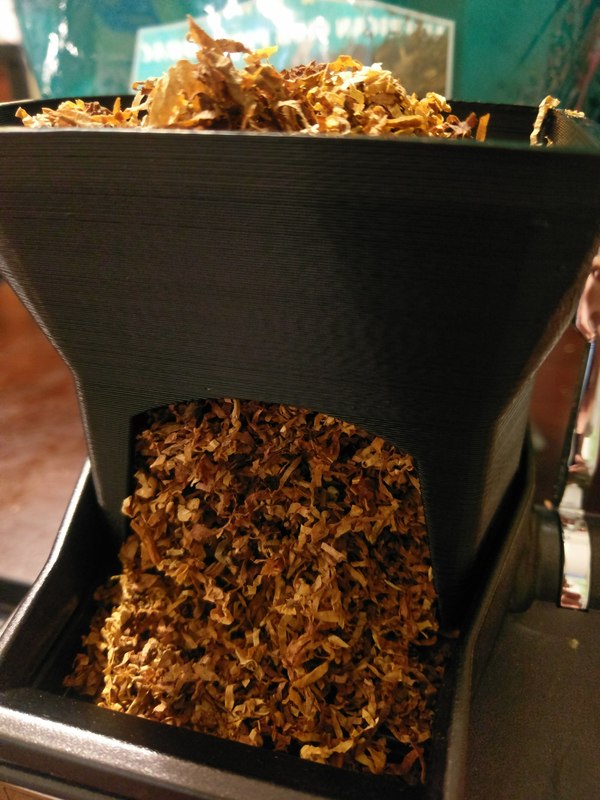
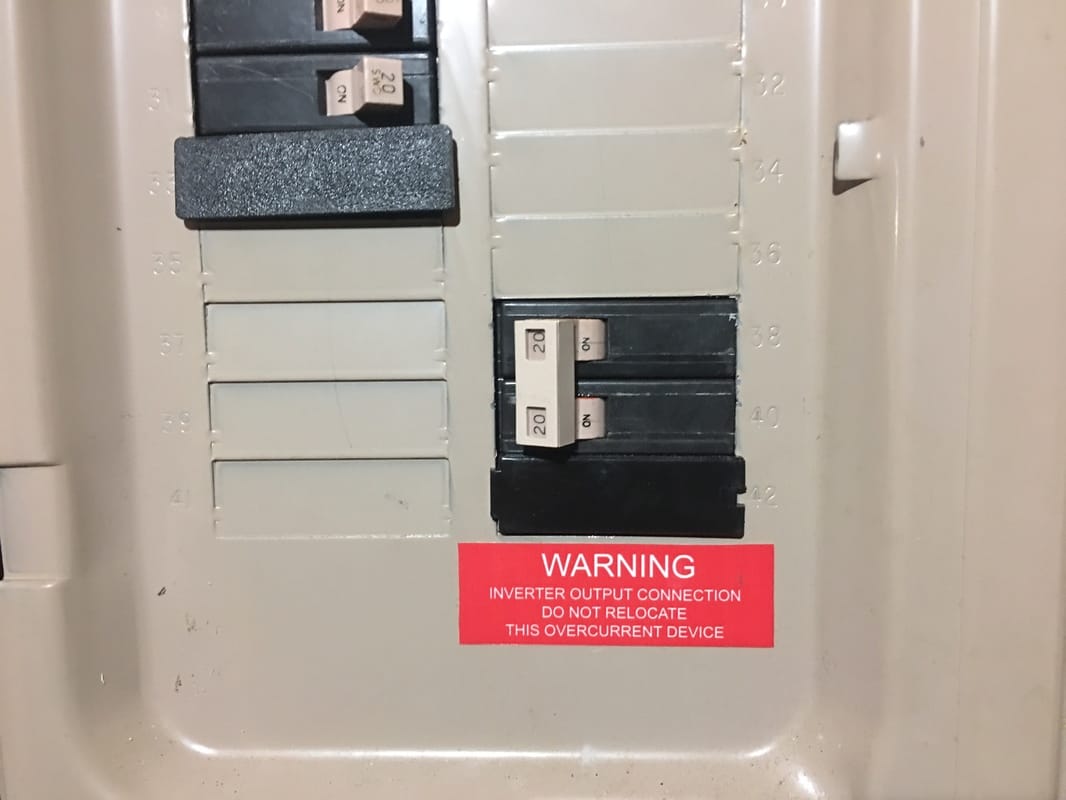
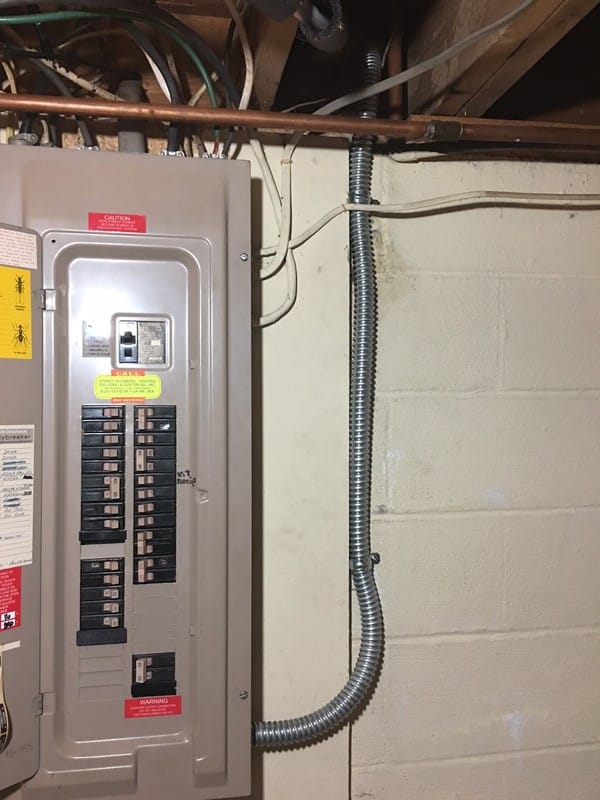
Installed some crypto miners in the basement to a) mine crypto and make money b) heat the house in winter - though the profitability of crypto mining is nullified unless you have a very low electricity rate. If your rate isn't below about 8-9 cents per kWh, then you are going to lose money in today's market. Choose a profitable miner(s) to start with though they seem to become obsolete quickly, so buyer beware. Wire up a 240v circuit for your miner - use with double pole 20 or 30 amp circuit with some 20 amp receptacles - mark them as 240V and do not plug in any 120v devices or you will destroy them.
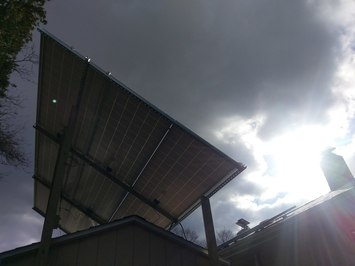
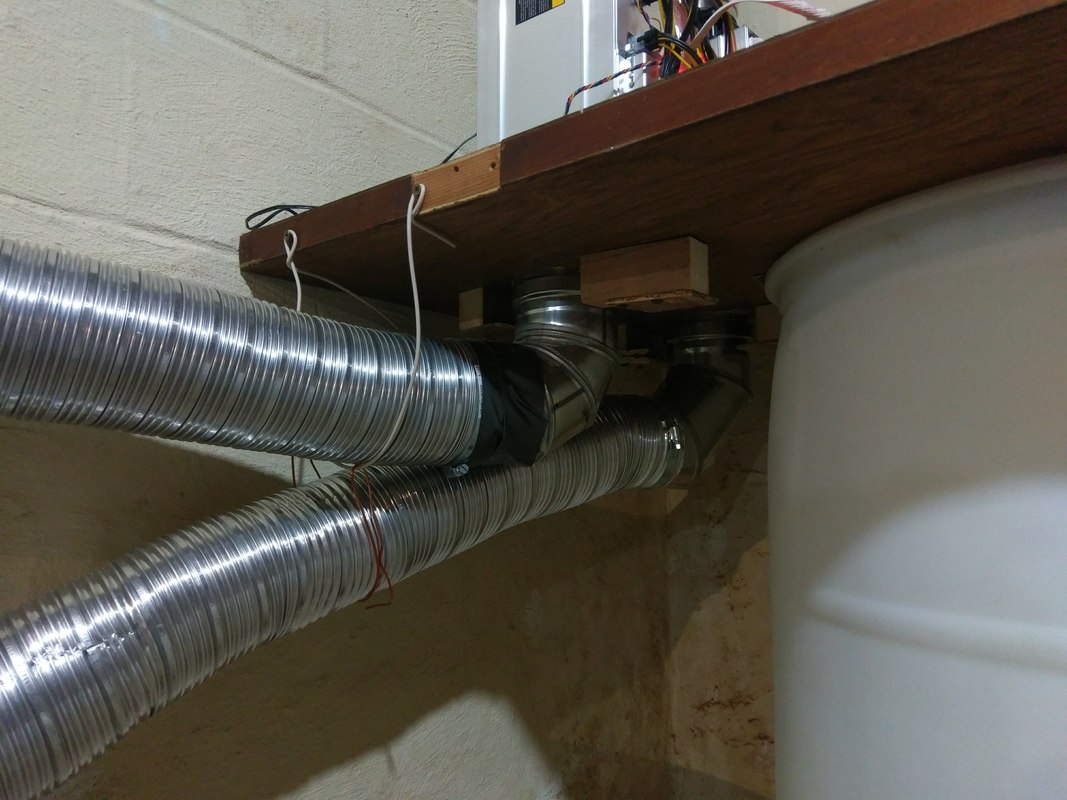
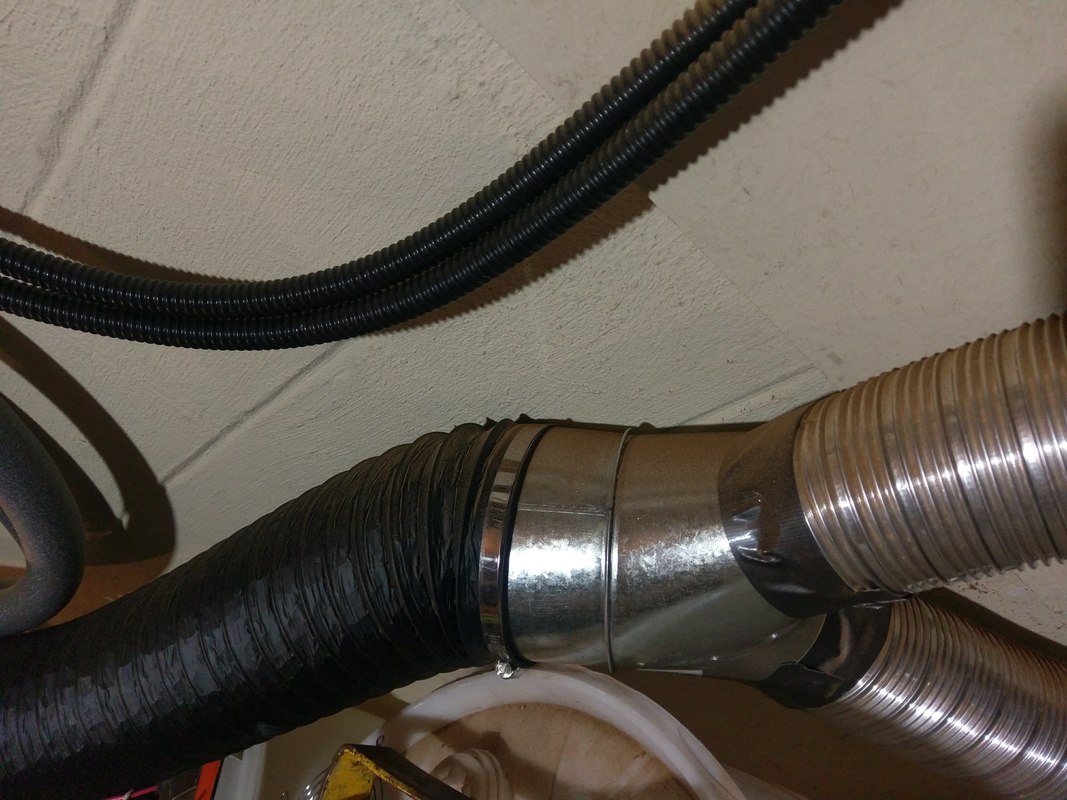
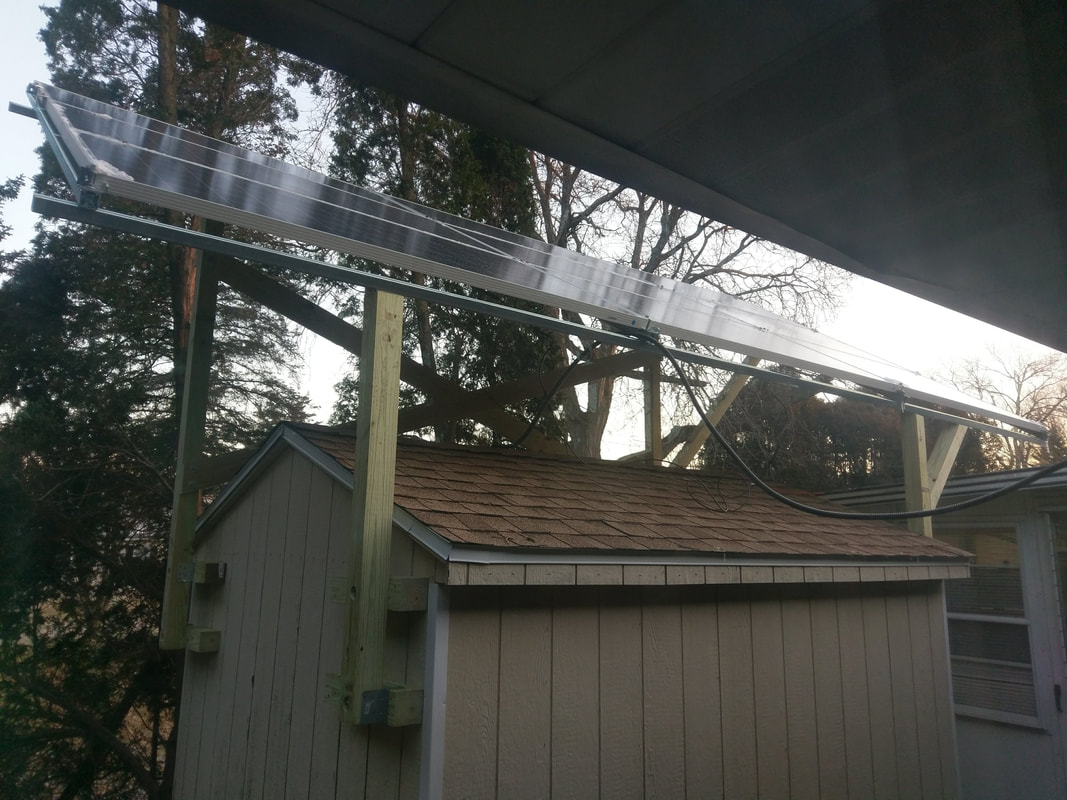
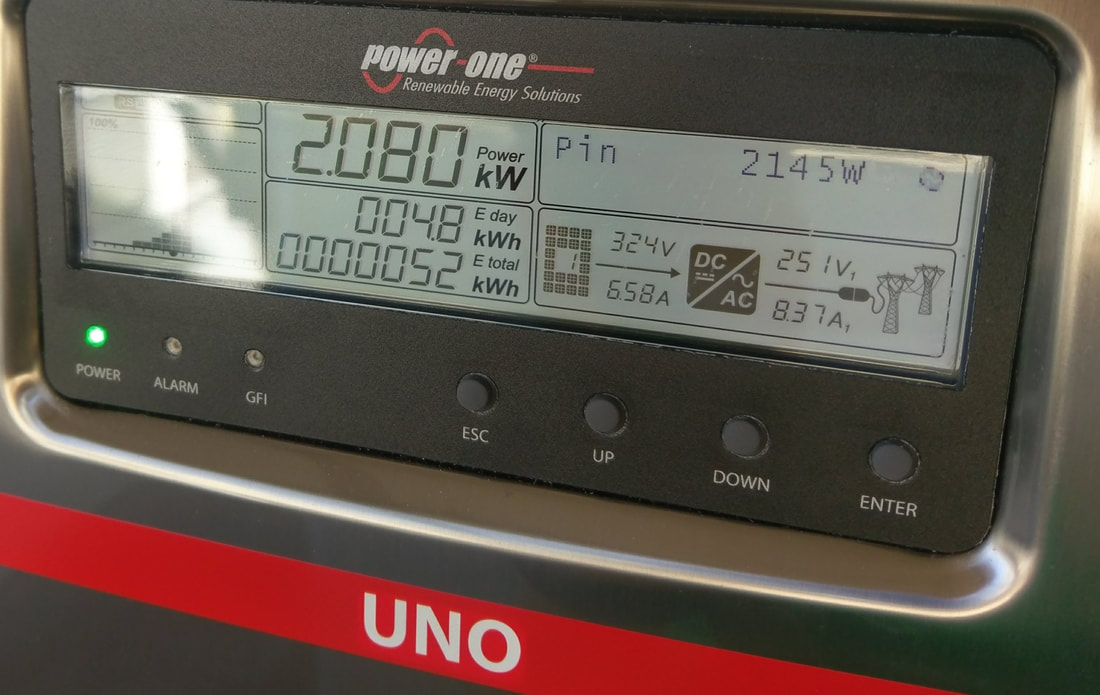
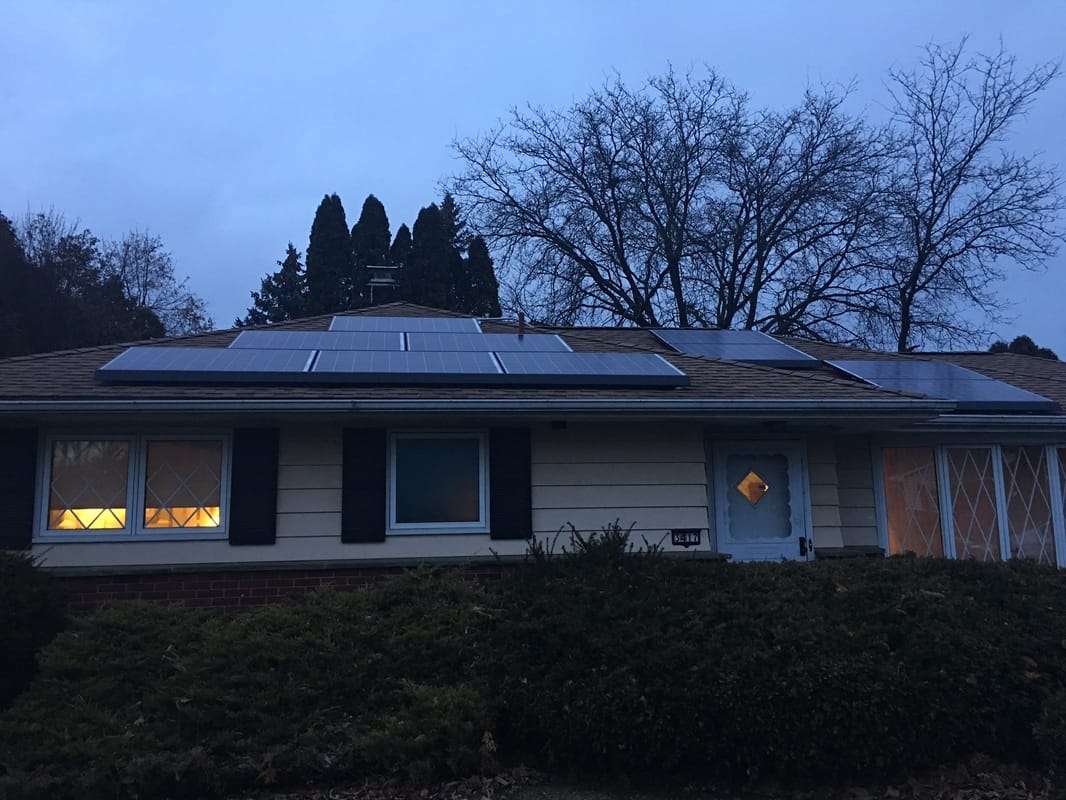
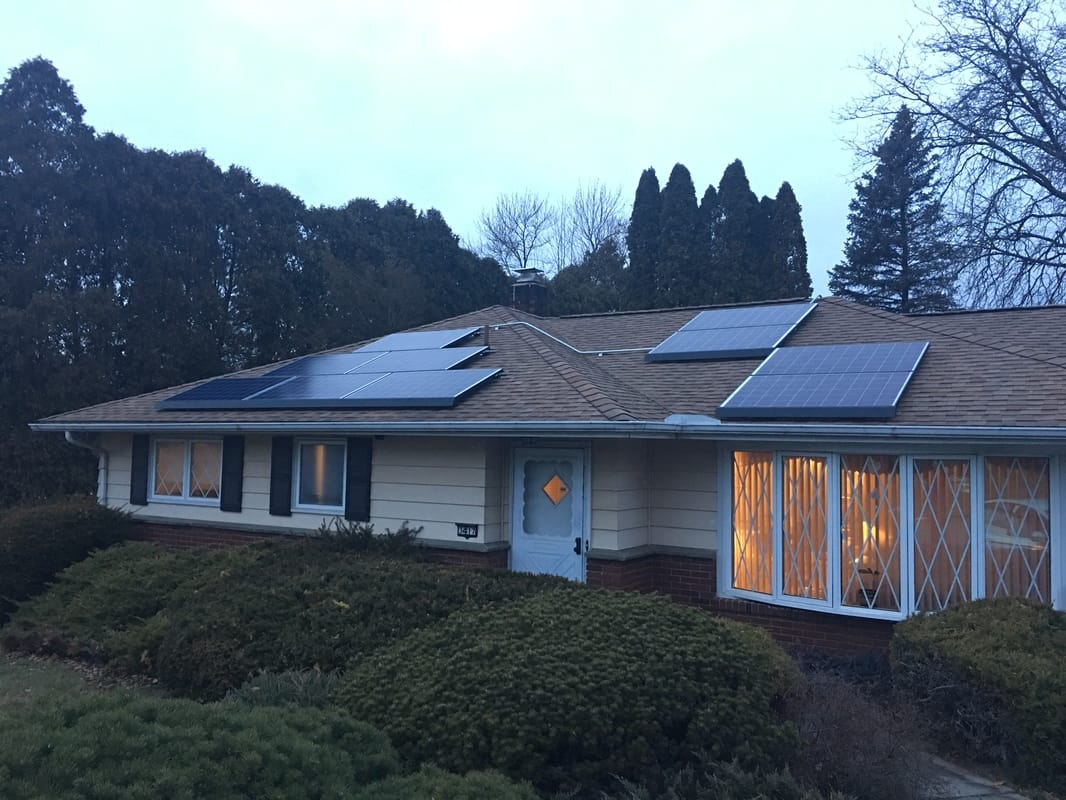
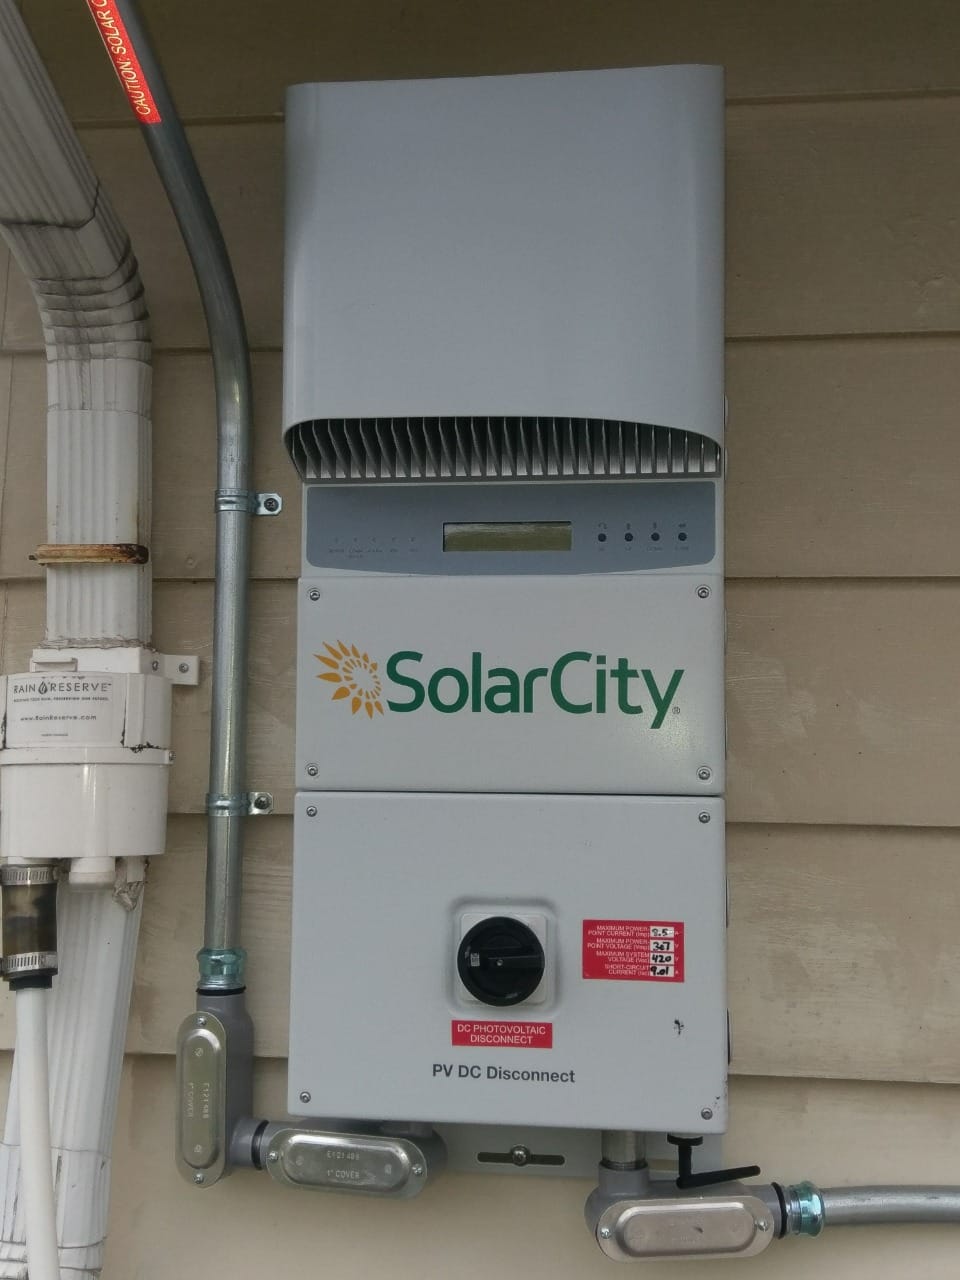
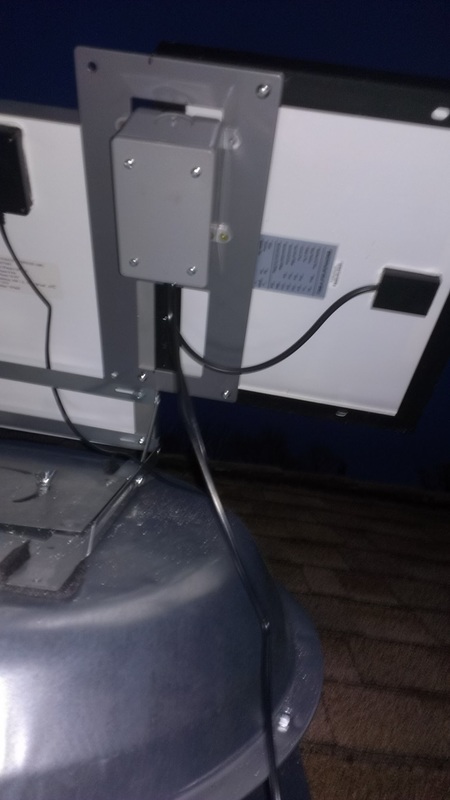
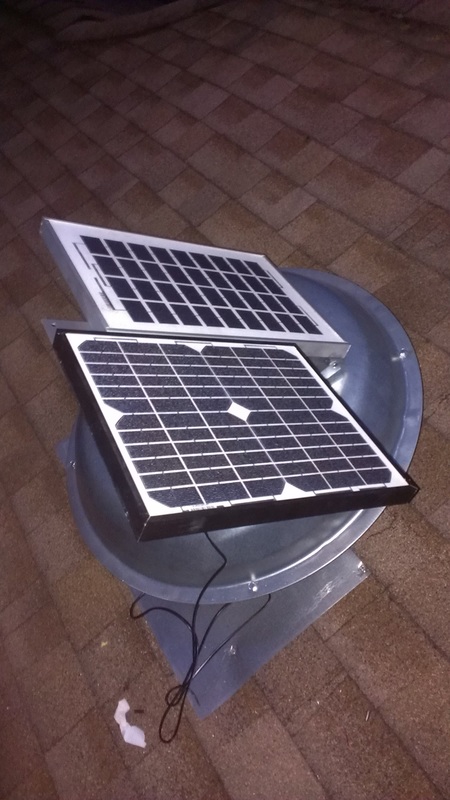
I decided to install a back yard 2.7kw solar panel array hooked up to a grid-tie inverter (I found a great deal on nine 305watt Solartec Panels down in Philly and a UNO 2.5 Inverter on eBay - see what you can find locally or online for a good value). Since they use a 2880 w dual miner server power supply - mine came with a standard 3 prong plug - but you must use a 240 wired double pole breaker / receptacle - make sure you connect the ground! I have the listing below for the miner power supply - but there are versions on ebay that have the 20 receptacle pin out wiring harness pre-attached from Asia, which is what I bought. They are much more efficient than buying two independent power supplies. With a 30 amp breaker and 10 gauge wire you could wire up a few power supplies on one circuit. If you are using 12 gauge wire, you can safely only have 1 receptacle if using a dual miner power supply. If you want to keep the miners in your house or basement - find some coolers for noise insulation, as they are loud. The server power supply is so much quieter when put into a Omaha Steak Styrofoam cooler. Use a inexpensive fiber high flow air filter too, that way it will remain dust free. Also use outside air if possible to cool the miners - I used 6" duct and some fittings along with some 3D printed fan shroud/adapters. Mount the miners vertically if you can as well, the chip temp should remain less due to the chimney effect (keep them below 80deg C). Mine are outputting between 75-85 degree air with 25 degree F intake air. If you live in a warm climate - you may want to rethink mining these days. No money it for cooling these puppies anymore.
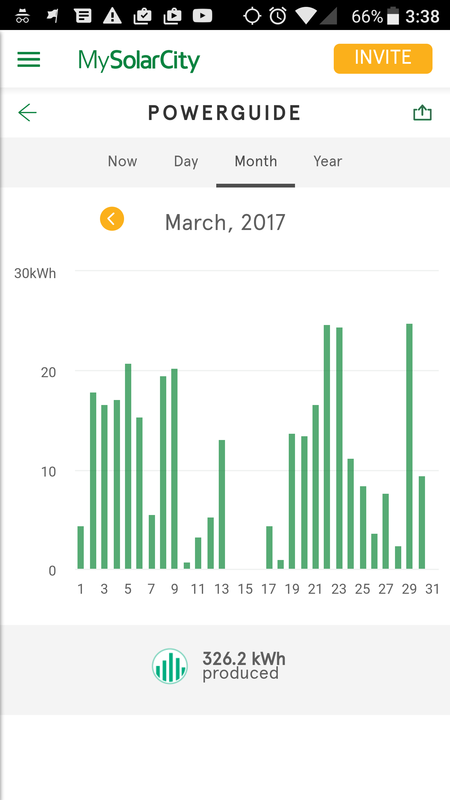
(We get around 10 hrs of daylight in the winter here in PA). This brings the cost per kWh adjusted down to around .06 cents for the miners - I designed a pressure treated / channels strut rack and mounted everything with galvanized hardware and stainless washers. Yesterday we generated about 12kwh with the array, but I expect the summer will bring this up to around 15-20kwh due to longer days and higher sun angle. Obviously I know a thing or two about AutoCAD, electricity and using some power tools,.... but you too can do this if you have a shed of your own that is not too far from your house.
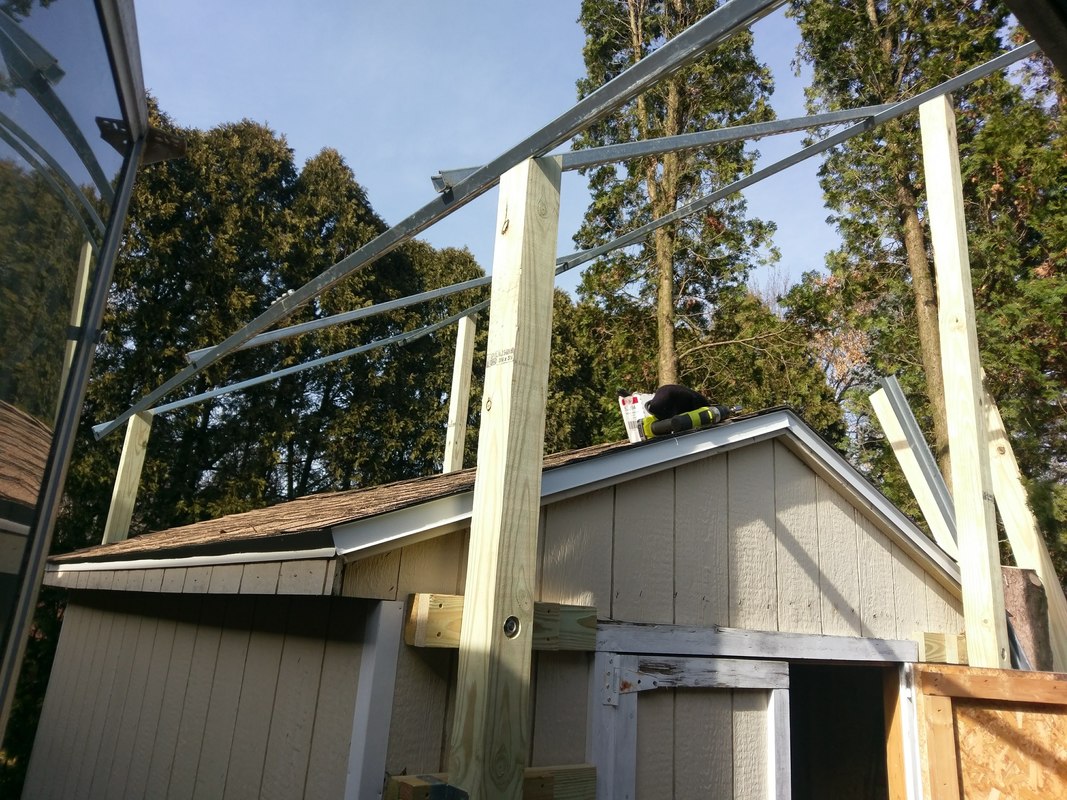
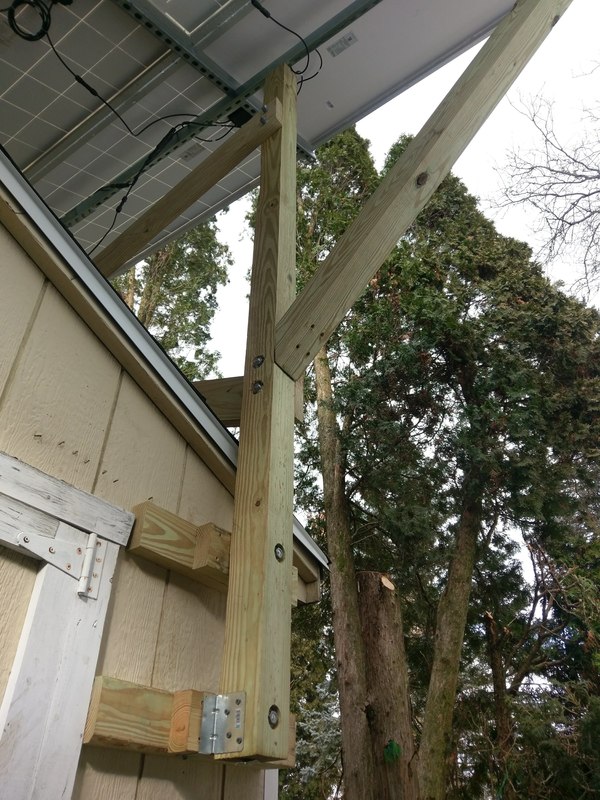
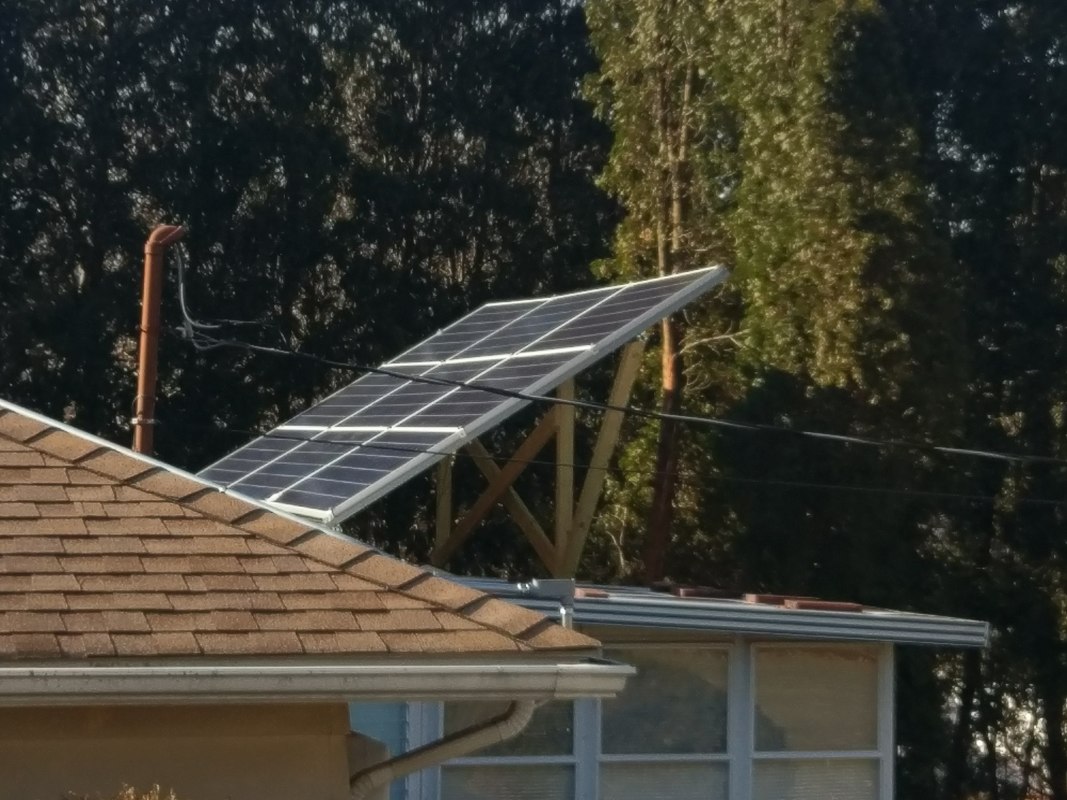
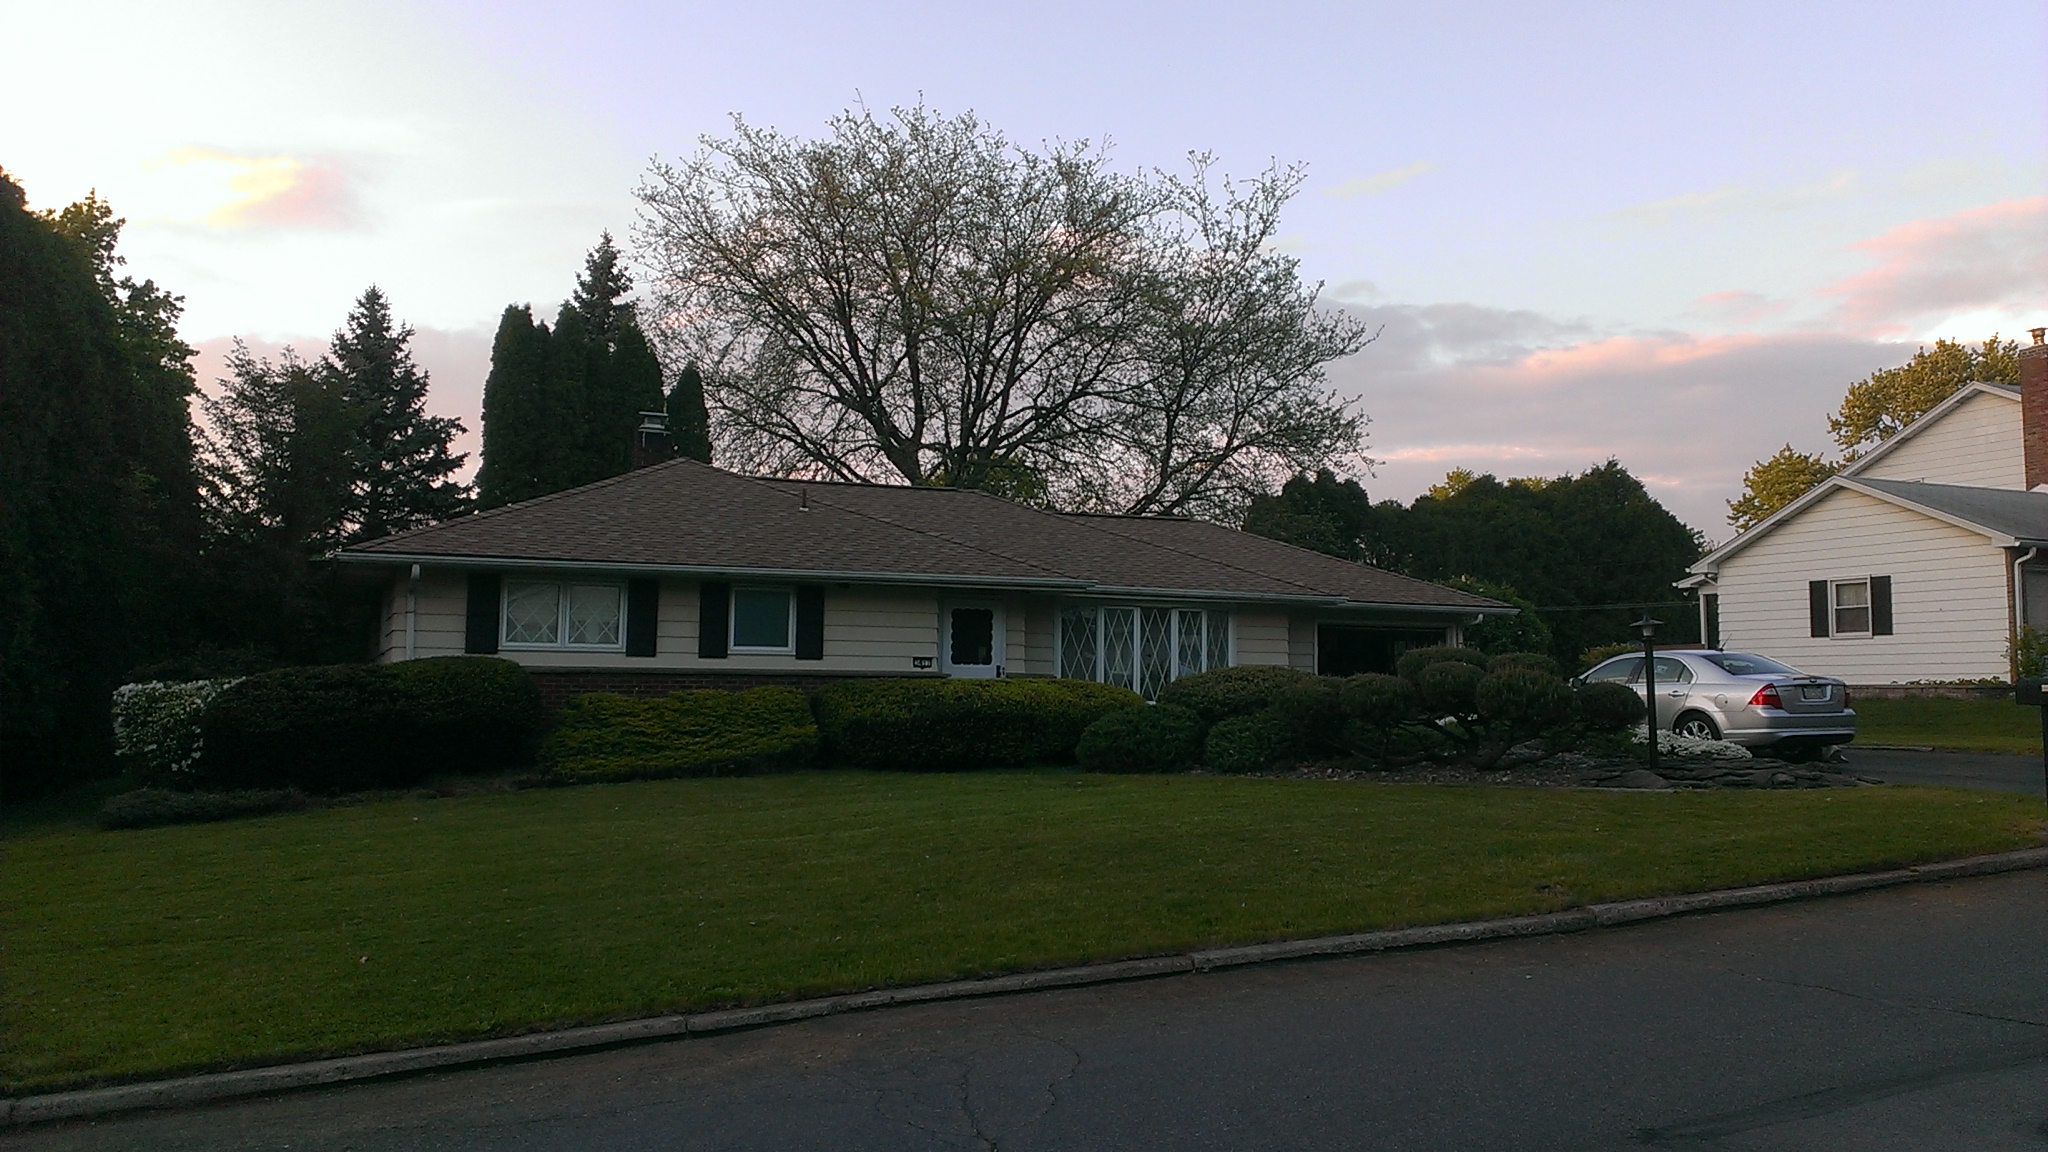
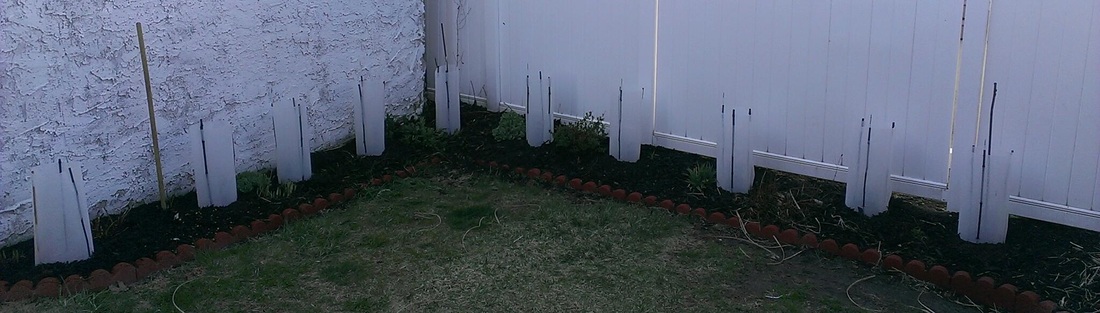
Installed pressure treated cross bars and reinforced the inside of the shed with additional lumber for strength. Tied everything together with 3" torx deck screws, then drilled through with a 5/8" bit and through bolted the whole thing with a 1/2" threaded rod. Using cad, I was able to calculate the lengths required for a 30 degree array angle (an angle that works well with our latitude of 40degrees). By angling the top of the (4) support posts and through bolting the tops with more 1/2" threaded rod (make sure to use washers and galv split lock washers) I now had a secure place to mount the 20' long pieces of strut(joined in the middle with two four hole plates each).
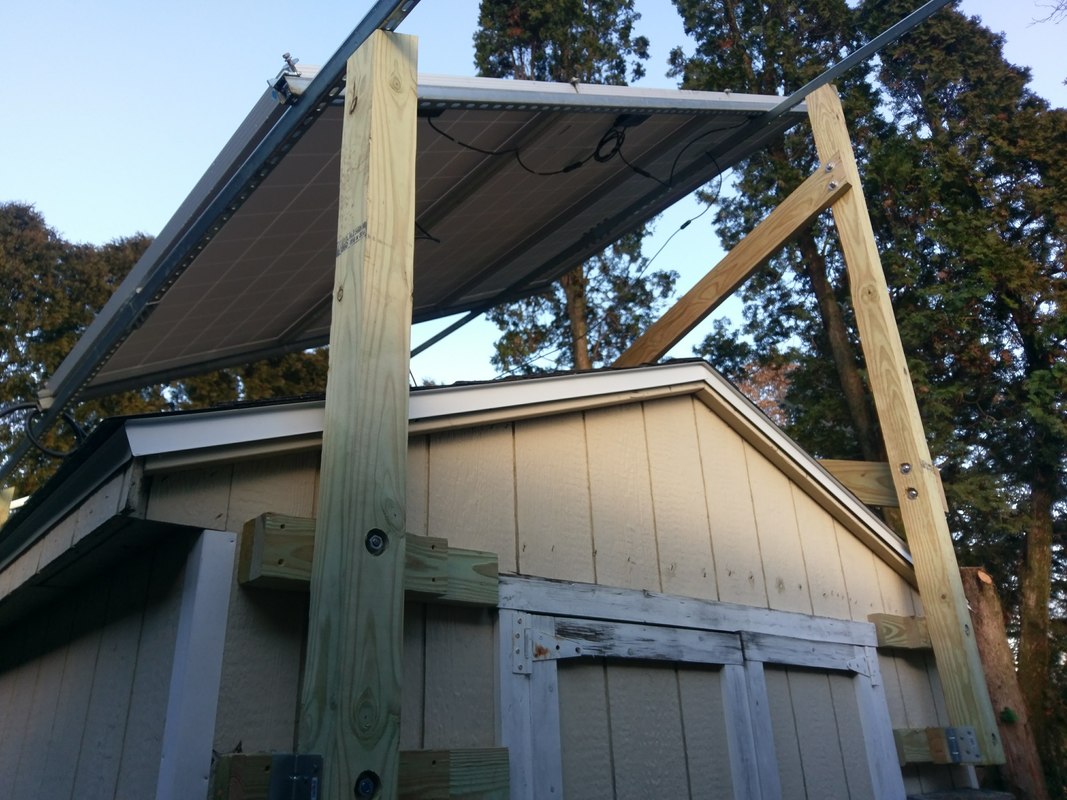
Once the main structure was built, the overhang on the East side was deemed too long - so I added some 45 degree 4x4 support angles, the top angle of 30 degrees required that the tops be compound mitered(which I did sort of by hand on a standard chop saw) but would have been much easier on a compound miter saw. Having a friend for this step is helpful, as the long pieces were heavy. Make sure to get high quality outdoor grade 3" long screws for fastening things together. Many holes have to be counter-bored with a 1/2" bit - so having a drill guide is helpful (or use masking tape to mark the desired drill bit depth. The project requires use of a corded 1/2" drill, a cordless drill is good for many of the tasks, but not the heavy duty 5/8" boring work(get the long wood shipbuilding bits at Harbor freight). I also installed an X brace with (2) 2x6x12' pressure treated - as lateral sway is no good when you have 10' 4x4's sticking up in the air that have ~700-800lbs on them.
Make sure your array does not get too much shade from trees, or if it does - sort out the tree with a saw. If you get shade from structures - find a better location or elevate as possible / codes allow. Don’t make it too high though or you won't be able to work on the array or build it easily when needed. I plan to stain the pressure treated wood too in the next few weeks so it will stand the test of time.
Make sure to use a string sizing tool for your inverter so you stay within design parameters.
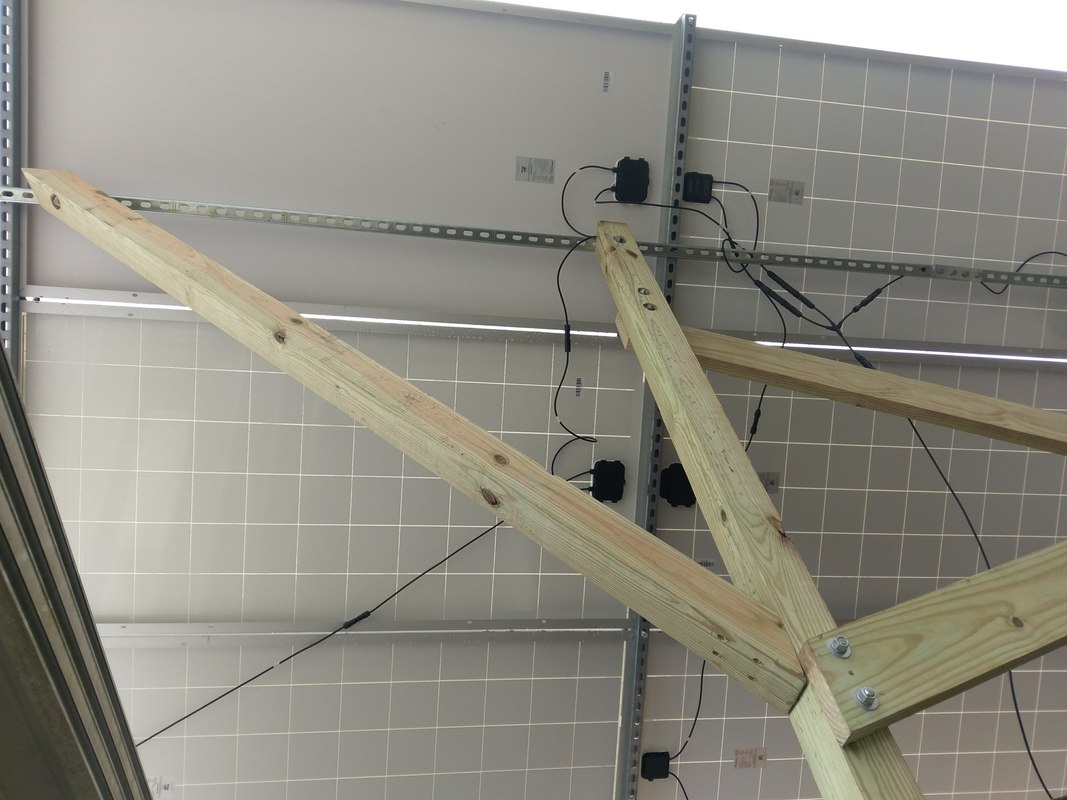
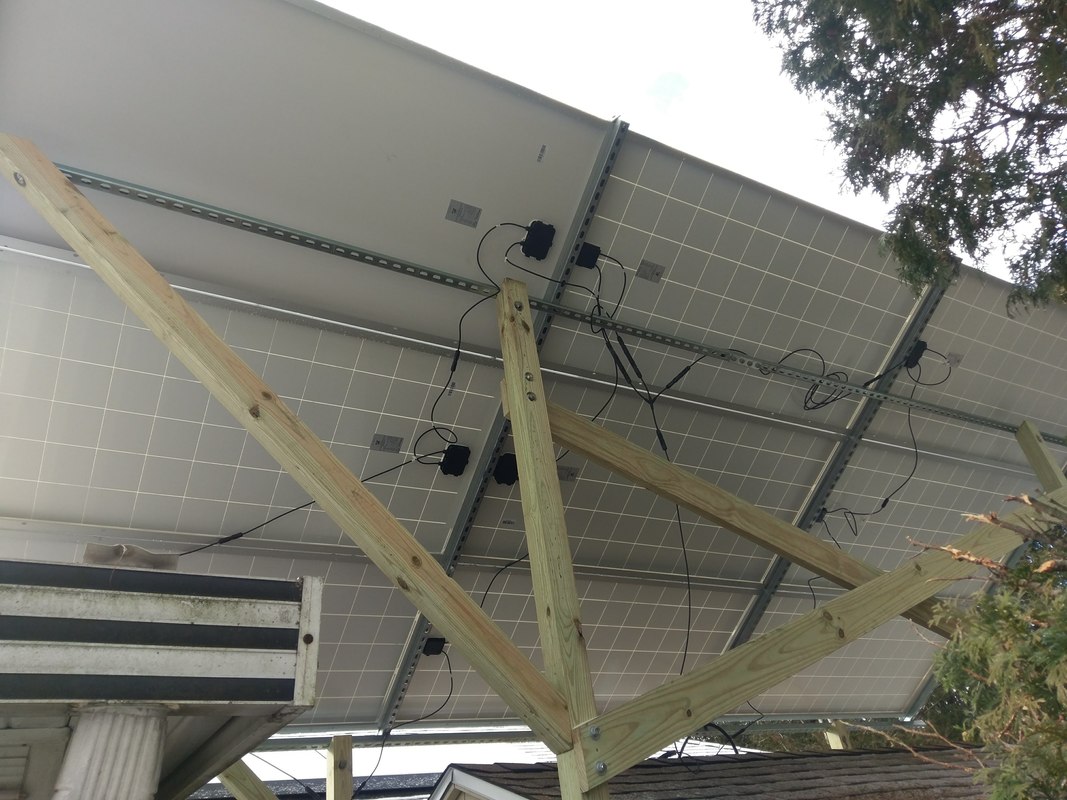
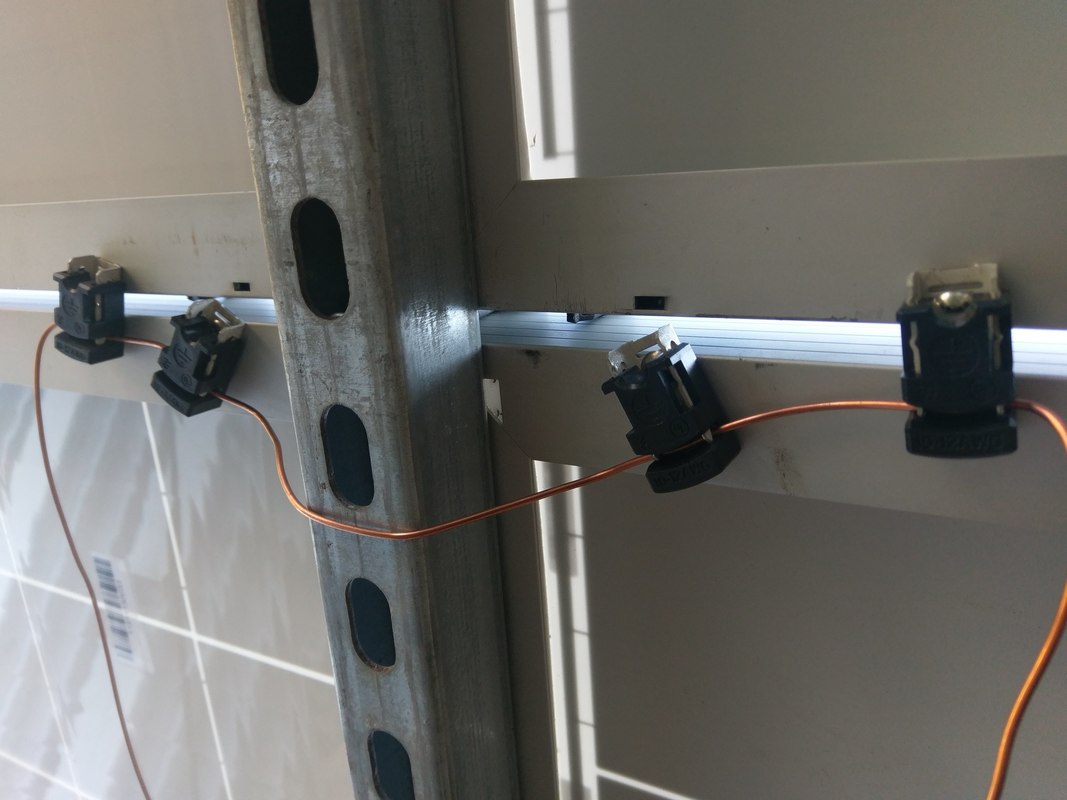
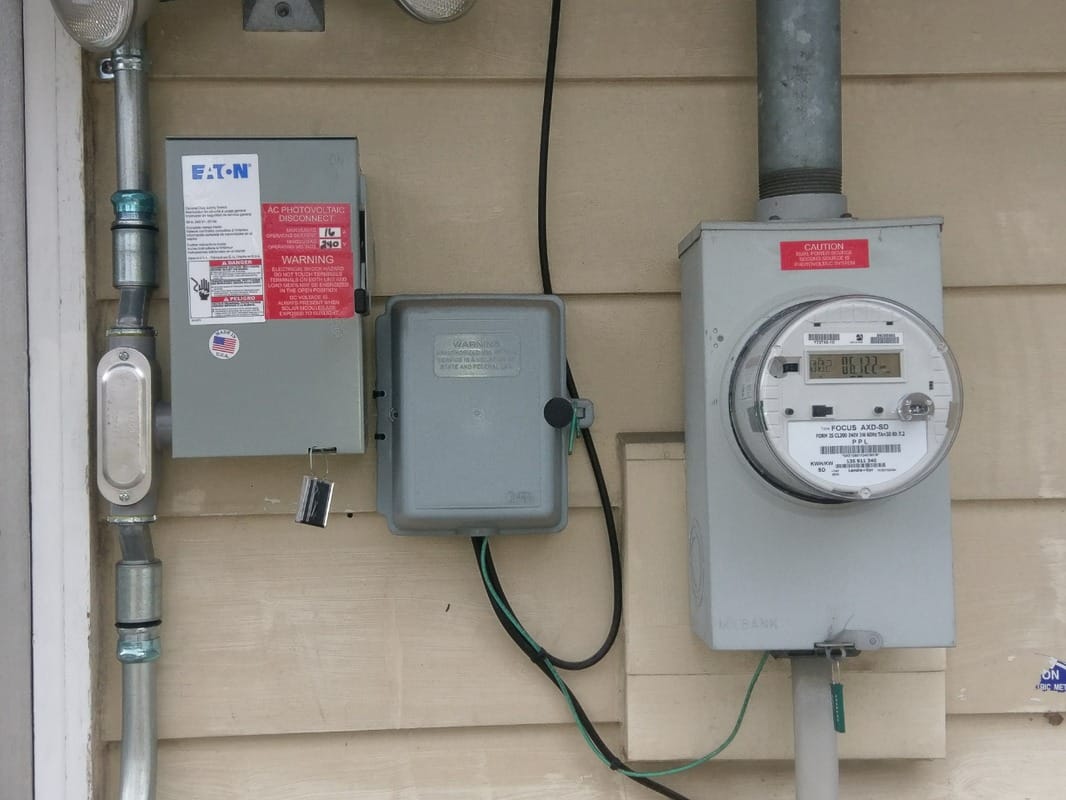
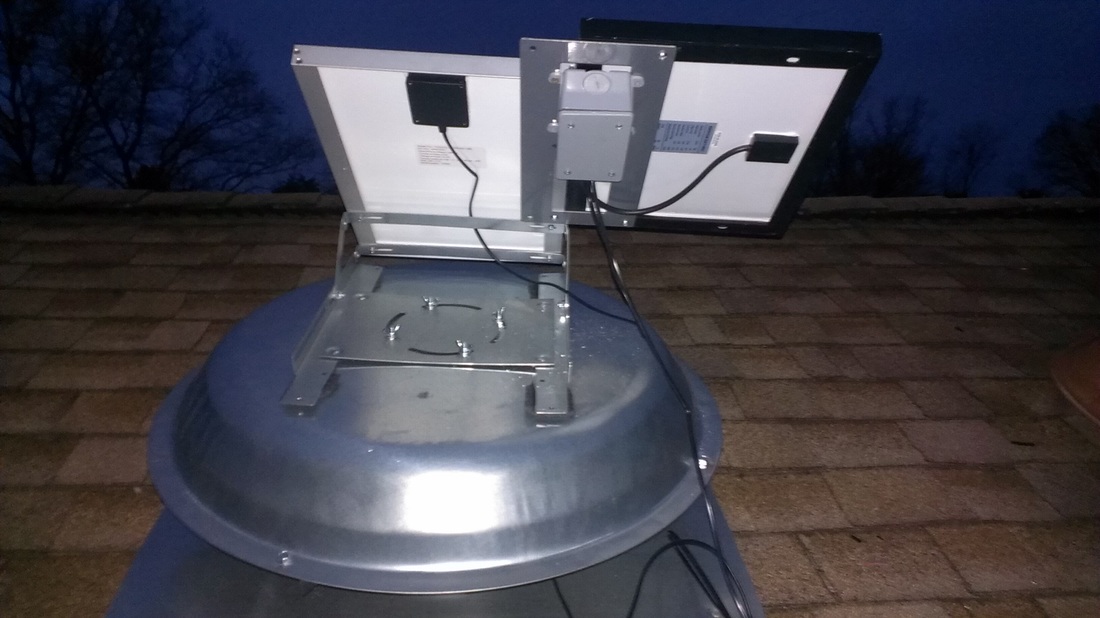
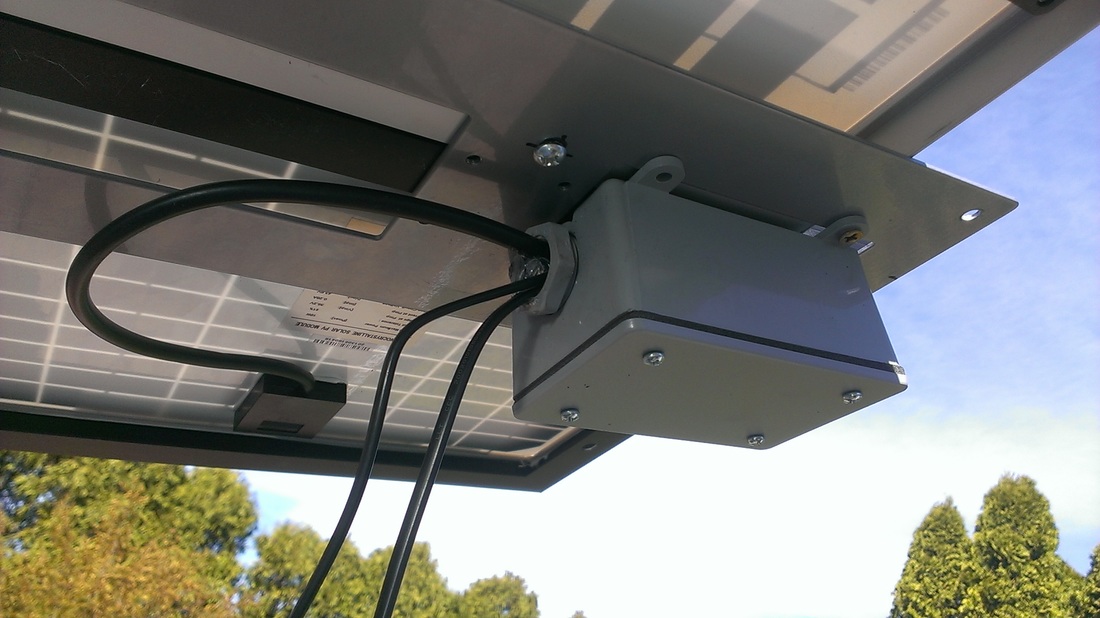
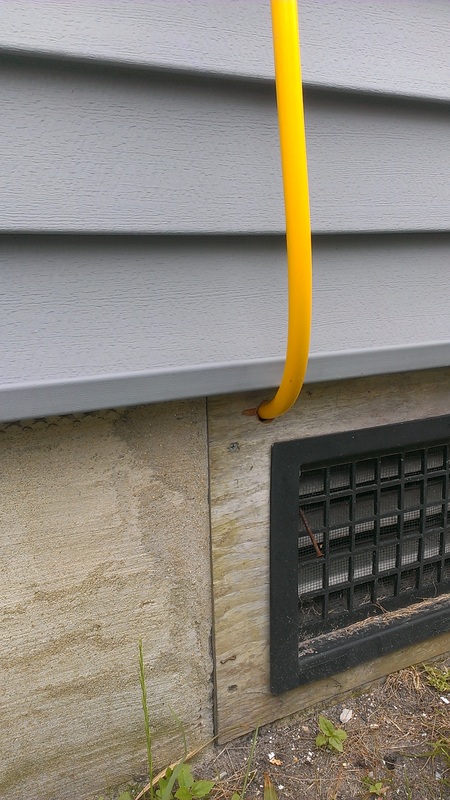
I used 10/3 wire as the system is only 2.7kw - be careful on wire size - don’t go too small. 10/3 can handle 25 amps so long as distance to service panel is not too long. You must have a 30 amp rated AC disconnect as well. You will need a pair of Mc4 extension cables to get to your array from the inverter - I used the Hubbell black 1/2" flex to keep the cables save and weather tight as they entered the inverter fittings. You will also likely need some extension cables to tie everything together. I like getting the prewired ones online but you can also buy the connectors and cable loose if you wish. Also may need a metric npt adapter fitting depending on your inverter for some of the fittings- check the thread type at the bottom. Finally, you will also need some ground wire mounts for each panel, I chose the Tyco units as they are easy on and easy off - and easy to move. Saving labor time is critical and they work with 12 or 10 ga solid bare copper wire - though you only have to strip the wire where you make the connections if desired.. though I chose bare 12 ga wire for simplicity.
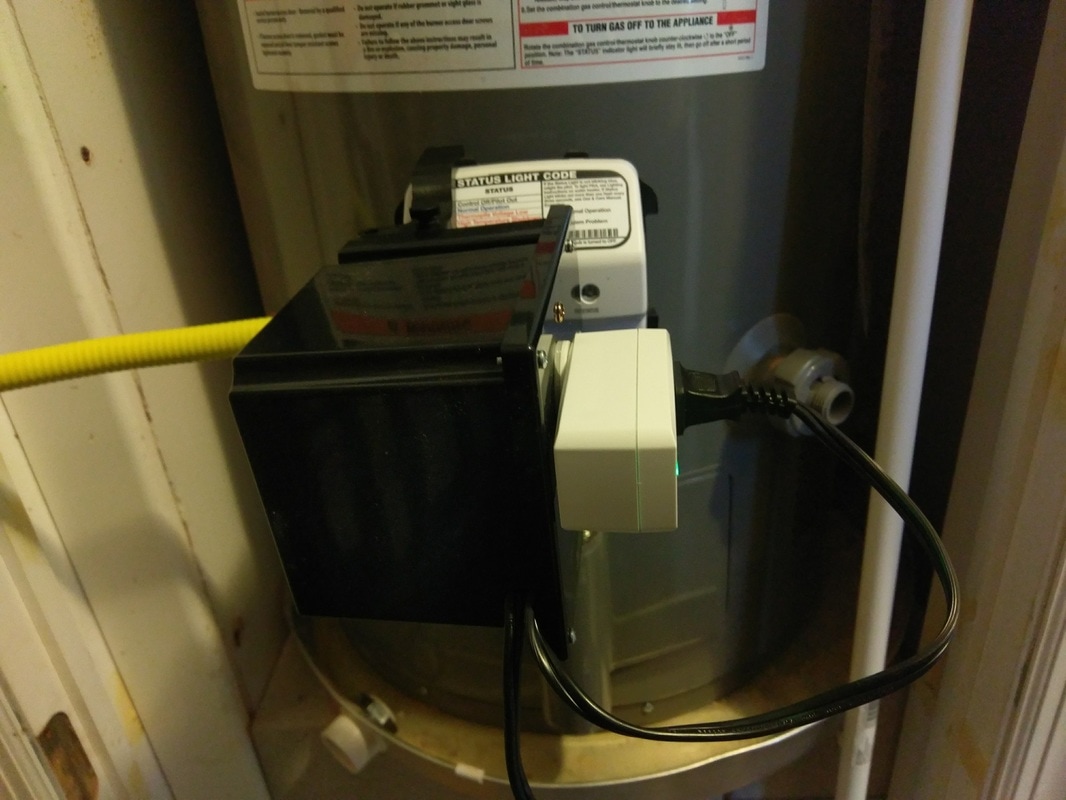
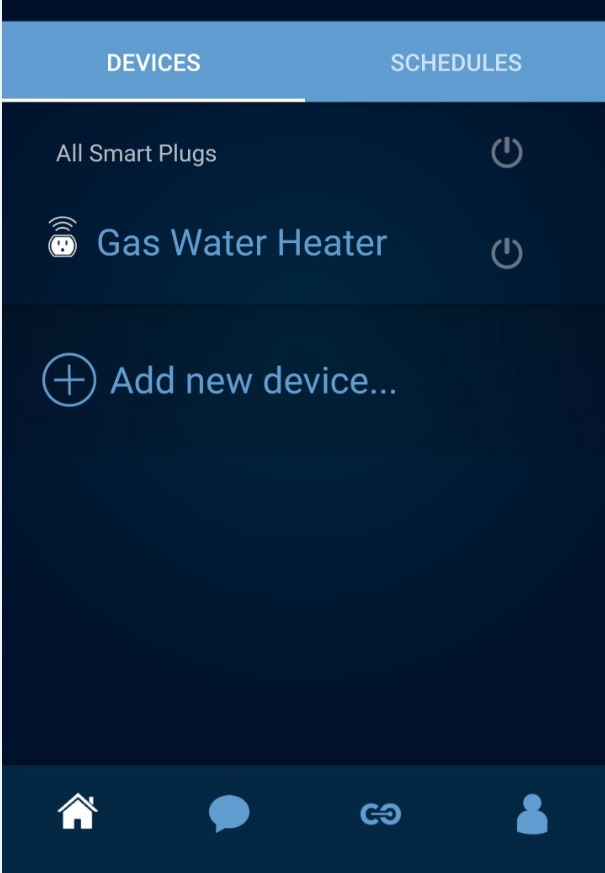
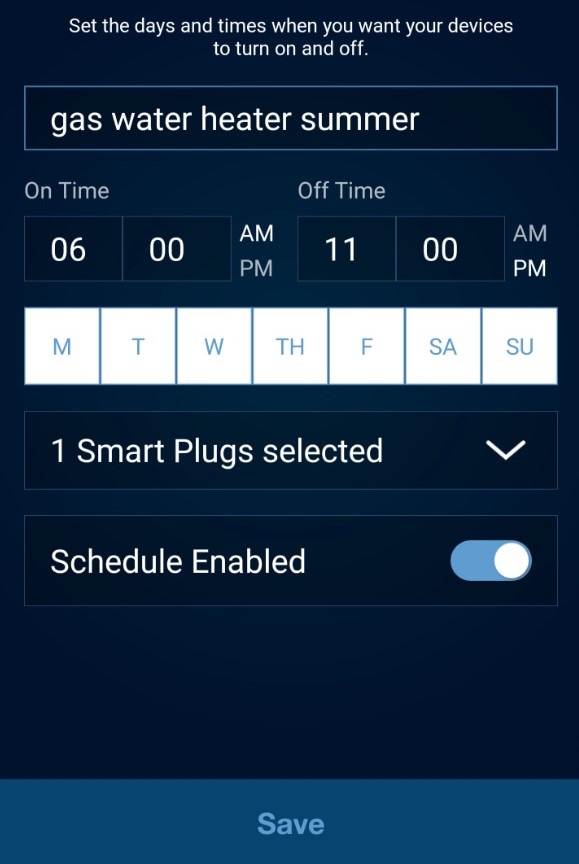
All of my materials were bought at: Craiglist, eBay, Amazon, Graybar Electric, Fastenal, Home Depot / Lowes.... happy hunting for parts... I was able to source the whole solar job for around 3k or so... the mining portion for about the same. The solar part will ROI in 2-3 years, the mining part is uncertain. Though the heat they generate decreases our heating bill from the oil man (no natural gas available on our street)
I decided to install a back yard 2.7kw solar panel array hooked up to a grid-tie inverter (I found a great deal on nine 305watt Solartec Panels down in Philly and a UNO 2.5 Inverter on eBay - see what you can find locally or online for a good value). Since they use a 2880 w dual miner server power supply - mine came with a standard 3 prong plug - but you must use a 240 wired double pole breaker / receptacle - make sure you connect the ground! I have the listing below for the miner power supply - but there are versions on ebay that have the 20 receptacle pin out wiring harness pre-attached from Asia, which is what I bought. They are much more efficient than buying two independent power supplies. With a 30 amp breaker and 10 gauge wire you could wire up a few power supplies on one circuit. If you are using 12 gauge wire, you can safely only have 1 receptacle if using a dual miner power supply. If you want to keep the miners in your house or basement - find some coolers for noise insulation, as they are loud. The server power supply is so much quieter when put into a Omaha Steak Styrofoam cooler. Use a inexpensive fiber high flow air filter too, that way it will remain dust free. Also use outside air if possible to cool the miners - I used 6" duct and some fittings along with some 3D printed fan shroud/adapters. Mount the miners vertically if you can as well, the chip temp should remain less due to the chimney effect (keep them below 80deg C). Mine are outputting between 75-85 degree air with 25 degree F intake air. If you live in a warm climate - you may want to rethink mining these days. No money it for cooling these puppies anymore.
(We get around 10 hrs of daylight in the winter here in PA). This brings the cost per kWh adjusted down to around .06 cents for the miners - I designed a pressure treated / channels strut rack and mounted everything with galvanized hardware and stainless washers. Yesterday we generated about 12kwh with the array, but I expect the summer will bring this up to around 15-20kwh due to longer days and higher sun angle. Obviously I know a thing or two about AutoCAD, electricity and using some power tools,.... but you too can do this if you have a shed of your own that is not too far from your house.
Installed pressure treated cross bars and reinforced the inside of the shed with additional lumber for strength. Tied everything together with 3" torx deck screws, then drilled through with a 5/8" bit and through bolted the whole thing with a 1/2" threaded rod. Using cad, I was able to calculate the lengths required for a 30 degree array angle (an angle that works well with our latitude of 40degrees). By angling the top of the (4) support posts and through bolting the tops with more 1/2" threaded rod (make sure to use washers and galv split lock washers) I now had a secure place to mount the 20' long pieces of strut(joined in the middle with two four hole plates each).
Once the main structure was built, the overhang on the East side was deemed too long - so I added some 45 degree 4x4 support angles, the top angle of 30 degrees required that the tops be compound mitered(which I did sort of by hand on a standard chop saw) but would have been much easier on a compound miter saw. Having a friend for this step is helpful, as the long pieces were heavy. Make sure to get high quality outdoor grade 3" long screws for fastening things together. Many holes have to be counter-bored with a 1/2" bit - so having a drill guide is helpful (or use masking tape to mark the desired drill bit depth. The project requires use of a corded 1/2" drill, a cordless drill is good for many of the tasks, but not the heavy duty 5/8" boring work(get the long wood shipbuilding bits at Harbor freight). I also installed an X brace with (2) 2x6x12' pressure treated - as lateral sway is no good when you have 10' 4x4's sticking up in the air that have ~700-800lbs on them.
Make sure your array does not get too much shade from trees, or if it does - sort out the tree with a saw. If you get shade from structures - find a better location or elevate as possible / codes allow. Don’t make it too high though or you won't be able to work on the array or build it easily when needed. I plan to stain the pressure treated wood too in the next few weeks so it will stand the test of time.
Make sure to use a string sizing tool for your inverter so you stay within design parameters.
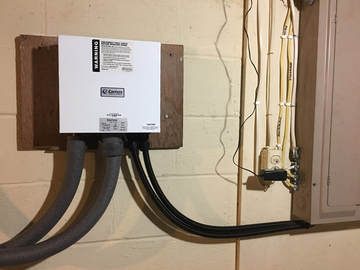
I used 10/3 wire as the system is only 2.7kw - be careful on wire size - don’t go too small. 10/3 can handle 25 amps so long as distance to service panel is not too long. You must have a 30 amp rated AC disconnect as well. You will need a pair of Mc4 extension cables to get to your array from the inverter - I used the Hubbell black 1/2" flex to keep the cables save and weather tight as they entered the inverter fittings. You will also likely need some extension cables to tie everything together. I like getting the prewired ones online but you can also buy the connectors and cable loose if you wish. Also may need a metric npt adapter fitting depending on your inverter for some of the fittings- check the thread type at the bottom. Finally, you will also need some ground wire mounts for each panel, I chose the Tyco units as they are easy on and easy off - and easy to move. Saving labor time is critical and they work with 12 or 10 ga solid bare copper wire - though you only have to strip the wire where you make the connections if desired.. though I chose bare 12 ga wire for simplicity.
All of my materials were bought at: Craiglist, eBay, Amazon, Graybar Electric, Fastenal, Home Depot / Lowes.... happy hunting for parts... I was able to source the whole solar job for around 3k or so... the mining portion for about the same. The solar part will ROI in 2-3 years, the mining part is uncertain. Though the heat they generate decreases our heating bill from the oil man (no natural gas available on our street)


 RSS Feed


