Summer will be upon us in a few short months - is your attic ready?
Attic temperatures during the summer months can reach staggering temperatures - as high as 160 degrees in some parts of the country. this heat buildup not only increases your air conditioning bill but also degrades your sub roof. A 25 yr shingle is worthless on a roof that has rotting or buckling plywood underneath due to heat damage.
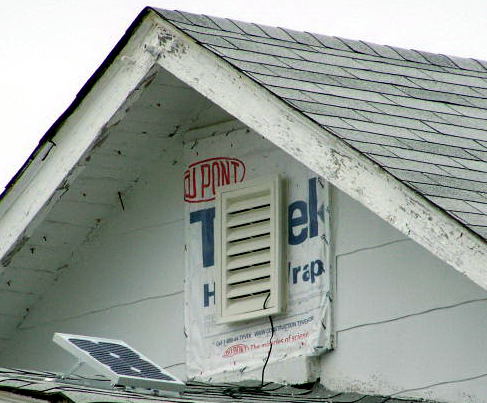
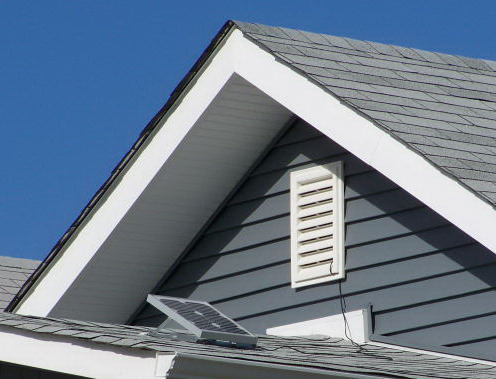
This past summer, I installed a solar powered fan to remove heat, moisture, and stagnant air in the attic. The benefit is that the fan only operates on sunny days and does not increase your power bill. If you have room for gable vents on either side of your house it is an easier installation than a roof penetration. Note: Though not required, the best time to install a a fan like this is prior to siding or re-siding your home.
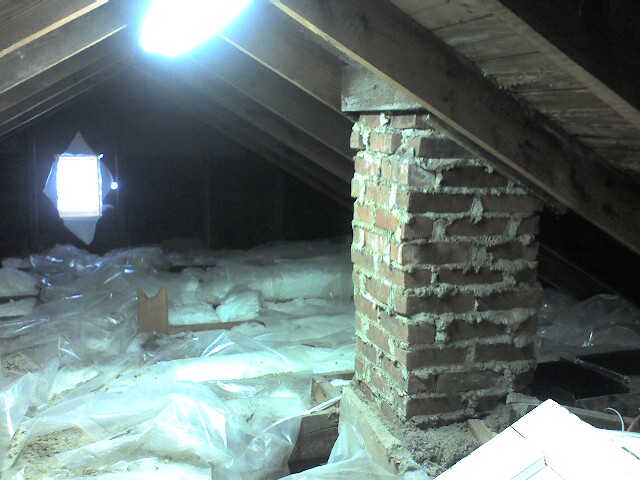
Step 1 - Install some attic lighting if you don’t have some already. Measure the opening in your attic walls and get a pair of vinyl gable vents, make sure you have a good quality ladder, or borrow one from a friend. (Typically the installation will require you to be both inside and outside on the roof, with your final steps to be done outside after the fan is installed.)
Step 2a - pencil out on the inside and drill a hole in your attic wall through each corner of the portion of the vent that protrudes through the wall. This will be for the inlet side, as the attic fan will not work properly unless it can draw air across the attic. double check, then saw-zall out the rest of the required cut-out. Note: If you have properly functioning ridge vents or soffit vents this step is not required.
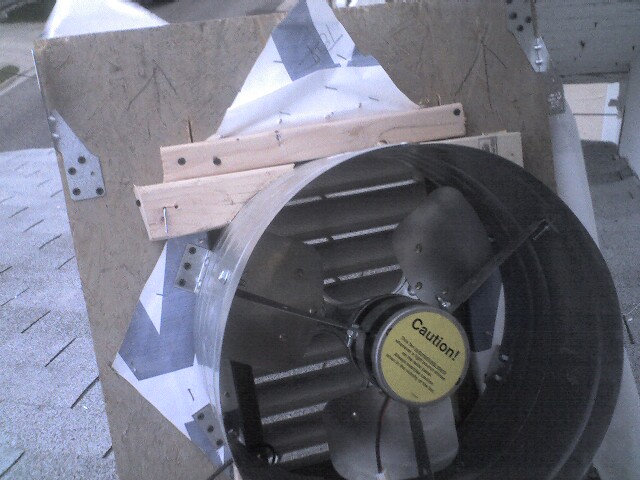
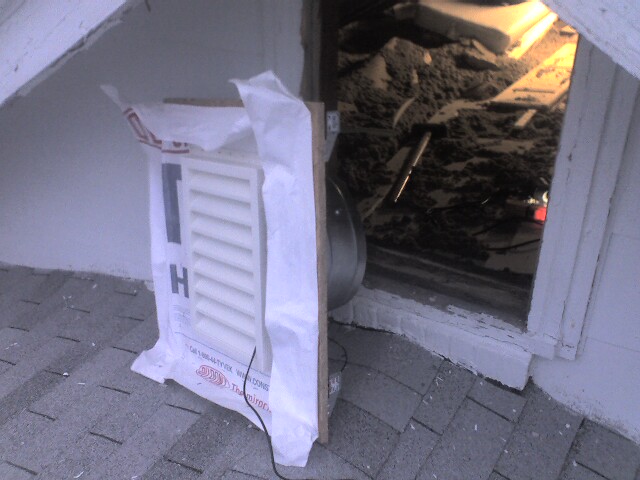
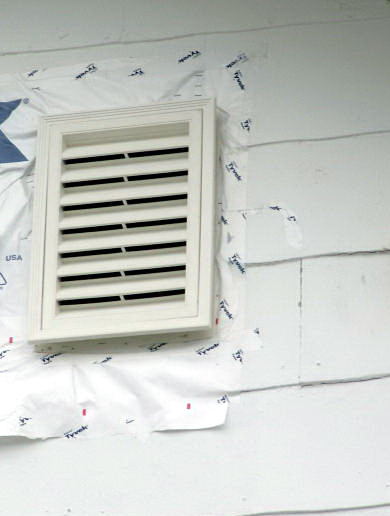
Step 2b (Many houses have a window in the attic that you can use to install your attic fan, in that case, remove the all or a portion of the window and make a cutout of OSB or plywood with a vent hole to accommodate the new gable vent/fan combo. Wrap the OSB with Tyvek so that you keep the wood free from damage, use staples to hold it in place. P.S. get the yellow handled staple gun, other kinds are not good and will have you cursing.
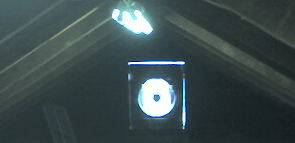
Step 3- Secure the fan in place and ensure that the power cord goes through the vent to the solar panel.
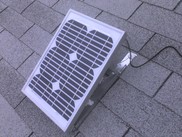
Make sure the solar panel is facing South or Southwest , you want to collect the most sun later in the day, as the attic won't really heat up to maximum till mid to late morning. When securing the panel to the roof, make sure you cover up the bolt holes with lots of silicone sealant to avoid leaking issues. Tighten all the panel adjustment bolts, so that you don’t have any surprises from the wind. Use a temperature thermostat to keep the heat in your attic in the winter time to save on your heating costs, (otherwise the attic fan will run whenever the panel is exposed to the sun.) Also, you can get additional modular panels to double the power of your fan, or install them at different solar collection angles, but I have found that the single 10W panel is plenty to cool a 700-1000 square foot attic space.
Step 4 - Fasten the OSB board into the window frame or cut out that you made for the fan, I like to use hurricane clips as they are inexpensive and very flexible in their mounting configurations. Secure the fan in four locations on the inside to prevent vibration, three is not adequate. Also try to block out as much airflow around the perimeter of the fan, to avoid blowback out of the sides.
Step 5 - Enjoy your lower electric bill from reduced summer cooling load, more enjoyable time when looking for items in the attic during the day, longer lasting sub roof, and increased home value..
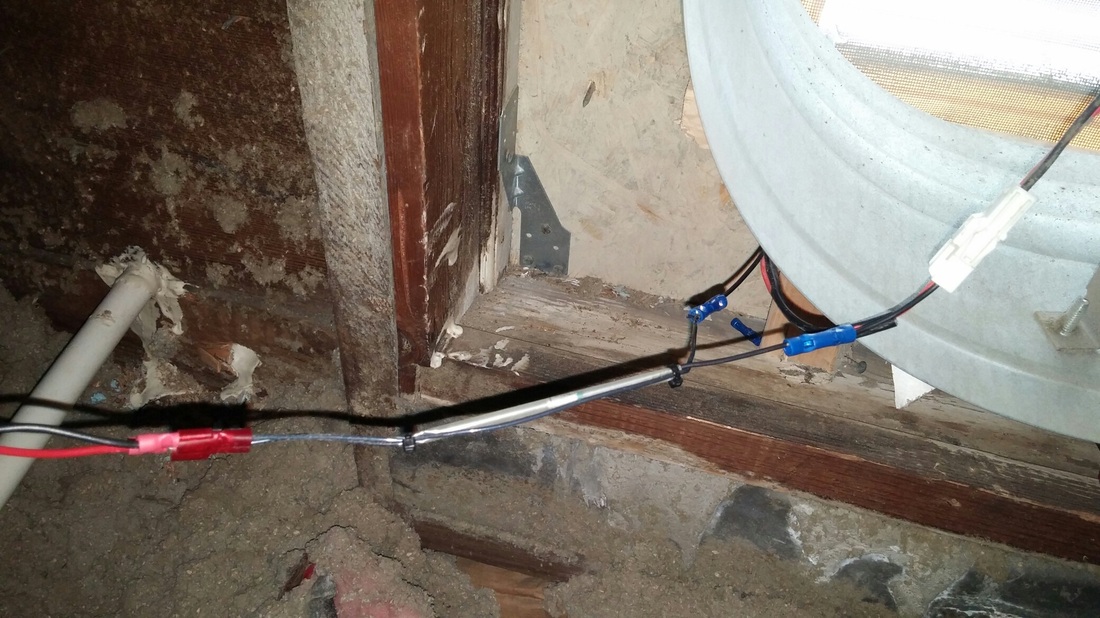
Update: 11/15/14 added a Fire Cutoff switch - this is a good idea as firefighters have no way to turn off the fan in event of a fire. the Fire cut off switch will melt at 280 F so that the fan will not draw air into the attic, burning your entire house down with a quickness.... make sure to install one on your fan, I had to use some butt splice connectors as the spade connections that came with it did not fit.
Attic temperatures during the summer months can reach staggering temperatures - as high as 160 degrees in some parts of the country. this heat buildup not only increases your air conditioning bill but also degrades your sub roof. A 25 yr shingle is worthless on a roof that has rotting or buckling plywood underneath due to heat damage.
This past summer, I installed a solar powered fan to remove heat, moisture, and stagnant air in the attic. The benefit is that the fan only operates on sunny days and does not increase your power bill. If you have room for gable vents on either side of your house it is an easier installation than a roof penetration. Note: Though not required, the best time to install a a fan like this is prior to siding or re-siding your home.
Step 1 - Install some attic lighting if you don’t have some already. Measure the opening in your attic walls and get a pair of vinyl gable vents, make sure you have a good quality ladder, or borrow one from a friend. (Typically the installation will require you to be both inside and outside on the roof, with your final steps to be done outside after the fan is installed.)
Step 2a - pencil out on the inside and drill a hole in your attic wall through each corner of the portion of the vent that protrudes through the wall. This will be for the inlet side, as the attic fan will not work properly unless it can draw air across the attic. double check, then saw-zall out the rest of the required cut-out. Note: If you have properly functioning ridge vents or soffit vents this step is not required.
Step 2b (Many houses have a window in the attic that you can use to install your attic fan, in that case, remove the all or a portion of the window and make a cutout of OSB or plywood with a vent hole to accommodate the new gable vent/fan combo. Wrap the OSB with Tyvek so that you keep the wood free from damage, use staples to hold it in place. P.S. get the yellow handled staple gun, other kinds are not good and will have you cursing.
Step 3- Secure the fan in place and ensure that the power cord goes through the vent to the solar panel.
Make sure the solar panel is facing South or Southwest , you want to collect the most sun later in the day, as the attic won't really heat up to maximum till mid to late morning. When securing the panel to the roof, make sure you cover up the bolt holes with lots of silicone sealant to avoid leaking issues. Tighten all the panel adjustment bolts, so that you don’t have any surprises from the wind. Use a temperature thermostat to keep the heat in your attic in the winter time to save on your heating costs, (otherwise the attic fan will run whenever the panel is exposed to the sun.) Also, you can get additional modular panels to double the power of your fan, or install them at different solar collection angles, but I have found that the single 10W panel is plenty to cool a 700-1000 square foot attic space.
Step 4 - Fasten the OSB board into the window frame or cut out that you made for the fan, I like to use hurricane clips as they are inexpensive and very flexible in their mounting configurations. Secure the fan in four locations on the inside to prevent vibration, three is not adequate. Also try to block out as much airflow around the perimeter of the fan, to avoid blowback out of the sides.
Step 5 - Enjoy your lower electric bill from reduced summer cooling load, more enjoyable time when looking for items in the attic during the day, longer lasting sub roof, and increased home value..
Update: 11/15/14 added a Fire Cutoff switch - this is a good idea as firefighters have no way to turn off the fan in event of a fire. the Fire cut off switch will melt at 280 F so that the fan will not draw air into the attic, burning your entire house down with a quickness.... make sure to install one on your fan, I had to use some butt splice connectors as the spade connections that came with it did not fit.


 RSS Feed


